Troubleshooting Stitches
Some stitches are inevitably going to cause problems. There are a number of refinement workflows to assist CaraVR when stitching images together.
Tip: CaraVR adds a new tab to the Properties panel of Nuke's Write node allowing you quickly select groups of views such as stereo and cams when rendering previews or stitches. You can still select views manually using the views dropdown, but View Presets can make the process faster.
Improving Vector Quality
The vectors produced by C_Stitcher default to a reasonable compromise between performance and quality, but there a number of controls than you can adjust to improve the vector detail, and subsequent stitch.
Note: Increasing the values in Vectors tab controls increases processing time, but can improve your stitch results.
| 1. | Increase the number of Iterations and Warps to see if the vector results improve: |
• Iterations - controls how may times the vectors are generated based on the previous iteration.
• Warps - controls the range of pixel comparison performed during generation.
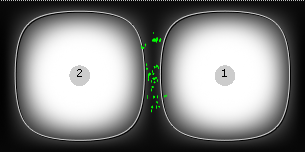
For example, increasing the Iterations and Warps values in the following stitch improves the vector quality around the man's head.
|
|
|
|
Low Iteration and Warp values. |
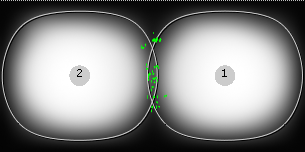
High Iteration and Warp values. |
| 2. | Next, increase the Strength and Consistency values: |
• Strength - the tolerance applied when matching pixels between matched cameras. Higher values allow you to accurately match similar pixels in one image to another, concentrating on detail matching even if the resulting vectors are jagged. Lower values may miss local detail, but are less likely to provide you with the odd spurious vector, producing smoother results.
• Consistency - how accurately the same points between matched cameras are mapped to each other. Increase the value to encourage the vectors to match.
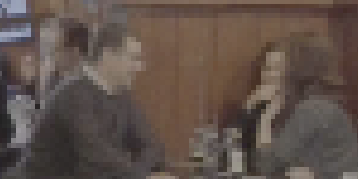
For example, increasing the Strength value in the following stitch improves the image quality around the man's head.
|
|
|
|
Low Strength values smooth the vector, but can miss local detail. |
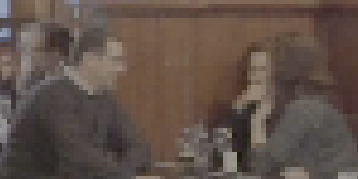
High Strength values add detail, but can cause jagged edges. |


| 3. | Increase the Vector Detail value to control the density of the calculated vectors. Higher values pick up finer disparity changes, but take longer to calculate. |
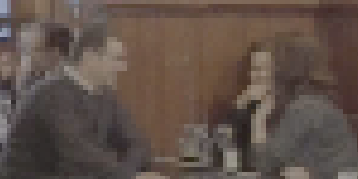
For example, increasing the Vector Detail value in the following stitch improves the image quality around the man's head.
|
|
|

| 4. | You can also increase the Temporal Window to increase the number of frames to either side of keyframes to perform temporal averaging over. |
Increasing this control produces smoother vectors, but significantly increases processing time.
Improving Overlap for Back to Back Rigs
Two camera, back to back rigs can cause problems for C_Stitcher because of the lack of overlap between the cameras. If the stitcher doesn't seem to affect the output, you can try increasing the crop size in the Cameras properties in the C_CameraSolver to increase the overlap area.
| 1. | Double-click the C_CameraSolver in the Node Graph to open its Properties panel. |
| 2. | Click the Cameras dropdown to expose the individual camera properties. |
| 3. | Scroll to the crop_x and crop_y properties and double-click to edit the values. |
|
|
|
|
Lower crop_x values produce less overlap. |
Higher crop_x values increase the overlap area. |