Local Color Matching
Local Matching mode involves more intervention to produce a color match, but it can be useful if there are local color differences between the views, such as highlights that are brighter in one view than the other.
Local Matching first divides the two images into square blocks according to the Block Size control. Then, it matches the color distribution from the view that want to modify to a reconstructed version of the same view, which has been constructed using the pixels of the source view. When an occluded pixel is detected by an upstream occlusion mask, C_StereoColourMatcher finds the closest unoccluded pixel and then uses this to make the color match for the occluded pixel.
| 1. | Set up the node tree as described under Basic Color Matching. |
| 2. | Adjust the Block Size to define the width and height (in pixels) of the square blocks that the images are divided into when calculating the color match. |
You can set a different Block Size for each view using the View button ![]() .
.
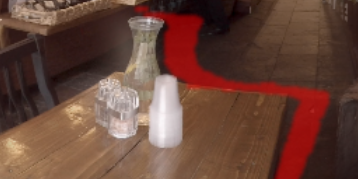
Tip: You can enable Preview colour correction to view the areas of color correction applied to the original image as a difference overlay.
| 3. | Increase the Scale control to broaden the color update and preserve the image structure, helping to prevent image shift and wobble, or decrease the Scale to pick up highlights and detailed color changes. |
| 4. | Use the Limit control to determine how average correction in a region affects the output. If you notice excessive color changes in areas of highlight, try reducing the Limit. |
| 5. | Use the Noise control to set how much noise to retain from the source view. If the color matching smooths the input noise, increase the Noise value. If the value is too high, color differences at very fine details are retained. |
Dealing with Occlusions and Edges
Occlusions occur when some pixels are not visible in the source view and cannot be used to create the new view. Enable Output corrected area to alpha to use the alpha channel as an overlay to determine where the color correction is applied.
You can then use the Correction dropdown menu to determine how the correction areas are handled:
• Occlusions - fills occluded pixels only, where color is missing from the other view.
• Occlusions and Edges - fills occluded pixels, where color is missing from the other view, and compensates for disparity changes at edges where matching and/or reconstruction can fail.
• None - applies no occlusion or edge color correction.
You can adjust how color correction is applied at edges using the following controls:
• Adjust Edges - sets the threshold for treating image edges as occlusions to reduce haloing and edge flicker. The higher the value, the more image edges are considered occlusions, even if they are not marked as such in the mask_occlusion channel.
• Colour Tolerance - sets the amount of blurring across edges in the color match at occluded regions. Decrease this to restrict the color correction in occluded regions to similar colors. Increase the value to blur the color correction.
• Support Size - sets the size of the region (in pixels) of unoccluded pixels used to calculate the color correction at an occluded pixel. C_StereoColourMatcher first finds the closest unoccluded pixel and then expands that distance by this number of pixels to determine the amount of unoccluded pixels to use.
Tip: Enabling Stablise occlusions can reduce flicker in occluded areas by using data from multiple frames.