Windows Firewalls
Two firewall exception methods are available to enable client machines to checkout licenses and connect to the web service in the License Server: programs and port numbers.
Windows Program Exceptions
|
1.
|
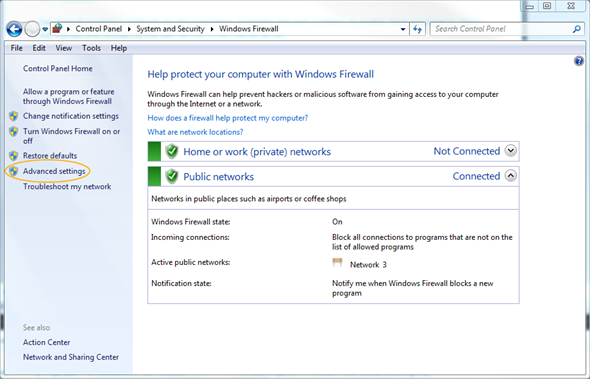
Go to Control Panel > System and Security > Windows Defender Firewall and then click on the Advanced settings link. |
|
2.
|
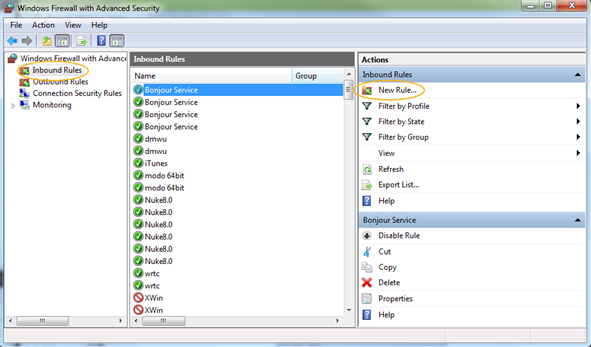
Select Inbound Rules in the left-hand panel and click New Rule as shown below. |
|
3.
|
Select Program and then click Next. |
|
4.
|
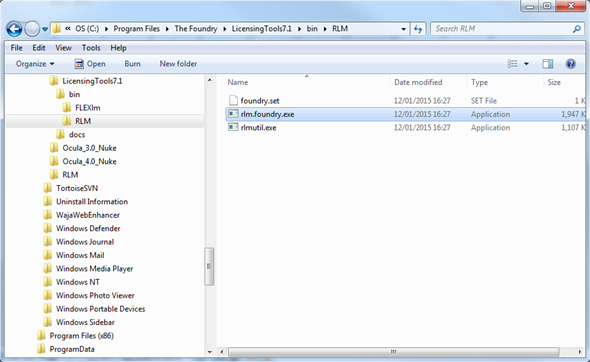
Select This program path and then browse to the following location: |
C:\Program Files\The Foundry\LicensingTools<version>\bin\RLM
Add rlm.foundry.exe.
|
6.
|
Click Allow the connection and then click Next. |
|
7.
|
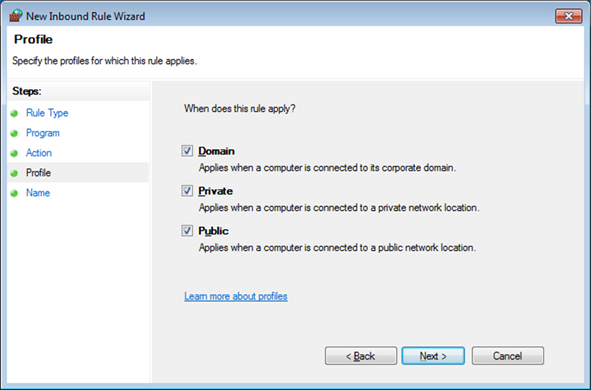
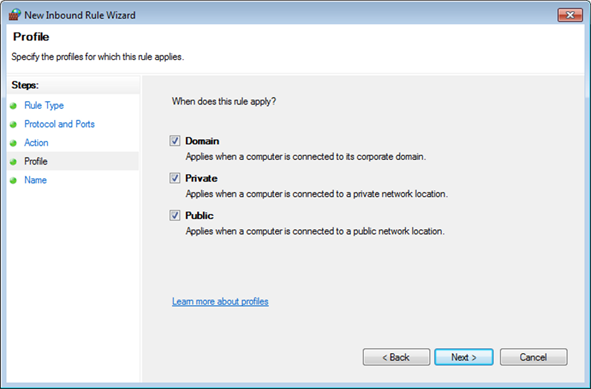
Select all the checkboxes that apply to the rule. Domain, Private, and Public in the example below. |
|
8.
|
Click Next and enter a meaningful name for the rule, such as RLM_HOST. |
|
9.
|
Click Finish to complete the process. |
Windows Port Exceptions
To add a port exception, you need to change your license file to include two different port numbers using an options file entry.
If you installed a license using the FLU, the options file was created automatically in the same directory as your license. If, however, you installed your license manually, create a plain text file called foundry.opt in the same directory as the license. See License Server Administration for the license file location.
A typical licence including port numbers and an options file might look like this:
HOST red 000ea641d7a1 4101
ISV foundry OPTIONS=foundry.opt PORT=12345
Note: You may want to check with your system administrator that the port number you choose is not already in use by another program.
A foundry.opt file for Mari should contain the following line:
TIMEOUT mari_i 3600
Or, for all RLM licensed products:
TIMEOUTALL 3600
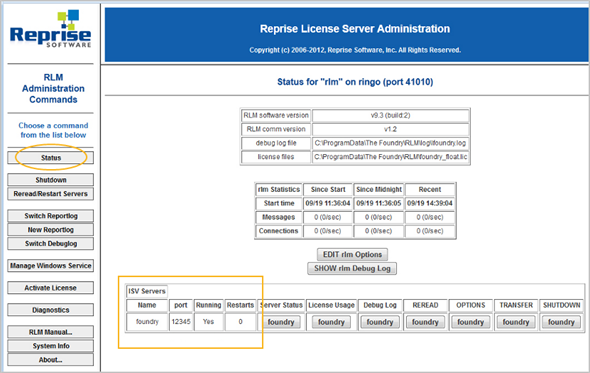
After editing the license and options file, stop and start the license server as described in Managing the License Server. In the license server interface, click Status and check that the ports specified are listed and that the server is running.
Next, go to your firewall settings and add Inbound Rules for TCP ports with the port numbers in the HOST and ISV lines.
|
1.
|
Go to Control Panel > System and Security > Windows Defender Firewall and then click on the Advanced settings link. |
|
2.
|
Select Inbound Rules in the left-hand panel and click New Rule as shown below. |
|
3.
|
Select the Port radio button and then click Next. |
|
4.
|
Select TCP and Specific local ports and enter the port number in the field provided (4101 in the example). |
|
6.
|
Select Allow the connection and click Next. |
|
7.
|
Select when the new rule should be applied using the checkboxes. In the example, the rule is applied at all times, but you can modify this as required. |
|
9.
|
Enter a meaningful name for the new rule, for example RLM_HOST, and write a description, if required. |
|
11.
|
Select the new rule from the Inbound Rules list and click Properties. |
|
12.
|
Click the Programs and Services tab, select This program, and browse to <app path>/rlm.foundry.exe as shown. |
|
13.
|
Click Open to return to the Properties dialog. |
|
14.
|
Click Apply, and close the dialog. |
|
15.
|
Repeat the process for the ISV port, replacing the port number and rule name. |
|
16.
|
Click the Programs and Services tab, select All programs that meet the specified conditions. |
|
17.
|
Click OK to close the dialog. |