Masking Out Regions of the Image
Tracking works best on fixed, rigid parts of the scene so that each track can create a single, fixed 3D point. The solver uses these 3D points to work out the camera path. Moving elements and burn-ins do not have a fixed 3D point in the world and should be masked out before tracking.
To mask regions of your sequence, attach a matte to the Mask input to define image regions that should not be tracked. You can also use the source input’s alpha channel as a matte.
| 1. | If you want to use a separate matte for masking, connect a Roto node to the CameraTracker Mask input. |
| 2. | Scrub through the sequence and keyframe the roto shapes to cover the areas you don't want to track. |
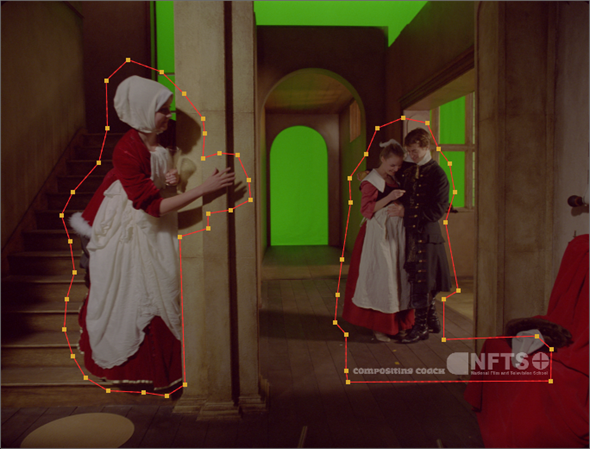
You don't have to be too accurate with the mask, it's only intended to cover areas that are likely to cause CameraTracker problems. For example, in the image shown, the actors and the copyright burn-in are masked.
| 3. | In the Properties panel, set Mask to the component you want to use as a mask: |
• None - Track features in the whole footage.
• Source Alpha - use the alpha channel of the source clip to define which areas to ignore.
• Source Inverted Alpha - use the inverted alpha channel of the source clip to define which areas to ignore.
• Mask Luminance - use the luminance of the mask input to define which areas to ignore.
• Mask Inverted Luminance - use the inverted luminance of the mask input to define which areas to ignore.
• Mask Alpha - use the mask input alpha channel to define which areas to ignore.
• Mask Inverted Alpha - use the inverted mask input alpha channel to define which areas to ignore.
| 4. | Track as normal using the automated Analysis Track button. See Tracking in Sequence Mode. |
Note: There is no need to mask areas of the image when tracking manually - you specify where User Tracks are placed.