Search is based on keyword.
Ex: "Procedures"
Do not search with natural language
Ex: "How do I write a new procedure?"
Applying Filters
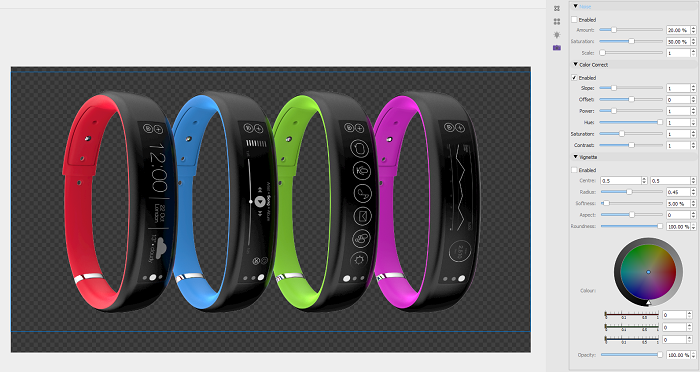
The Filters Editor allows you to apply a stack of effects to your image.
Open the Filters Editor:
| 1. | Select the item in the Items List or on the sheet. |
| 2. | Click the pencil in the Lighting section of the properties. |
| 3. | Open the Effects Editor by by clicking the Filters |
The Filters editor displays a list of any existing filters that have been applied. The filters are applied in the order they appear in the list.
Note: If no filters have been applied to an item, the Filters editor is blank.
Adding a Filter
| 1. | Click the |
This opens a list of filters.
| 2. | Select the required filter from the dropdown. |
This adds the filter to the Filters Editor list.
| 3. | Adjust the settings to get the required effect. |
Tip: To revert a value to its default, right-click on the slider, then click Set to Default in the pop-up.
Disabling, Removing, and Re-ordering Filters
Filters are applied in the order that they are listed, from top to bottom. Colorway allows you to disable and re-order filters, as well as add and remove them.
|
Icon |
Description |
|---|---|
|
Enabled
|
To disable a filter, uncheck Enabled. This does not remove it from the list. |
|
|
To remove a filter completely, select the filter you want to remove from the list and then click the |
|
|
The filters are applied to the project in the order they appear in the list. To re-order them, select the filter you want to move up or down and then click the up or down icons in the bottom-right of the editor. |
Available Filters
|
Filter |
Description |
Effect |
|---|---|---|
|
Noise |
This adds a grainy effect making the image look analogue. You can adjust the Amount, Saturation, and Scale of the noise. |
|
|
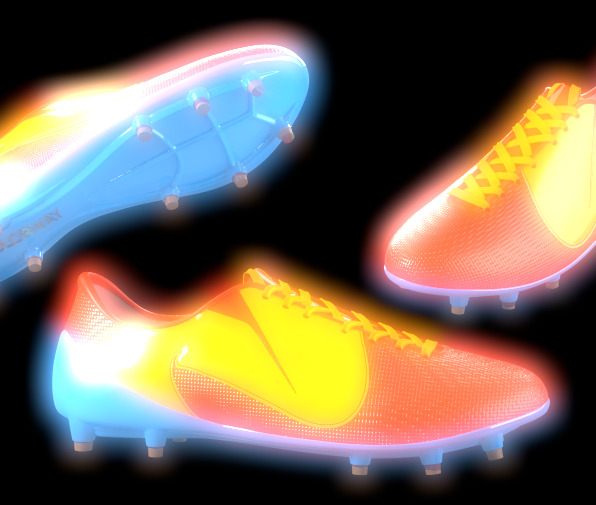
Bloom |
You can use the Bloom filter to add fringes around bright parts in the project. This makes the bright parts seem extremely brightly lit and glowing. You can adjust the Amount, Radius, and Threshold of the bloom. |
|
|
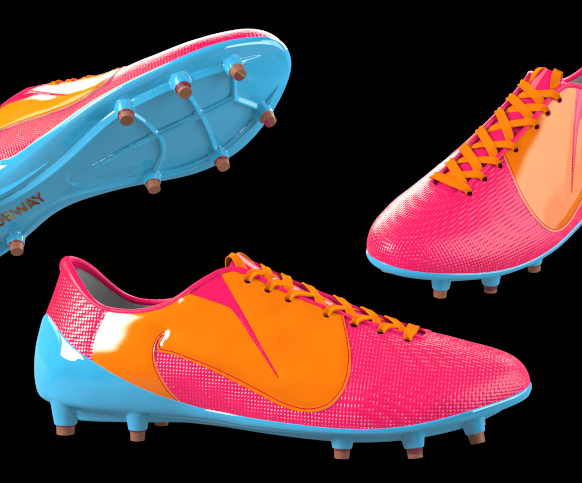
Color Correct |
Use the Color Correct filter to adjust the colors in the project including Slope, Offset, Power, Hue, Saturation, and Contrast. |
|
|
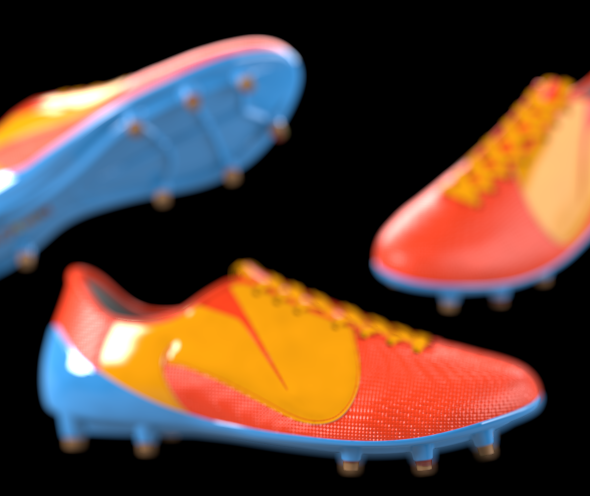
Defocus |
You can use this to defocus the image in a specified radius. You can also adjust the Strength, Radius Limit, Focus Distance, and Depth of Field. |
|
|
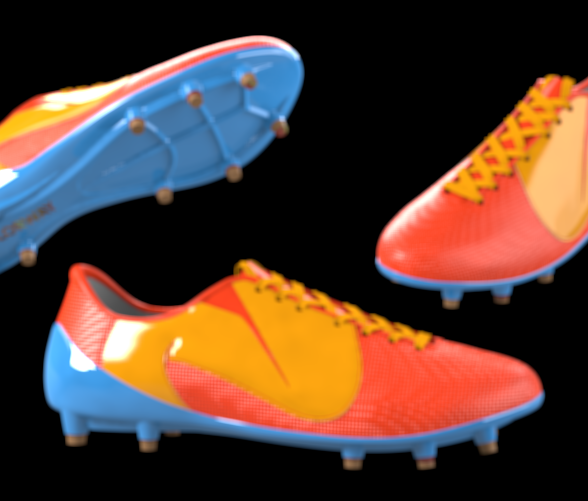
Denoise |
You can use the Denoise filter to remove any noise that's in your image, making the image smoother. |
|
|
Lens |
You can use the Lens filter to apply lens effects. You can adjust the Distortion, Blur, and Dispersion. |
|
|
Tonemapping |
Use the Tonemapping to apply a Filmic, Reinhard, or an sRBG to Linear effect. This maps one set of colors to another to make the colors more consistent in a varying range. |
|
|
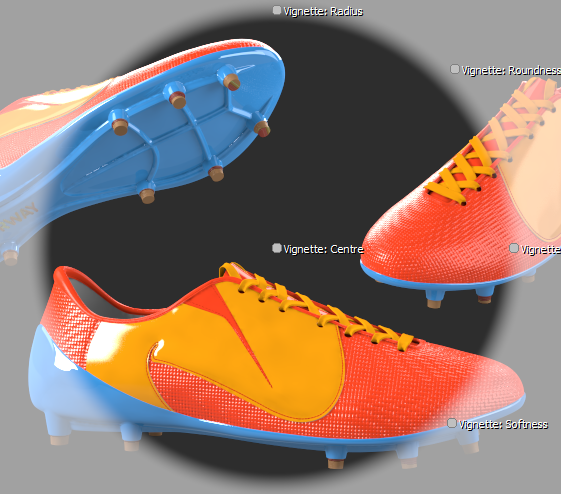
Vignette |
You can use the Vignette filter to create an effect of the image fading into the background. You can select the Color and adjust the Centre position, Radius, Softness, Aspect, Roundness, and Opacity. |
|
Sorry you didn't find this helpful
Why wasn't this helpful? (check all that apply)
Thanks for your feedback.
If you can't find what you're looking for or you have a workflow question, please try Foundry Support.
If you have any thoughts on how we can improve our learning content, please email the Documentation team using the button below.
Thanks for taking time to give us feedback.