Search is based on keyword.
Ex: "Procedures"
Do not search with natural language
Ex: "How do I write a new procedure?"
Lighting
Adjusting Lights
When you are creating a layout by placing assets on your sheet, editing image and text properties, and creating variations, you are working in Colorway's Layout mode. To edit a .dci item's lights and looks, enter Edit mode.
To open a .dci item for editing, in the menu bar, click Items > Edit Item. The view focuses in on the Colorway asset with all other assets hidden. On the right side of the sheet a panel appears with buttons for opening the Looks, Lights, and Filters editors. Click on the icon of the editor that you want to open.
|
Icon |
Description |
|---|---|
|
|
Opens the Looks editor. |
|
|
Opens the Lights editor. |
|
|
Opens the Filters editor. |
To adjust the different lights in the project, you first need to select the light you want to change. You can do this using the Lights Editor.
| 1. | Click the pencil in Lighting properties for the item to open the Lighting and Effects Editor. |
| 2. | Click the lightbulb icon |
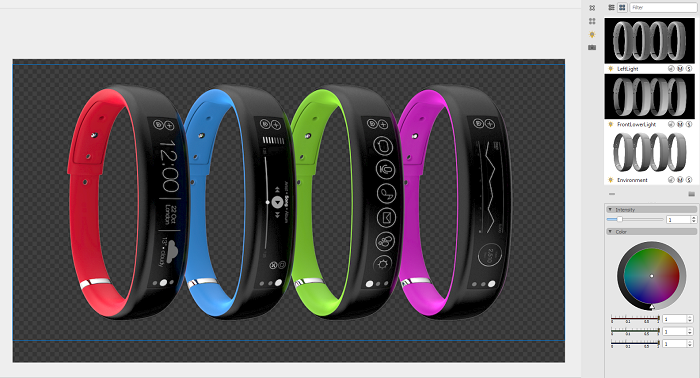
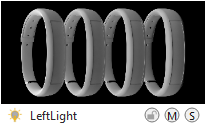
All the lights that can be changed are listed in the editor. These were defined with the original asset in a 3D application. If a light was not specified in the 3D application, it does not appear in the list.
Select the lights you want to change by clicking them in the list. You can then use the slider at the bottom of the editor to alter the intensity of the selected lights, or you can use the color wheel to change their color.
Each light has additional mute and solo controls. These are displayed in the bottom-right corner of each light as M and S buttons.
Click the M button on a light to mute it, any other lights remain visible.
Click the S button on a light to solo it, any other existing lights are muted.
You can lock a light from editing by clicking on the padlock button.
You can select multiple lights by using Shift and/or Ctrl/Cmd+click .When you have multiple lights selected, you can set their tint and brightness simultaneously.
Grouping Lights
You can create a group of lights by doing the following:
| 1. | Select multiple lights by using Shift and Ctrl/Cmd, and clicking on the lights. |
| 2. | Click the folder icon at the bottom-right of the lights panel. |
A group is created and is named New Group by default. There are also a few controls on the group name:
• Click the arrow on the left of the group name to expand or collapse the group contents.
• Click on the padlock icon on the right of the group name to lock or unlock the group of lights.
• Double-click on the default group name to rename it.
• Use the M and S buttons next to the group name to mute or solo the lights in the group.
Removing Groups
You can delete any groups that have been created by first selecting the group(s) you want to remove, then clicking the – (minus) button in the bottom-left of the Lights editor.
Note: Deleting a group does not delete the lights within it. Instead, the lights appear back in the Lights editor outside any groups.
Locking Lights and Groups
Colorway allows you to lock lights or whole groups of lights so that they are not editable. This allows you to maintain control over what can be changed in your project to create different looks.
To lock a light or group, click the padlock button next to the light or group name. When a light or a group is locked, the icon appears like a closed padlock and highlights orange ![]() .
.
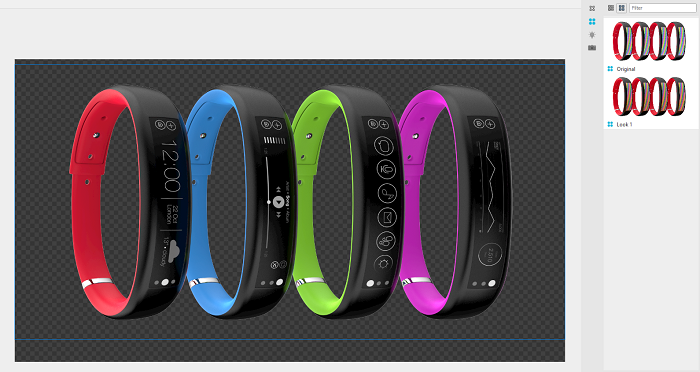
Saving and Applying Lighting Setups
When you are happy with a lighting setup that you've created, you can save it in the Saved Lighting Setups Editor.
You can then access and switch between your looks in the properties panel of the Colorway asset, under Lighting.
Click the Saved Lighting Setups ![]() icon to open the Saved Lighting Setups Editor. When you have the editor open, the icon highlights blue and the editor is displayed on the right-hand side of the sheet.
icon to open the Saved Lighting Setups Editor. When you have the editor open, the icon highlights blue and the editor is displayed on the right-hand side of the sheet.
|
Icon |
Action |
|---|---|
|
|
When you have developed a lighting setup you like, click the |
|
|
To remove a saved design from the editor, select it from the list and then click the |
|
|
You can duplicate an existing design by selecting it from the list and clicking this icon in the bottom-right corner of the editor. You can choose to duplicate multiple selected looks. |
|
|
To update a saved look, select the look in the Saved Lighting Setups editor, then click this icon in the bottom-right corner of the editor. |
|
|
To create a group of looks, select the looks you want to include in the group from the Saved Lighting Setups, then click the folder icon in the bottom of the panel. |
To load a previously saved design from the Saved Lighting Setups editor, double-click on the required design.
You can select multiple looks by using Shift and/or Ctrl/Cmd+click.
Removing Groups
You can delete a group by first selecting the group(s) you want to remove, and then clicking the ![]() (minus) icon in the bottom-left of the Saved Lighting Setups editor.
(minus) icon in the bottom-left of the Saved Lighting Setups editor.
Warning: Deleting a group of looks also deletes the looks within the group.
To remove a look from a group, drag-and-drop the look's thumbnail to the panel, outside of the group.
Sorry you didn't find this helpful
Why wasn't this helpful? (check all that apply)
Thanks for your feedback.
If you can't find what you're looking for or you have a workflow question, please try Foundry Support.
If you have any thoughts on how we can improve our learning content, please email the Documentation team using the button below.
Thanks for taking time to give us feedback.