Material Libraries
Colorway allows you to manage a large number of materials using material libraries. A material library references a .csv file containing information about the materials. Each material has a unique ID, which Colorway uses to populate the project with information about the material. You can store multiple material libraries.
Note: Once you have a material library selected in Colorway, you can add, remove, and edit materials from inside the application using the Material Library Editor. See Adding and Editing Materials in the Material Library to learn more.
The Material Library Spreadsheet
Colorway uses a .csv file to reference material information.
Some of the columns in the spreadsheet are required for Colorway to populate the library, and some are arbitrary and customizable.
The following columns are required for Colorway to display material information correctly.
| Column Header | Description |
|---|---|
|
#id |
The material ID. The # marks the beginning of a header row and should not be removed. |
|
Name |
The name of the material. |
|
Category |
The category the material belongs to. For example, add a Lacing category for all materials used by lacing. The materials are grouped by their categories in the Material Library. |
|
T0_file |
The file name of the texture to be assigned to the material. If the file is not in the same directory as the material library .csv file you can add the full path of the file prefixed with /file/, for example: /file/c:/materials/texture.png |
Note: To learn about the other material properties you can add to the Material Library .csv file, see Material Properties.
Scaling Images
You can influence how your image is applied to the item in Colorway in the spreadsheet. Here's how you can scale an image:
Add a scaleX and scaleY column to the image you want to modify. For example, if you want to scale the image in T0_file, add a T0_scaleX and T0_scaleY to the spreadsheet, for the horizontal and vertical scales respectively. For the image to appear in its original size, enter '1'. To decrease the size of the image, increase the value. For instance, to scale the image to 50%, enter '2'.
Linking a Material Library
First, you'll need to make sure that Colorway is linked to a material library.
To link a material library:
| 1. | Click on the Materials & Textures |
The following message appears: Add a material library from Preferences.
| 2. | Click on Preferences. |
The Colorway Preferences window opens on the Material Library tab.
Note: You can also access this menu under Edit > Preferences > Material Library on Windows, or Colorway > Preferences > Material Library on Mac.
| 3. | In the Library Folder Location section, click Choose. |
A window opens. Navigate to the folder in which your material library is stored.
| 4. | Click Select Folder. |
| 5. | Click Apply. |
Colorway presents a preview of the materials referenced in the library file. You can change whether these thumbnails appear inside Colorway as 3D spheres or 2D flat images.
Use the Values drop-down menu to define which information is displayed next to each material thumbnail in the right hand dock. See example below.
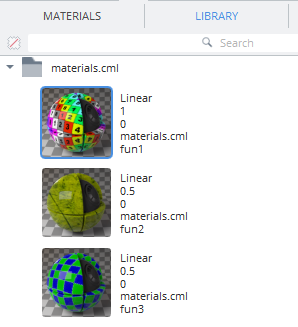
Use the Tooltip Values drop down menu to define which information is displayed in a tooltip when hovering over a material thumbnail (if Hints are enabled). See example below. To toggle Hints on or off, see Hints Bar and Tooltips.
| 6. | Click OK to apply your settings. |
Adding and Editing Materials in the Material Library
The Material Library Editor lets you add, remove, and modify materials. The editor makes it easier to add or edit your materials compared to editing the material library .csv file.
The editor is opened by selecting LiveSources > Edit Material Library.
Note: You need to set a material library directory before you can use the Material Library Editor. See Linking a Material Library for more information.
The editor is split into five areas:
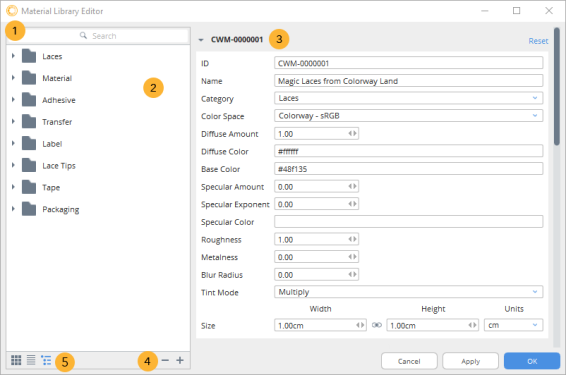
- The search bar - type material metadata to filter materials in the material panel.
- The material panel - available materials from the material library are listed here.
- Material information - view and edit material information for the selected material.
- Add and remove buttons - click the Add material
 button to add a material, or click the Remove material
  button to remove any selected materials.
 - View buttons - view your materials in grid, list, or tree view.
Adding a Material with the Material Library Editor
You can add materials to your material library with the Material Library Editor. To add a new material:
| 1. | Click the Add Material |
A blank material is added to the Material Library.
| 2. | Input an ID and Name for the material. |
Note: Changes are reflected in the dialog when you click Apply.
| 3. | Select a Category from the drop-down for your new material. |
The material is placed under the selected category in the material panel.
Note: If no categories exist, you can add one by populating the Category column in the original .csv file. See The Material Library Spreadsheet for more information.
Editing Materials with the Material Editor
You can edit the properties of a material using the Material Library Editor:
- Material properties - these properties control the overall look of the material, for example, the Base Color, Specular Amount, and Size of the material. See Material Properties for descriptions of these properties.
- Texture Layers - once a texture layer is added, you can tweak these properties to adjust the selected image on the material, for example, change the Opacity of the selected image. See Textures Properties for descriptions of these properties.
- Metadata - input custom metadata for your material to store important information, such as cost, country of origin, and vendor. See Managing Custom Metadata on your Materials in the Material Library Editorfor more information.
Material Properties
The following properties are available in the material properties panel of the Material Library Editor, or can be added as headers to the material library .csv, with the values next to the relevant material:
|
Property |
Description |
Default value |
||||||
|
ID |
A unique identifier for the material. You can filter materials in the material library by their ID. |
|
||||||
|
Name |
The name of the material. The name can be used to filter out materials in the material library, or added to the dynamic table to display information about materials assigned to parts.
A material in the Material library with the name, ID, and category displayed. |
|
||||||
|
Category |
The category the material belongs to. For example, add a Lacing category for all materials used by lacing. The materials are grouped by their categories in the Material Library. |
|||||||
|
Color Space |
Choose the input colorspace for the material, which converts the working colorspace of the material to the chosen colorspace. For example, if your material textures for a given material are in Linear sRGB colorspace, you need to select Linear sRGB from Color Space. This ensures the material appears correctly on the part and in the material thumbnail.
|
Colorway - sRGB |
||||||
|
Diffuse Amount |
Amount of color the object has under pure white light. For example, a value of 0.0 gives off no color, and a value of 1.0 gives full color.
|
1.00 |
||||||
|
Diffuse Color |
The overall tint of the material, including all texture layers.
|
#ffffff |
||||||
|
Base Color |
This color is used as the base of the material. If no material layers above are valid, the material uses this color.
|
#ffffff |
Warning: The Specular Amount, Specular Exponent, Specular Color, Roughness, and Metallic properties do not function in the current version of Colorway. You can edit part specularity with the Blur, Glow, and Intensity sliders. See Adjusting the Specularity of a Part for more information.
|
Blur Radius |
The amount of blur assigned to the material.
|
0.00 |
||||
|
Tint Mode |
The Tint Mode determines the blend mode for the material's color when you apply a new color onto the material. The options are:
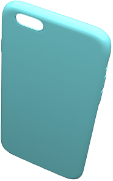
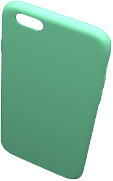
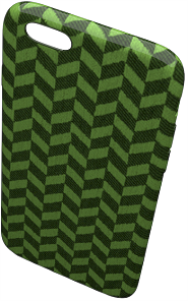
A green color assigned to a material with Tint Mode set to Multiply.
A green color assigned to a material with Tint Mode set to Replace. |
Multiply | ||||
|
Size |
The real world size of the material. For example, if you have a square of material which is 10cm high and wide, you can specify that size using the Size property so it is assigned to parts at the correct scale in Colorway. See Defining Real World Size of Materials in the Material Library for more information. |
1.0 cm |

Adding Texture Layers to a Material in the Material Library Editor
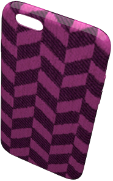
Material texture layers allow you to add photographs and decals to your materials to mimic real world materials. For example, you could create a woven material in Colorway by applying a photograph of a woven material scan to a texture layer. Then, adjust the texture layer and material properties to match the look of the real world reference.
Note: See Textures Properties for more information about editing your texture layers.
To add a texture layer to your material:
| 1. | Select the material you want to edit from the left panel in the Material Library Editor. |
| 2. | Scroll down to the Texture Layers properties. |
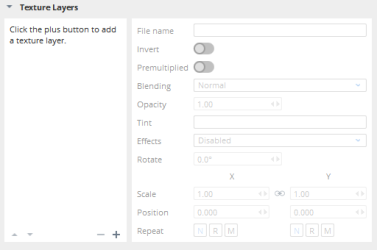
The Texture Layers properties.
| 3. | Click the Add Texture Layer |
| 4. | Click the File name field and select an image to use for the layer from the file explorer. |
| 5. | In the Effects drop-down, select an effect to use for the image. |
For example, if you want to use the image as a color map for the material, select Diffuse Color. See Effects for more information.
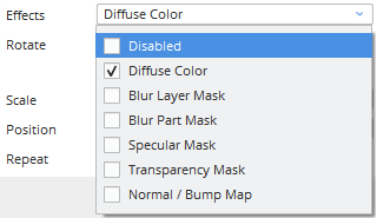
The Effects drop-down in the Texture Layers properties.
| 6. | Click Apply on the Material Library Editor. |
Your changes are applied and saved to the material.
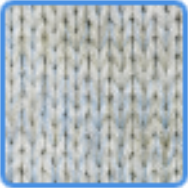
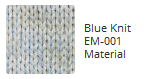
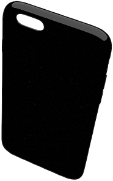
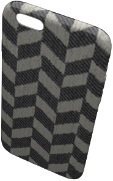
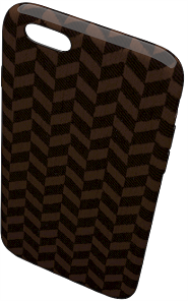
A material created in the editor using a knit image as a Diffuse Color texture layer.
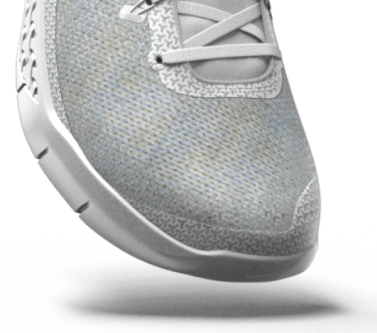
The knit material assigned to a part.
Note: You can apply as many texture layers as you like to a material, and blend them on top of one another using the Blending property. See Blending for more information.
Tip: Use the arrows at the bottom of the texture layers panel to move the selected layer up and down the stack.
Managing Custom Metadata on your Materials in the Material Library Editor
Metadata helps you to keep track of important information about the materials in your material library. This metadata can be displayed on your dynamic table, and once the project is exported, the production line can see necessary information, such as cost, country of origin, and vendor.
Note: To learn how to add metadata columns to your dynamic table, see Dynamic Tables.
To add metadata to your material in the editor:
| 1. | Select the material you want to edit from the left panel in the Material Library Editor. |
| 2. | Scroll down to the Metadata properties. |

| 3. | Click the drop-down arrow to select an existing metadata tag, or type a new tag. |
For example, if you want to specify the material's vendor, type Vendor.

| 4. | Type a value for the tag into the next field. |
For example, the vendor of this material is Colorway Fabrics.

| 5. | Click the Add Metadata |
If you need to edit a metadata tag for all materials, click the pencil ![]() icon next to the metadata tag in the tag drop-down and type a new metadata tag name, then press Enter. This edits the metadata header in the .csv file, changing that metadata tag for all materials.
icon next to the metadata tag in the tag drop-down and type a new metadata tag name, then press Enter. This edits the metadata header in the .csv file, changing that metadata tag for all materials.
To remove metadata from your material, click the Remove Metadata ![]() button next to a metadata row. This clears the value in the corresponding cell in the .csv file, but it does not remove the metadata tag. In the example above, Vendor remains as a header in the .csv file, but Colorway Fabrics is cleared from the material's cell.
button next to a metadata row. This clears the value in the corresponding cell in the .csv file, but it does not remove the metadata tag. In the example above, Vendor remains as a header in the .csv file, but Colorway Fabrics is cleared from the material's cell.
To remove a metadata tag from all materials in your Material Library, click the delete metadata tag ![]() icon next to the metadata tag in the tag drop-down. This also removes the metadata header from the Material Library .csv file.
icon next to the metadata tag in the tag drop-down. This also removes the metadata header from the Material Library .csv file.
Defining Real World Size of Materials in the Material Library
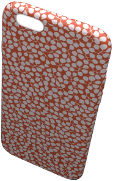
Real world materials are often scanned and imported into 3D applications in either centimeters or millimeters to ensure they are applied at the correct scale to the 3D model. For example, you could have a square of material which is 10cm wide and high that you want to appear at the correct scale when applied to your models.
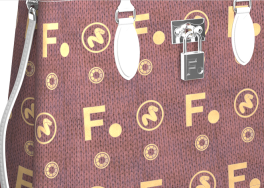
You can retain the real world scale of the material when applying them to .dci and .svg parts in Colorway by assigning the material a width, height, and unit in the Material Library Editor. The material is then applied to the part with respect to the real world size of the part's UV tile. For example, if the part has a UV tile that is 40cm wide and high, a material with the same real world size would scale to fit the boundaries of the UV tile.
If no width or height is defined for a material, a default of 1.0 x 1.0 cm is applied.
|
|
|
|
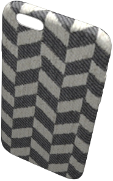
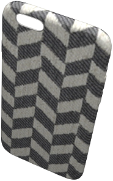
Material with a real world size of 10 x 10 cm applied to a bag. |
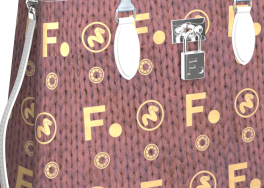
Material with a real world size of 25 x 25 cm applied to a bag. |
Note: The real world material size is only applied to parts rendered from Modo with custom UV tiles. See Exporting UV Maps from Modo to Colorway for more information.
To assign a real world size to your materials:
| 1. | Click LiveSources > Edit Material Library. |
The Material Library Editor is opened.
| 1. | Select the material you want to edit from the left panel in the Material Library Editor. |
| 2. | Scroll down to the Size property. |
| 3. | Input the Width and Height of the material and specify the Units as centimeters (cm), inches (in), millimeters (mm), or meters (m). |
Note: If you don't need to maintain aspect ratio on the width and height of the material, disable the Constrain aspect ratio ![]() button.
button.
| 4. | Click OK. |
The material can be assigned to parts using its real world size.
Note: To apply the real world size of the material to the part, enable the Real World Size option in the material properties when the part is selected.
Note: .dci files rendered with previous versions of the Colorway Kit do not support this feature.
Applying a Material to a DCI item
Once a material library has been linked to your Colorway application, you can apply materials to your DCI items in the same way as applying colors.
To apply a material to a .dci or .svg item:
| 1. | Click on the Materials & Textures |
| 2. | Click on the Library tab. |
| 3. | Drag a material onto a part. |
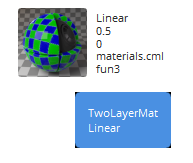
The material appears under the part to which it has been applied in the item list. If you drag more materials onto that part, they will stack in the item list. Only the material at the top of the list is displayed. See example below.
Note: Materials, like colors, apply to individual variations. To apply a material to all variations, right-click on the part you've applied the material to and select Apply Material to all Variations.
Tip: To replace a material on a part, hold Ctrl/Cmd and drag it onto the part.
No Swatch Labels in Dynamic Tables
If no color is applied to a material, it will be represented in a Dynamic Table with the label "[no swatch]". You can remove this label by unchecking the Show [no swatch] labels option under Edit > Preferences > General on Windows, or Colorway > Preferences > General on Mac.
Material Palettes
You can create palettes of materials to quickly access materials for specific projects.
If you haven't linked to a material library file, see Applying a Material to a DCI item for information on how to link one.
To add a material to a palette:
| 1. | Click on the |
| 2. | Click on the Library tab. |
Thumbnails of the materials in your linked material library file are listed here.
| 3. | Right-click on a material. |
| 4. | Select Add Material to... |
The following options appear:
- New palette - Creates a new palette and adds the selected material to it.
- All palettes - Adds the selected material to any palettes you have already created.
- "Palette name" - Names of existing palettes are listed here. Click on one to add the selected material to it.
| 5. | Click on the Materials tab. |
Any existing or newly-created palettes are listed here. Right-click and select Remove or click on the![]() button to the right of the material to delete it from the palette.
button to the right of the material to delete it from the palette.
Dynamic Material Palettes
A dynamic material palette displays all materials used in either the sheet or an item.
To add a dynamic palette:
| 1. | In the right dock, select the Palette |
| 2. | Draw an area on the sheet in which to drop your palette. |
Your palette defaults to displaying swatches from the currently selected palette.
| 3. | Select the dynamic tool |
| 4. | On the right hand dock, in the Data Type drop down menu, select Materials. |
The swatches are replaced by any materials that are used by the item.
For more information on Dynamic Palette settings, see Working with Palettes