Dynamic Tables
You can display information about your assets in tables. One easy way to add content to tables is to link a .csv file to your table item. For example, you can display a measurement chart on your sheet this way. Another way to use tables is to display dynamic information about the items on your sheet, such as parts of the item and the various swatches assigned to them.
To add a table:
| 1. | In the left-side panel, select the sheet to which you want to add the table. |
| 2. | In the right menu, click the Table |
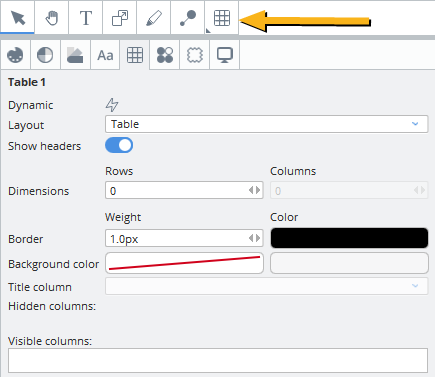
Note: If a tool is not visible, right-click the last icon in the toolbar to reveal additional tools.
3. Click and drag an area on your sheet where you want the table to appear.
Creating a Dynamic Table
This video presents how to create a dynamic table. A dynamic table references a DCI item and the parts inside it. It also references an SVG item created in Adobe Illustrator.
In the video:
• Creating a table.
• Changing the table's layout and content distribution
• Adding metadata to your table
Dynamic Icon
This video presents how to use the Dynamic icon.
In the video:
• In previous topics, we've covered how to create dynamic items. See Making Text Dynamic.
• At the top-right corner of the Dynamic item's bounding box, click the Dynamic icon and drag it to the item you want to reference.
Linking External Data to Your Table
You can add content to your table by linking an existing .csv file, or by making the table dynamic and referencing a Colorway asset.
To link to a .csv file:
| 1. | Add a table as described above. |
| 2. | Click the Assets |
| 3. | Click the |
A dialog box opens.
| 4. | Navigate to your .csv file's location and click Select. |
Your table will now be populated by the data in your .csv file.
Note: You can also simply drop your .cvs file straight onto the canvas. Colorway will query if you are inserting a New Table Item or a New Text Item.
Exporting Dynamic Table Data
You can export the data from your Dynamic Table in Colorway as a .csv file so that you can import it into database software such as Microsoft Excel.
To export your table data:
| 1. | Click the download data button |
A dialog box opens.
| 2. | You can now select if you want to download data for the working variation or for all variations. If you choose "all variations", you can specify if you want a single .csv file to incorporate the data from all variations or create separate .csv files for each variation. |
| 3. | Click Download. |
| 4. | Give your export file a name and choose the location in which you want it saved. |
| 5. | Click Save. |
Your table is now converted to a .csv file that can be opened in any software that reads the .csv format.
Working with Dynamic Tables
This video presents how to change the dynamic table's display.
In the video:
• Applying color to items using the table.
• Changing the table's border color.
• Changing the table's background color.
Note: Changing the background color improves the visibility when there are items behind the table.
Tip: Assign color swatches to specific material layers and texture layers by dropping swatches directly onto their cells in the table.
The order in which the items are displayed is the same in both the table and the Item tree. You can move the items up and down in the Item tree and the changes are reflected in the table.
Visible Columns in the Dynamic Table
You can pick which columns you would like to be visible in your dynamic table, and in which order, by dragging column labels from the Hidden columns property, to the Visible columns property.
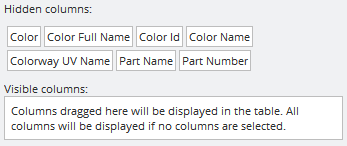
The hidden and visible column options in the Dynamic Table properties.
By default, all part, color, material, and texture information on the current item is displayed in the dynamic table. The Visible columns property remains empty when all default columns are displayed.
Right-click and select Clear visible columns to clear any labels in Visible columns.
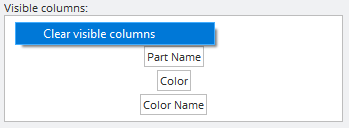
The context menu inside the Visible columns property.
No Swatch Labels in Material Color Columns
If no color is applied to a material, it will be represented in a Dynamic Table with the label "[no swatch]". You can remove this label by unchecking the Show [no swatch] labels option under Edit > Preferences > Material Library on Windows, or Colorway > Preferences > Material Library on Mac.
Hiding Empty Cells in the Dynamic Table
If there is no information for a particular table cell, sometimes you may find large gaps of empty space in your dynamic table. You can witness this behavior when you have colors applied to a part's materials, but no colors applied to another. You have the option to skip the rendering of the empty cells by turning on the Skip empty cells option in the Dynamic table properties, which removes the cells containing no information.
Note: When Skip empty cells is turned on, this disables the Show headers option and turns off the table headers.
Part Name and Part Metadata Adjustment in the Dynamic Table
Data inside the Dynamic table can be edited by double clicking on the cell you want to edit, and typing in the new information you want to display.
Note: Only part names and part metadata can be edited in this way.
Ordering Dynamic Tables
In Colorway 5.0 and later, you are able to sort visible columns in alphabetical or numerical order. To do this, select the table you want to order, then hover over the name of your visible column and press the arrow button that appears.
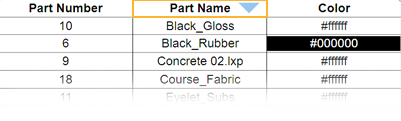
Note: Only one column can be ordered per table. When ordered, other columns may change order, but this will be relative to the sorted column.
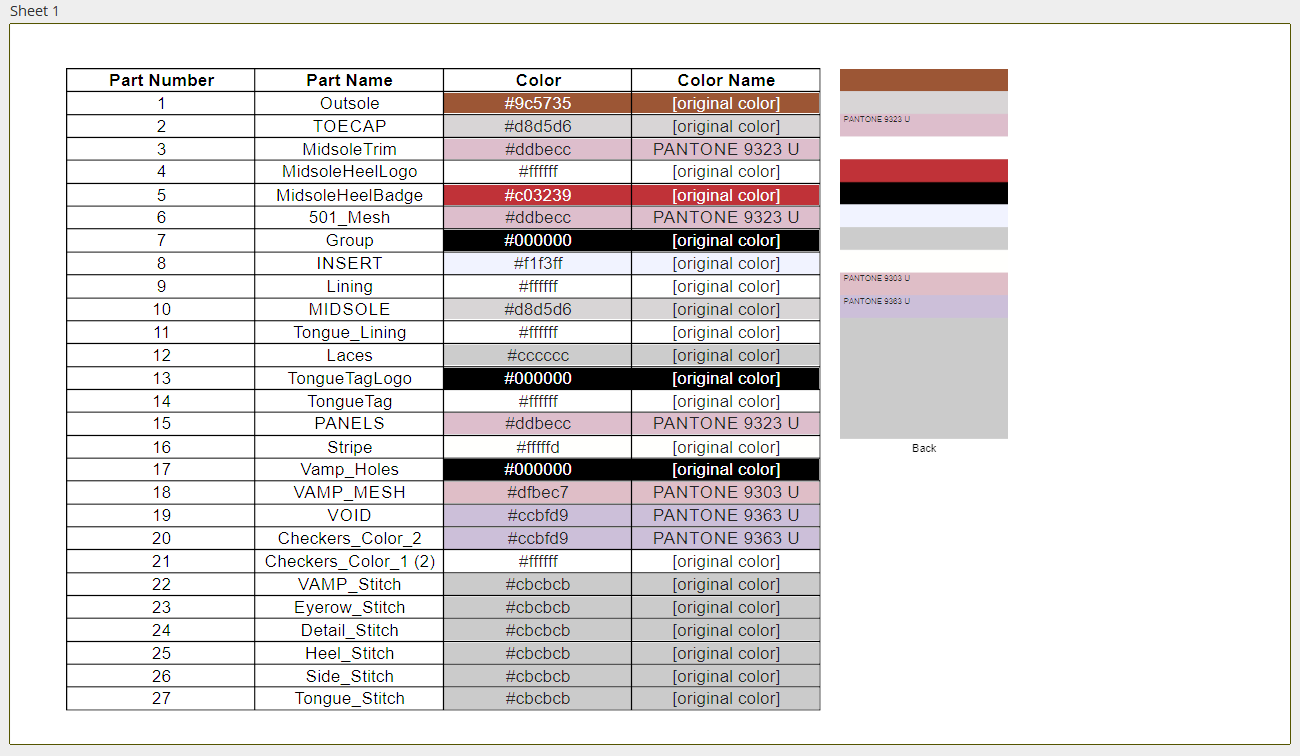
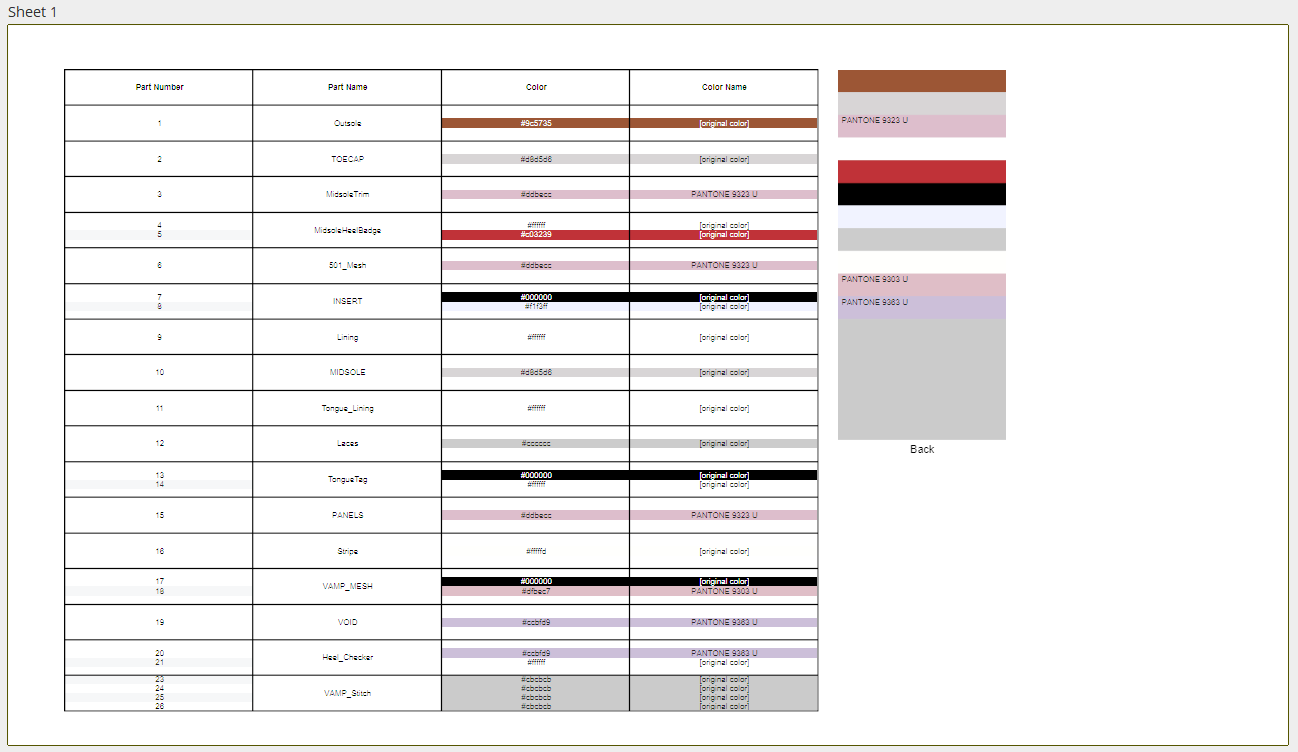
Collapsing Groups into One Cell
If your project has parts that belong to a group, you can collapse the group into one cell to keep your table clean and easier to read.
Note: For more information on grouping parts, see Working with Parts
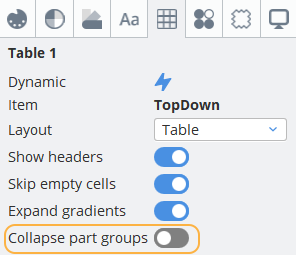
Group visibility can be switched on or off by toggling the Collapse part groups option in the Table Item menu.
|
|
|
|
Table without part groups collapsed |
Table with part groups collapsed |