Drawing and Manipulating Vector Shapes within Colorway
In Colorway 5.1 and higher, you can draw and manipulate SVG shapes from within Colorway. This eliminates the need to create SVG decals, images, or textures in a third-party application and export as an SVG, then reimport into colorway. However, SVG images can still be imported into Colorway.
Drawing Vector Shapes Within Colorway
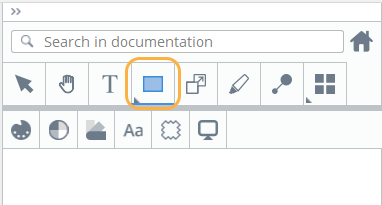
Colorway supports rectangle, ellipsoid, line, or arrow shapes. All these shapes can be found in the Creation tab in the right menu.
After selecting a shape, click and drag on the canvas to create the respective shape type. Once drawn, the Shape Style panel is displayed in the right-hand menu.
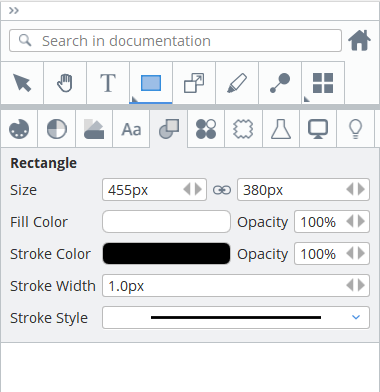
You can adjust the Size, Stroke Color, Width, and Style, as well as the Fill color of your shape.
This panel can be accessed even after the shape is drawn by clicking the shape you want to edit on the canvas.
Shapes can be deleted by selecting them in the Items Tree and pressing delete on your keyboard.
Merging and Separating Vector Shapes Within Colorway
SVGs and Vector Shapes can also be directly edited within Colorway, whether they were created in Colorway or imported from another application.
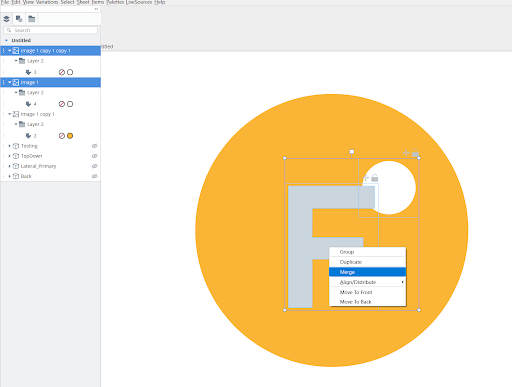
To merge shapes together:
- Select the two vector shapes you want to merge.
- With the shapes selected, right-click a selected shape on the canvas and choose Merge from the context menu.
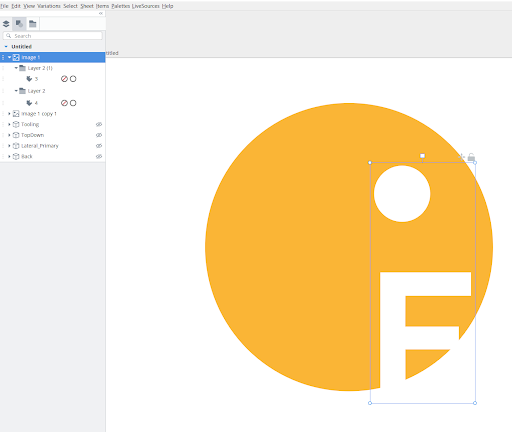
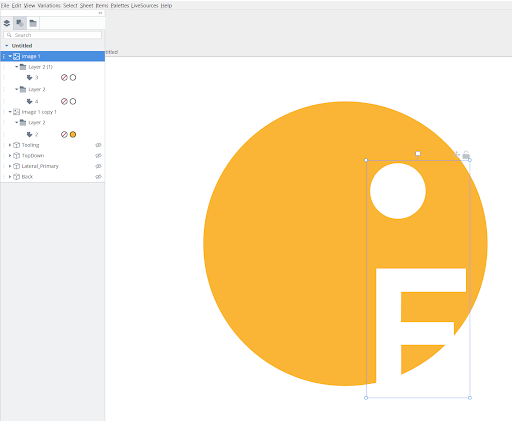
- Once merged, your selected shapes are available under a single image in the Items Tree and can be scaled, rotated, or moved by selecting a single shape instead of selecting multiple shapes individually.
You can select multiple shapes in the Items Tree or click a shape on the canvas and then hold down Shift and then click the other shapes you want to merge.
Merged shapes can also be separated, allowing you to move shapes independently of each other.
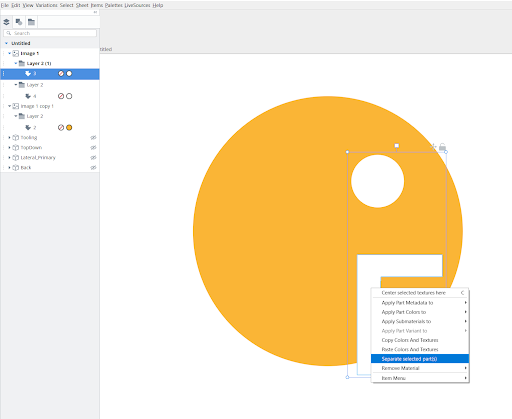
To separate shapes:
- Select the merged vector shapes you want to separate.
- Right-click the selected shape on the canvas and choose Separate Selected Part(s) from the context menu.
- Your selected shapes are now available as multiple images in the Items Tree and can be scaled, rotated, or moved independently of other shapes.
Tip: For more information on SVGs in Colorway, such as how to recolor them and use them in variations, see Inserting an SVG from Adobe Illustrator.
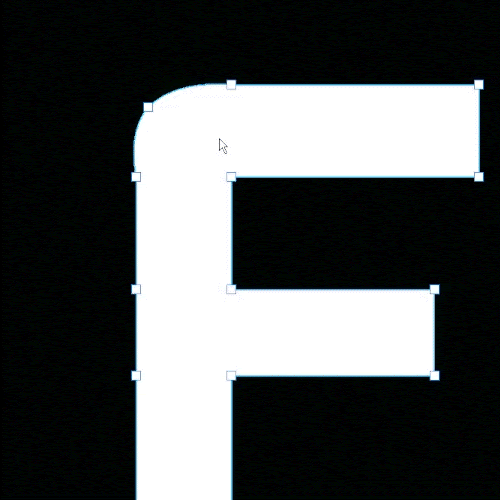
Adding and Removing Points Along a Path
Points can be easily added or removed along a vector path within Colorway. This allows you to apply fine edits to any vector shapes or SVGs within Colorway without the need to use an additional vector graphics application.
To add a point along a path:
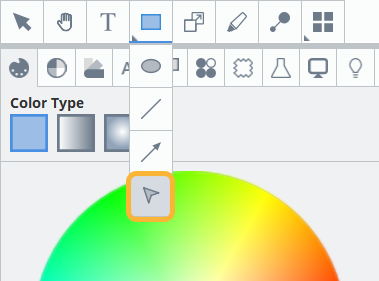
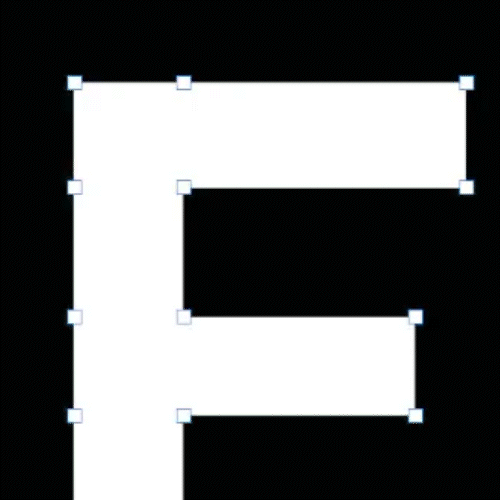
- Activate the Shape Edit Tool from within the Vector Tools menu.
- With the Shape Edit Tool active, select the shape to which you want to add additional points. Shapes can be selected by double-clicking the shape you want to be selected, or selecting it from the tiems tree.
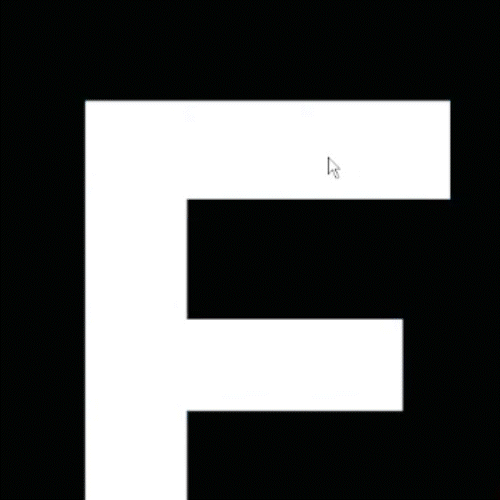
- Click where you want to add points along the path of the shape
The Shape Edit Tool van be accessed by right clicking the vector shape tool.
Note: Compound or merged shapes may need to be separated before individual parts are able to be selected.
Points along a path can aso removed, to simplify the curve or change the appearance of your shape.
To remove a point:
- With the Edit Shape Tool active, select the point to remove
- Press Delete or Backspace on your keyboard.
Tip: Multiple points can be selected at once by holding down Shift and selecting additional points.
Converting Points to Curves
Points can also be converted unto curves. This gives you the ability to adjust shapes by rounding corners or curving straight lines.
To convert a point into a curve:
- Double-click the point you want to be converted into a curve.
- Using the handles on either side of the anchor point, adjust the curve
Once converted, a handle appears on either side of the converted point
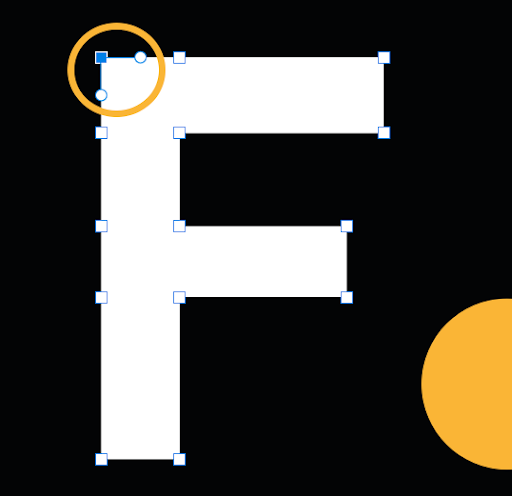
Tip: Handles are represented with a circular point, while anchor points (the point that the curve handles originate from) remain square.
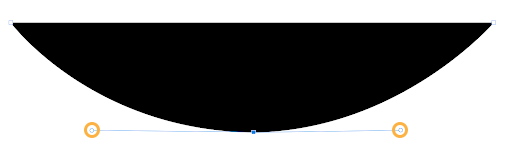
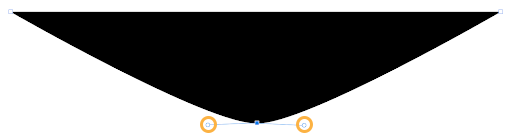
The tightness of your curve depends on the length and direction of your handles. For sweeping curves, keep your handles long. For tight curves, keep them short.
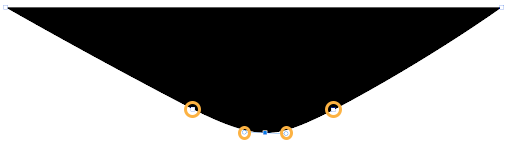
To prevent tight curves from becoming pointed, add additional points adjacent to your anchor point.
|
|
|
|
|
Handles are long, so the curve is sweeping |
Handles are short, so the curve becomes tighter |
Additional points are added to either side of the anchor point to maintain the curve. |
Curved points can be converted back into hard points selecting the point you want to convert and double-clicking it.