Search is based on keyword.
Ex: "Procedures"
Do not search with natural language
Ex: "How do I write a new procedure?"
Contact Support
Photoshop
Flix 5 links to Photoshop so you can edit your panels directly in Photoshop and send them back to Flix 5.
Note: Flix 5 supports Abode Photoshop CC 2015.5, CC 2017, and CC 2018. See Application Dependencies section.
Video: If you want to have a quick look at the tutorial about the Photoshop basics, watch Flix and Photoshop: Basics.
Installing/Updating Photoshop Actions
If you have full read, write, and execute permissions, you can update the Photoshop scripts by clicking on the Install/Update Scripts ![]() button at the bottom left of the Flix 5 interface and selecting Install Photoshop scripts or Update Photoshop scripts.
button at the bottom left of the Flix 5 interface and selecting Install Photoshop scripts or Update Photoshop scripts.
Note: If you don't have full read, write, and execute permissions, you need to install and upgrade the scripts manually, see Enabling the Third-Party Applications for more information.
Once the scripts are installed or updated, in Photoshop, navigate to File > Automate to access the actions.
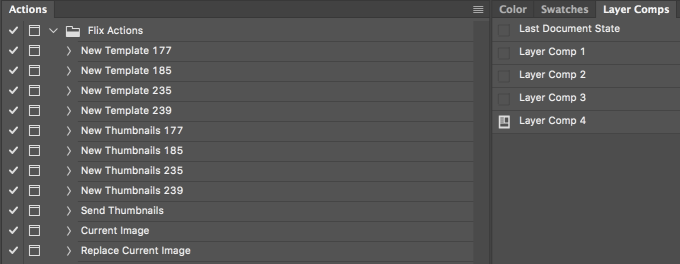
Alternatively you can display the actions in the Actions menu:
| 1. | Navigate to View > Actions. |
The Actions menu opens on the right-hand side.
| 2. | Click the hamburger icon and select Flix Actions. |
The Flix Actions display in the Actions menu.
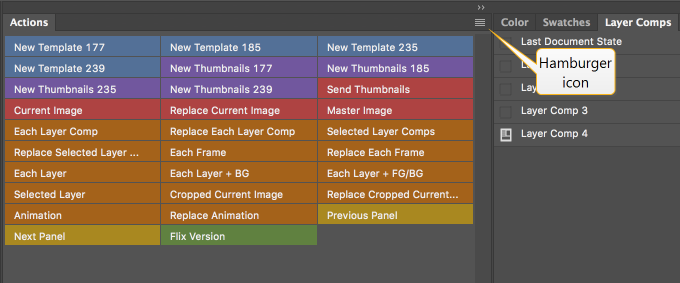
| 3. | If some actions are no use to you, select them and click the bin icon at the bottom to delete them. |
| 4. | To switch to Button Mode, click the hamburger icon and select Button Mode. |
Photoshop Actions
Note: Both Photoshop and Flix 5 need to be open for these actions to function.
|
Action |
Description |
|---|---|
| New Template 177 | Creates a new document with an aspect ratio of 177. |
|
New Template 185 |
Creates a new document with an aspect ratio of 185. |
|
New Template 235 |
Creates a new document with an aspect ratio of 235. |
|
New Template 239 |
Creates a new document with an aspect ratio of 239. |
|
New Thumbnails 177 |
This creates a new document that contains 9 thumbnails, each with an aspect ratio of 177. |
|
New Thumbnails 185 |
This creates a new document that contains 9 thumbnails, each with an aspect ratio of 185. |
|
New Thumbnails 235 |
This creates a new document that contains 9 thumbnails, each with an aspect ratio of 235. |
|
New Thumbnails 239 |
This creates a new document that contains 9 thumbnails, each with an aspect ratio of 239. |
|
Send Thumbnails |
Sends thumbnails, which were created by the New Thumbnails action to Flix 5 as individual panels. By default, this action also triggers the Master Image action, which exports the current .psd file as a master image to Flix 5's Panel Libraries. To disable the Master Image automated action, see Photoshop Parameters. |
|
Current Image |
Sends the current image to Flix 5. |
|
Replace Current Image |
Replaces the currently-selected Flix 5 panel with the image. |
|
Master Image |
Exports the current .psd file as a master image to Flix 5's Panel Libraries. |
|
Each Layer Comp |
Imports or re-imports each layer comp as a separate panel with all the visible layers from the individual layer comp. By default, this action also triggers the Master Image action, which exports the current .psd file as a master image to Flix 5's Panel Libraries. To disable the Master Image automated action, see Photoshop Parameters. |
|
Replace Each Layer Comp |
Replaces Flix 5 panels with each layer comp, starting from the selected Flix 5 panel. |
|
Selected Layer Comps |
Re-imports all selected layer comps. By default, this action also triggers the Master Image action, which exports the current .psd file as a master image to Flix 5's Panel Libraries. To disable the Master Image automated action, see Photoshop Parameters. |
| Replace Selected Layer Comps | Replaces Flix 5 panels with each selected layer comp, starting from the selected panel in Flix 5. |
| Each Frame |
Re-imports each frame in the Timeline as a separate panel. This is only available if you are using the animation timeline workflow. By default, this action also triggers the Master Image action, which exports the current .psd file as a master image to Flix 5's Panel Libraries. To disable the Master Image automated action, see Photoshop Parameters. |
| Replace Each Frame | Replaces Flix 5 panels with each frame in the Timeline, starting from the selected Flix 5 panel. This is only available if you are using the frame timeline workflow. |
|
Each Layer |
Re-imports each visible layer in an image as a separate panel. |
|
Each Layer + BG |
Flix Each Layer + BG- re-imports each visible layer in an image as a separate panel but keeps the background the same for each one. By default, this action also triggers the Master Image action, which exports the current .psd file as a master image to Flix 5's Panel Libraries. To disable the Master Image automated action, see Photoshop Parameters. |
|
Each Layer + FG/BG |
Re-imports each visible layer in an image as a separate panel but keeps the background and foreground the same for each one. By default, this action also triggers the Master Image action, which exports the current .psd file as a master image to Flix 5's Panel Libraries. To disable the Master Image automated action, see Photoshop Parameters. |
|
Selected Layer |
Re-imports only the selected layers of the image as a new panel. |
|
Cropped Current Image |
Exports the image selection to a new Flix 5 panel. |
|
Replace Cropped Current Image |
Replaces Flix 5 currently-selected panel with the image selection. |
|
Animation |
Exports an animated timeline to Flix 5 creating an animated panel. |
|
Replace Animation |
Replaces Flix 5 currently-selected panel with an animated panel when using the video timeline. |
|
Previous Panel |
Selects the previous panel in the Flix 5 current sequence from within Photoshop. |
|
Next Panel |
Selects the next panel in the Flix 5 current sequence from within Photoshop. |
|
Flix version |
Displays the current script version. |
Video: Have a quick look at the Flix and Photoshop: Using Layer Comps and the Flix and Photoshop: Using the Timeline videos.
Flix to Photoshop
Open either a single panel to Photoshop or multiple panels at once, depending on your needs. Follow the steps for each process below:
Opening One Panel in Photoshop
To send one panel to Photoshop from Flix 5:
| 1. | Select the panel that you want to open in Photoshop. |
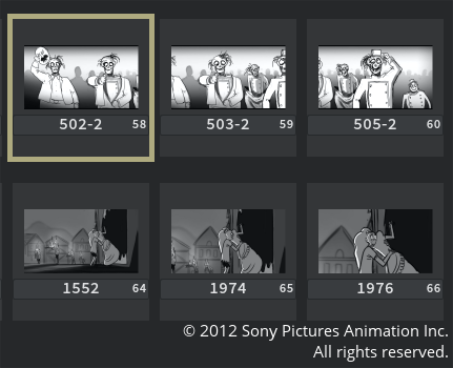
| 2. | In the Edit workspace, either: |
• Click the Photoshop button ![]() on the Workspace toolbar,
on the Workspace toolbar,
• Press Ctrl/Cmd+Enter while the panel is selected,
• Double-click the panel, or
• Right-click the panel and select Edit Image from the dropdown menu.
The selected panel opens in Photoshop automatically.
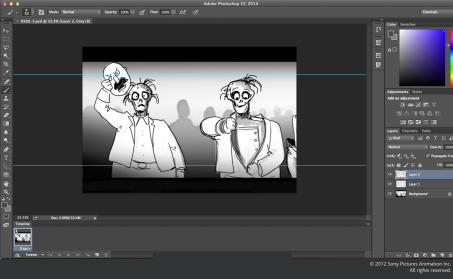
If the panel is a .psd file, all layers are preserved and displayed in Photoshop. If the file is a .jpg, you can add layers when making your changes within Photoshop.
Opening Multiple Panels in Photoshop
To send several panels from Flix 5 to Photoshop as layer comps or in a timeline:
| 1. | Select the panels that you want to open in Photoshop. |
| 2. | In the Edit workspace, on the Workspace toolbar, click and hold the Editing plug-in Group |
| 3. | Select Photoshop (layer comps) to send the selected panels to Photoshop as layer comps. |
OR
Select Photoshop (timeline) to send the selected panels to Photoshop in the Timeline.
| 4. | In the Edit workspace, either: |
• Click on the Photoshop ![]() button,
button,
• Press Ctrl/Cmd+Enter while the panels are selected, or
• Right-click one of the selected panels and select Edit Image from the dropdown menu.
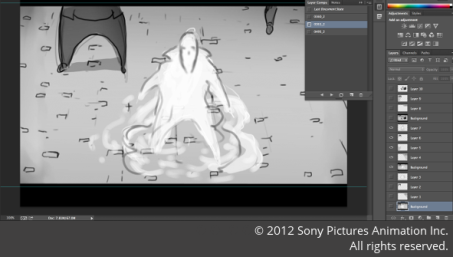
If you clicked on Photoshop (layer comps), the selected panels open as layer comps in Photoshop.
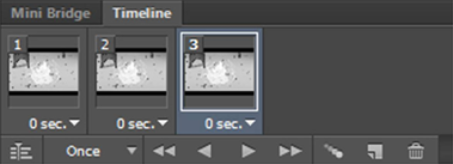
The selected panels open in Photoshop’s Timeline tab, if you clicked on Photoshop (timeline). This splits up the images so that you can edit them individually.
Note: If you can't see the Timeline or LayerComps tabs in Photoshop, on the Photoshop menu bar, navigate to Window > Layer Comps or Timeline to display them.
Note: The Editing Plug-in Group button is dynamic. If the icon isn't set to the correct plug-in option, click and hold the button until the list of plug-ins appears in a dropdown menu and select the required Photoshop ![]() plug-in.
plug-in.
Video: For more information about the Layer comps and Timeline in Photoshop, have a quick look at the Flix and Photoshop: Using Layer Comps and the Flix and Photoshop: Using the Timeline videos.
|
| Multiple panels in the Timeline tab. |
|
| Multiple panels in a layer comp. |
As with editing a single panel in Photoshop, if multiple files are .psd, all layers are preserved and displayed in Photoshop. If the panels are .jpg files, you can add layers when making your changes.
|
|
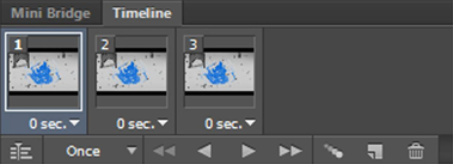
Changes to multiple panels in the Timeline tab. |

|
| Changes to multiple layers in a layer comp. |
Exporting Panels as PSDs
See Exporting Selected Panels as PSDs
Photoshop to Flix 5
If you want to round-trip a panel and replace the older version directly in Flix 5, follow the steps below. If you don’t want to replace an older version, but import changes as a new file within Flix 5, refer back to the instructions on Importing Files.
Once you’ve finished making changes to the panel in Photoshop:
| 1. | Ensure that you have both Photoshop and Flix open. |
| 2. | To save your changes as a new version of the panel, either: |
• Select File > Save within Photoshop, or
• Press Ctrl/Cmd+S.
Once you’ve saved your changes, the updated panel appears in Flix 5 with a new version number.

If you are reimporting multiple files from Photoshop:
| 1. | Ensure that you have both Photoshop and Flix 5 open. |
| 2. | Once you’ve made your changes to all the panels in the Timeline tab or layer comps, either: |
• Select File > Save within Photoshop, or
• Press Ctrl/Cmd+S.
Once you’ve saved, the updated panels appear in Flix 5 with new version numbers.
You don’t necessarily need to save your files in Photoshop. If you want to re-import your changes directly into Flix 5 and save yourself the trouble of saving the file in Photoshop, there are several options for reimporting using custom Flix 5 commands.
To re-import the current image into Flix 5 from Photoshop:
| 1. | Ensure that you have both Photoshop and Flix 5 open, and that you have the correct panels in Flix 5 selected. |
| 2. | Within Photoshop, select File > Automate > Flix Current Image from the dropdown menu. |
The panel is sent to Flix 5 as a new panel added to the sequence.
| 3. | If you don’t want to save the file, you can close it in Photoshop once you have re-imported the panel back into Flix 5. If you choose to save the file in Photoshop, it saves the panel and replaces it in Flix 5 as a new version. You can go back to any version of the panel within Flix 5, so none of your previous changes are ever lost. |
Note: To re-import an image from Photoshop using one the Photoshop, follow the same steps you would to re-import Flix Current Image.
Video: If you want to have a quick look at how to create camera moves, watch Flix and Photoshop: Creating Camera Moves.
Creating Panels Using Templates
You can create a panel using a blank Photoshop template with a choice of aspect ratios provided. Edit this template in Photoshop and export it to Flix 5 as a new panel. To set up a template:
| 1. | In Photoshop, navigate to File > Automate or open the Actions menu and select any of the following: |
• Flix New Template 177
• Flix New Template 185
• Flix New Template 235
• Flix New Template 239
The numbers represent the aspect ratio of each template. For example, the template 177 is equivalent to an aspect ratio of 1.77.
| 2. | Make any desired edits in Photoshop. |
| 3. | Export your template to Flix 5 by navigating to File > Automate > Flix Current Image or in the Actions menu, click Flix Current Image. |
The edited template appears as a new panel in Flix 5.