Clip and Shot Properties
The Properties contain standard controls similar to Hiero's Read node Properties and format-specific controls, depending on the selected source clip or shot. You can also control localization for individual clips and shots using the localization policy dropdown.
See Localizing Media for more information on localization.
If the clip Properties are not displayed in your workspace, double-click a source clip or shot or navigate to Window > Properties to open them in a floating window.
Note: The Properties panel allows you to override the Preferences and Project Settings on a per file basis. See Preferences and Project Settings for more information.
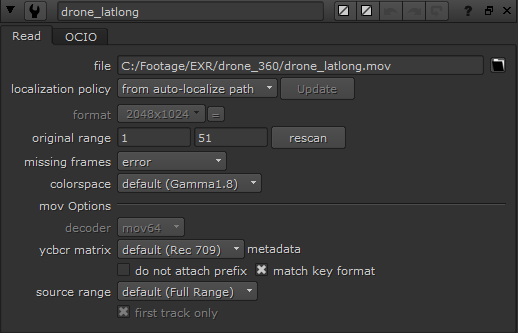
As an example, .mov files allow you to control the decoder and ycbcr Matrix for clips, as well as the standard controls available for all clips. R3D and ARRIRAW media use their own software development kits (SDKs) to control the extensive settings usually seen on RED and ARRIRAW Cameras.
Note: The RED Decode Resolution and ARRIRAW Resolution and Proxy dropdowns control the maximum allowed Viewer resolution, overriding the Viewer Image Quality setting.
In addition, source clip properties are accessible through the same Python API as Nuke, improving scripting capabilities and integration into existing pipelines.
Setting Source Clip Ranges
The original range controls in the source clip/shot Properties panel allows you to set the output range for source clips when you add them to a sequence as shots. The entire frame range of the clip is read on import, but altering the original range changes the output of the shot on the timeline.
Note: You can reset source clip to its original frame range at any time by clicking rescan. Rescanning also appends new frames as they become available.
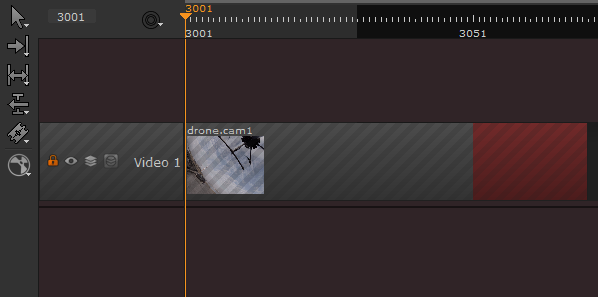
Changing the original range affects source clips and shots differently. Opening a source clip in the Viewer, or in the right-click Timeline View, and adjusting the original range limits or extends the clip to that range of frames.
Extending the range past the original range adds handles, shown in red.
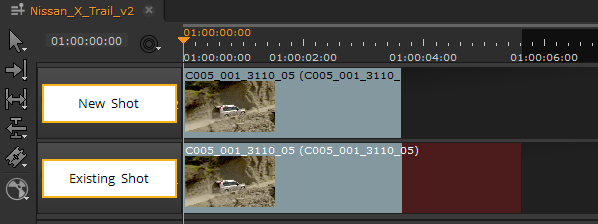
Adjusting the original range changes the output of any existing shots, but still allows you to trim and slip the shot range using the available handles. New shots pick up the new original range specified in the Properties.
Using Relative Paths to Media
Nuke Studio's timeline Read nodes support relative paths in the file control, allowing you to import media relative to a specific project directory. The Project Settings control this behavior for the current project.
Tip: If you want to set the project path for all new projects, navigate to the Preferences under Project Defaults > General and set the project directory there.
To set a Read file path to a relative location:
| 1. | Open the Project Settings by clicking Project > Edit Settings. |
| 2. | Enter the required file path in the Project Directory field. |
Tip: Click Hrox Directory to automatically enter an expression that evaluates to the .hrox location.
| 3. | Double-click the required source clip or shot to display its Properties. |
| 4. | In the file field, adjust the path to the relative location of the .hrox project file. For example, if the project directory and absolute path to the source clip are: |
C:/projects/timeline_read/scripts/
C:/projects/timeline_read/footage/renders/shot110/A009C005_101029_L1O3.%04d.dpx
Then the relative path to the clip is:
./../footage/renders/shot110/A009C005_101029_L1O3.%04d.dpx