Creating Your Own Workspace
Hiero's interface is comprised of any number of panels. Panels act like containers with different tabs; you can configure panels to contain specific tools, such as the timeline or a Viewer, depending on the task you are presently performing. The default panel configurations are saved as Workspaces (referred to as Layouts in Nuke) and include: Conforming, Editing, Reviewing, and Timeline. You can easily create your own custom workspace that suits your needs, and then save it as a custom Workspace for easy recall.
During the customization process, you can:
• Resize your entire workspace or panes independently.
• Split panes to create new work areas, for example two Viewers side-by-side.
• Add and remove panes and tabs as required.
• Float and nest tabs to group similar functions together, for example Histogram, Vector, and Waveform in the same pane.
• Maximize the pane under the mouse cursor by pressing ` (back tick). Press ` again to return to the regular interface.
You can create as many workspaces as you require, one for each project you undertake if necessary. In practice though, you may find that two or three custom workspaces are sufficient.
Tip: You can return to the saved version of a workspace by navigating to Workspace > Reset Workspace.
Resizing Your Workspace
Resizing the interface, panes, and tabs works in much the same way as other software applications:
• To resize the entire interface, drag the resize handle at the bottom right of the application to the required width and height.
• To resize individual panes, hover the mouse over the edges of the required area until the cursor changes to the resize icon. ![]() Click and drag the cursor to resize the pane or tab.
Click and drag the cursor to resize the pane or tab.
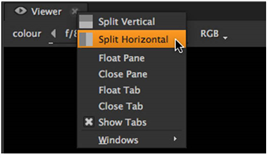
Splitting Panes
Splitting panes allows you to organize your workspace into distinct areas delineated by well-defined borders.
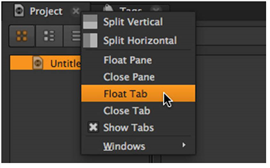
• To split panes, right-click the required pane and select Split Vertical or Split Horizontal.
Adding and Removing Panes and Tabs
Adding and removing tabs gives you the freedom to personalize your workspace depending on your current project.
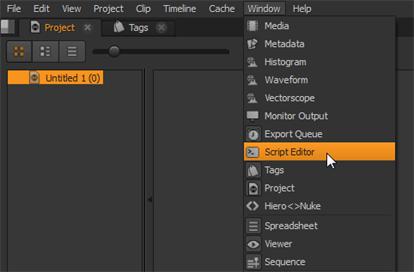
• Add new tabs by:
• Navigating to Window and selecting the required tab. The tab is embedded in its default position or added to the interface as a floating window,
OR
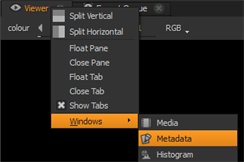
• Right-clicking the pane in which you want the tab to appear and selecting it from the Windows dropdown.
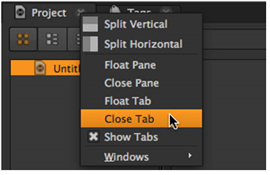
• Close any tab that is not required by:
• Clicking the x on the tab’s right-hand side,

OR
• Right-clicking the tab name and selecting Close Pane or Close Tab.
Floating and Nesting
You can move existing panes and tabs to new locations in the interface (to help you organize your project).
• Float a pane or tab by:
• Right-clicking the tab name and selecting Float Pane or Float Tab.
OR
• Dragging the required tab from its current location.
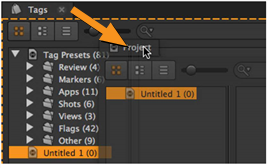
• Nest any floating pane or tab by dragging it to any existing pane.
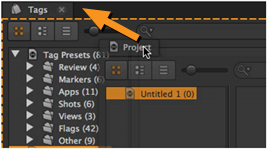
Tip: Use the orange highlight  around the destination pane to help you determine where the tab nests.