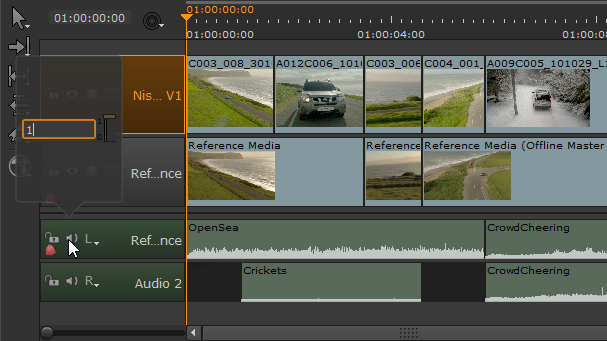
Audio and the Timeline
Audio tracks on the timeline are handled in much the same way as video tracks. By default, linked audio and video tracks are edited at the same time, but you can lock either track and move them independently or hold Alt to select a single track, if required.
Hiero supports integrated audio from container files, such as .mov, and audio specific files, such as .wav, on the timeline. Hiero assigns the channels in the audio file to separate tracks and matches the channels in the file to the available channels on the timeline.
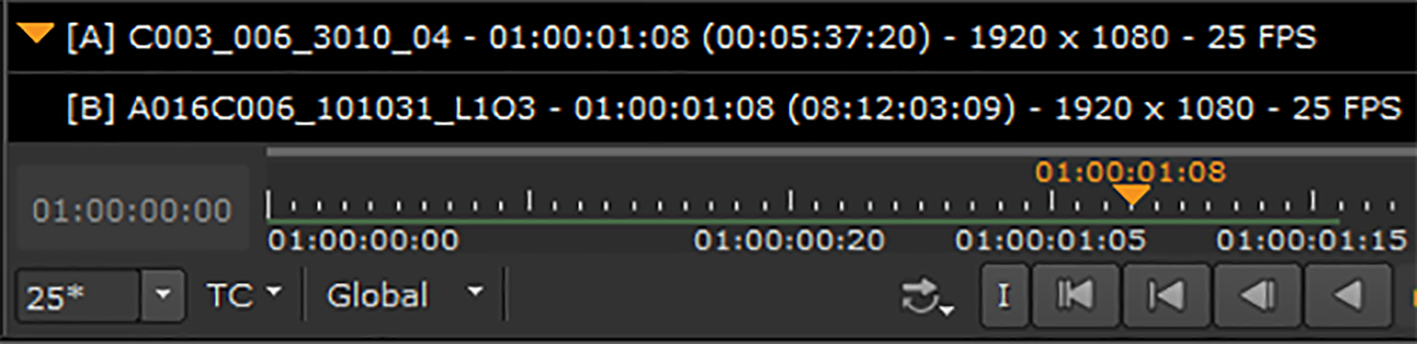
When both Viewer inputs contain clips, the audio output is set by the orange marker in the color picker information bar, displayed by clicking ![]() . In the following example, input A is providing the audio output:
. In the following example, input A is providing the audio output:
The volume slider in the upper-right corner of the Viewer controls the output level for that Viewer only.

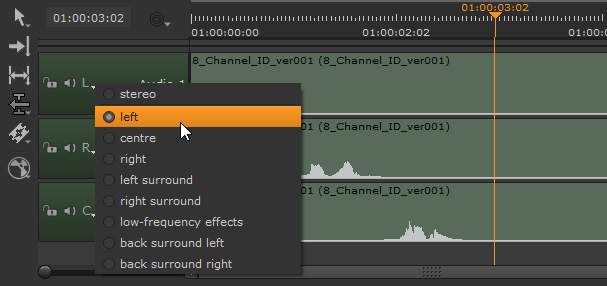
Audio output for shots can be toggled between eight channels, depending on the requirements of the clip or shot: left, center, right, left surround, right surround, low-frequency effects, back surround left, and back surround right. Click on the dropdown to cycle between outputs:
You can also control audio on a per track and per shot basis. Audio track headers and shots have independent volume controls in the timeline and Properties tab.
• Track headers - click and hold the mute icon on the header to display the volume slider.
• Shots - select an audio shot and click on the Properties tab to display the Volume control.
Tip: You can control the volume on multiple shots simultaneously by holding Ctrl/Cmd and selecting the required items before adjusting the volume slider.
The Preferences > Panels > Viewer (Sequence) sub-menu contains audio controls allowing you to control the volume level for all new Viewers. See Preferences for more information.
Note: If the frame rate drops too low, audio is automatically muted and the speaker changes to the no audio playback icon.