Changing the View Position
You can change which camera or light you are viewing through and their position and orientation. This makes light and camera positioning easy. To change the view’s current position and orientation:
|
Shortcut |
Action |
|
Alt+left-click and drag |
Tumbles the view around its center of interest. |
|
Alt+middle-click and drag |
Pans the view. |
|
Alt+right-click and drag |
Dollies the view forward (drag right) and back (drag left). |
Note: Looking through a location with no xform attribute does not allow you to move the object within the Viewport. To enable transformation of a scene graph location, add a Transform3D node and assign the location to the node’s path parameter.
Note: In many Linux windows managers, the Alt key is used by default as a mouse modifier key. This can cause problems in 3D applications where Alt is used for camera navigation in 3D environments.
You can use key mapping to assign the mouse modifier to another key, such as the ![]() (Super or Meta) key, but the method changes depending on which flavor of Linux you're using. Please refer to the documentation on key mapping for your particular Linux distribution for more information.
(Super or Meta) key, but the method changes depending on which flavor of Linux you're using. Please refer to the documentation on key mapping for your particular Linux distribution for more information.
Changing What You Look Through
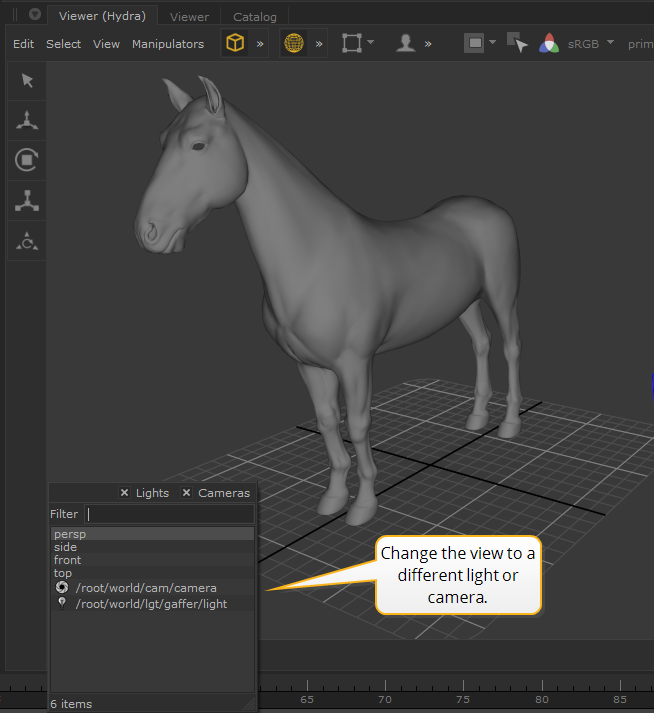
The view from a viewport comes from either a light or a camera. You can change the view to a different light or camera to make placement easier or to help with composition. To set this:
| 1. | Click the text at the bottom of the Viewer (Hydra) tab (such as persp). |
This brings up a list of available lights and cameras.
Note: The default cameras are persp, side, front, and top.
| 2. | Filter the list to find the camera or light you want. To filter the list you can: |
• Uncheck the Cameras checkbox to remove cameras from the list.
Cameras with a scene graph location can be identified by the ![]() icon in the filter list.
icon in the filter list.
• Uncheck the Lights checkbox to remove lights from the list.
Lights with a scene graph location can be identified by the ![]() icon in the filter list.
icon in the filter list.
• Type text into the Filter field to only display items that contain the text.
Text entered into the Filter field of the view selection dialogs may contain some basic regular expression patterns, such as ranges [a-z].

| 3. | Select the required light or camera from the list. |
Note: The camera and lights displayed in the filter list are populated in four ways:
• Cameras from the globals.cameraList at the /root/world location.
• Lights from the lightList attribute at the /root/world location.
• The default four cameras (persp, side, front and top).
• The current render camera (such as set with the RenderSettings node).
