Using Stereo Cameras in the OSG Viewer
When designing scenes for stereo displays, you may need to preview each side of the view (left eye/right eye) to make appropriate adjustments. To support this, the OSG Viewer has stereo mode controls. These allow you to assign a left and right camera in addition to the main camera. You can then switch the viewpoint between your main, left, and right cameras.
Note: To use stereo mode you must have a rig with the left and right cameras in place. For example, you can add and name cameras using CameraCreate nodes, or you can import a pre-configured rig.
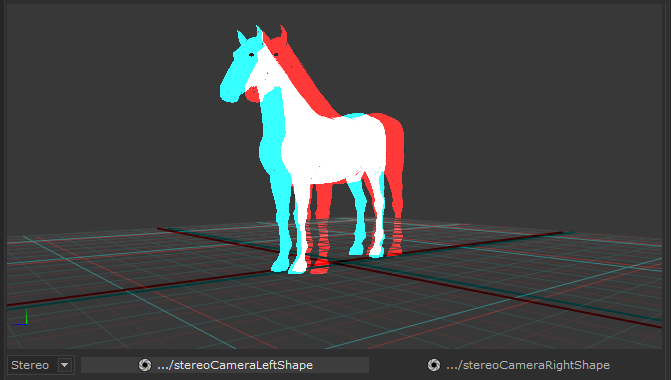
The OSG viewer also provides a stereo option to view your scene stereoscopically as an anaglyph. The scene is represented as two separate images (red and cyan), which are seen as a single 3D image when viewed with 3D glasses.
Using the Stereo Controls
| 1. | Click the  stereo controls toggle to reveal the controls. stereo controls toggle to reveal the controls. |

| 2. | The selector on the left (labeled 'Selector' in the diagram above) lets you choose the view camera. The selector has three options: Main, Left, Right, and Stereo. |
Left and Right correspond to the two cameras that are selected in the left and right camera dropdowns (to the right of the camera selector). Click on these dropdowns to change the left and/or right camera selection.
The Main camera corresponds to the one shown in the camera selector (labeled 'Main camera' in the diagram) at the bottom of the viewer.
| 3. | You can see an anaglyph of the scene by selecting Stereo. This draws a stereoscopic 3D version of the scene using red and cyan images for viewing through compatible glasses. |

