Defining and Overriding a Color Output
The RenderOutputDefine node can be used to create a new render output or override the settings for an existing one.
To define or override a color output:
| 1. | Create a RenderOutputDefine node and add it to the recipe. |
| 2. | Select the RenderOutputDefine node and press Alt+E. |
The RenderOutputDefine node becomes editable within the Parameters tab.
| 3. | Type the pass name to define or override in the outputName parameter. |
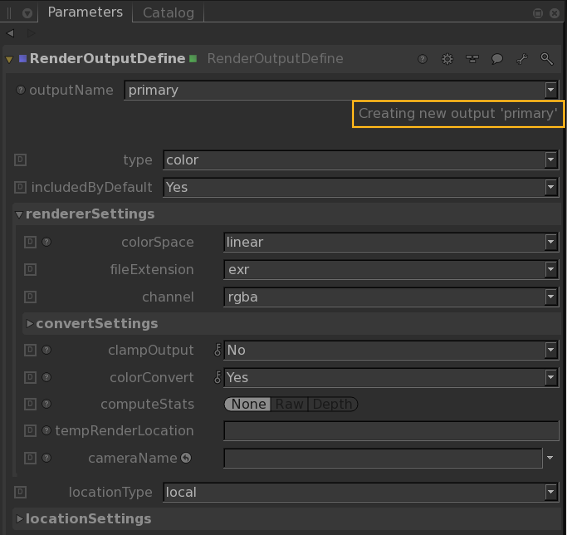
The primary pass is the default pass. Setting the pass name to something other than primary results in more than one pass. Katana provides feedback below the outputName parameter that displays whether or not you are creating a new pass or editing an existing one.

| 4. | Select the output file’s colorspace using the colorSpace dropdown. |
The output colorspace is ignored if the colorConvert dropdown is set to No. For more on colorspaces within Katana, see Managing Color.
| 5. | Select the file type to use from the fileExtension dropdown. |
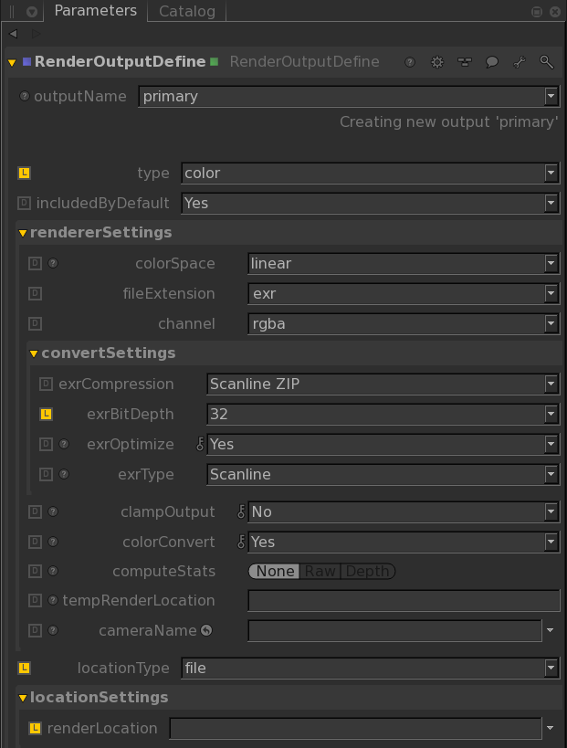
The file type should have sufficient bit-depth for the colorspace selected in step 4. For instance, certain colorspaces require 32-bits and, as such, some file formats aren’t supported. Use the convertSettings parameter grouping to access the file type specific settings, including bit depth.
| 6. | Select the type of location for the output file using the locationType dropdown. The locationType can be: |
• local - the output is saved to a temporary directory below /tmp. The exact directory is stored in the KATANA_TMPDIR environment variable.
• file - the locationSettings parameter grouping gains a renderLocation parameter where a file location can be specified.
• studio’s asset manager - your studio may have an asset manager, which is displayed here, details are implementation specific.

