Grouping Nodes
Group nodes are used to group together a number of nodes into a single node, which can help to simplify the node graph.
Creating Group Nodes
To create a Group node, in the Node Graph tab, select a number of nodes and press G. A new Group node, with the previously selected nodes as its children, is created. Any connections between selected nodes are preserved.
To create an empty Group node:
| 1. | In the Node Graph tab, either: |
• Press Tab and select Group from the node list,
• Right-click and select Other > Group from the menu, or
• From the Node Graph tab's menu, navigate to New > Other > Group.
The Group node floats with the cursor.
| 2. | Click inside the Node Graph tab to place it at that location. |
A new empty Group node is created.
You can duplicate Group nodes like any other node, which also creates duplicates of any child nodes.
Navigating in Hierarchies of Group Nodes
Group nodes are similar to folders in a file system, in that they can be used to group other nodes, including other Group nodes, thereby creating hierarchies of nested Groups.
A breadcrumbs bar at the top of the Node Graph tab uses Node Buttons to represent the Group node whose contents are shown in the tab, as well as all of its ancestor Group nodes. You can click any Node Button in the breadcrumbs bar to enter the corresponding ancestor Group node.
To enter a Group node, either:
• Select the Group node to enter and press Ctrl+Return,
• Ctrl+middle-click the Group node to enter,
• Select the Group node to enter, and navigate to Go > Enter Selected Group in the Node Graph tab's menu.
• Click the Node Button that represents the node in the breadcrumbs bar, or
• Drag the Group node into the breadcrumbs bar.
To leave a Group node that was entered, either:
• Press Ctrl+Backspace,
• Click the - icon in the title bar of an entered Group,
• Click the Node Button that represents the parent node of the Group node (if any),
• From the Node Graph tab's menu, navigate to Go > Up,
• Click the Node Button that represents the parent node of the Group node (if any) in the breadcrumbs bar, or
• Click the Go To Root button in the breadcrumbs bar (if the Group node exists in the root level of the node graph).
To jump up to the root level of the node graph, either:
• Press Ctrl+Shift+Backspace,
• From the Node Graph tab's menu, navigate to Go > To Root, or
• Click the Go To Root button in the breadcrumbs bar.
Connecting Group Nodes
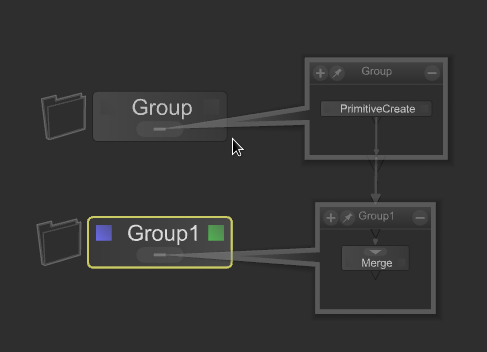
Group nodes can have any number of input and output ports, to which nodes from outside of the Group can be connected, in order to connect to nodes inside the Group.
The simplest way to create input or output ports is to expand the Group node bubble to show its contents. Nodes from outside of the Group can then be directly connected to nodes inside the Group, which automatically creates the input or output port on the Group as required.
Note: For more on Group nodes, and their incoming and outgoing connections, see Help > Developer Guide.
Editing Group Nodes
Group nodes do not provide any parameters by default. However, you can add custom parameters to Group nodes, and link parameters of child nodes inside the Group nodes to those parameters through parameter expressions. That way, a Group node's parameters can act as the interface of the Group as a whole.
In order to edit the parameters of a Group node, either:
• Click the green edit flag on the Group node in the Node Graph tab,
• Move the pointer over the Group node, and press the E key, or
• Select the Group node, and press Alt+E.
Note: See the section on Adding User Parameters for more information.