Search is based on keyword.
Ex: "Procedures"
Do not search with natural language
Ex: "How do I write a new procedure?"
Contact Support
Discover the Workspace
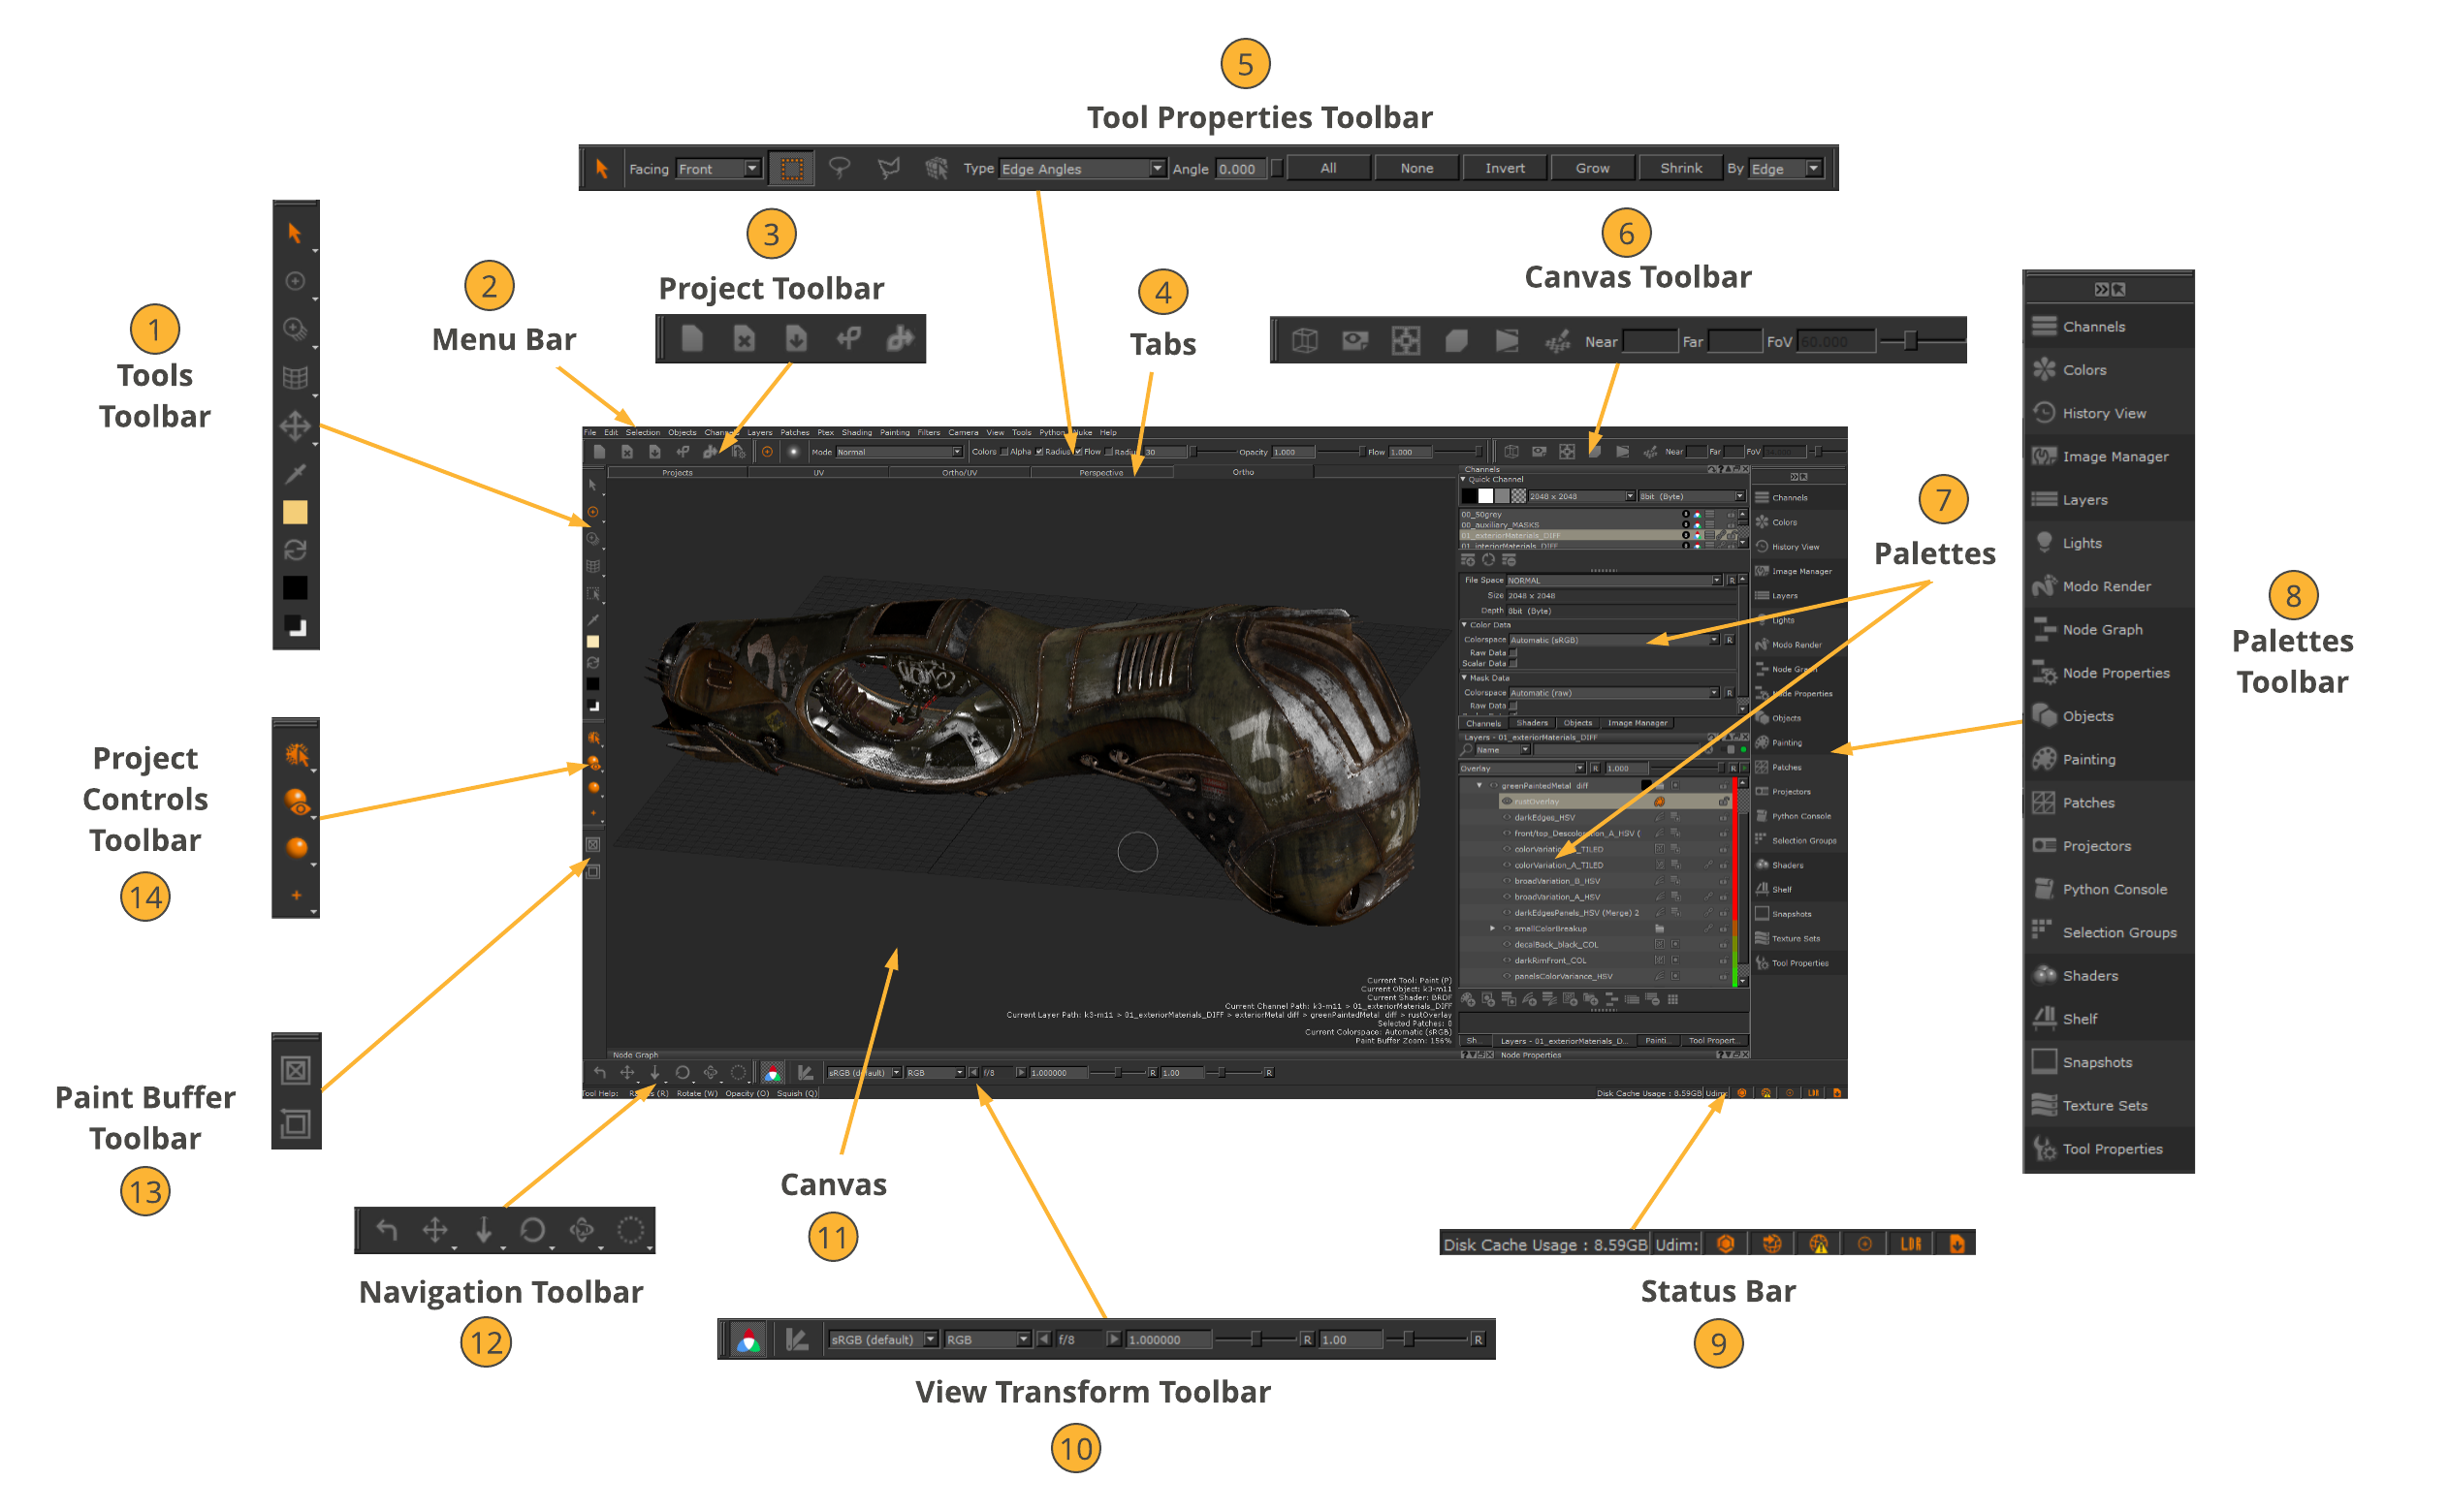
The Mari workspace consists of a menu bar, a canvas, toolbars, palettes, and a status bar. Palettes are used for working with items such as channels or shaders. They can be either docked in the application or made to float wherever you find them most useful. You can also place toolbars at the top or bottom and on the left- or right-hand side of the canvas.
What it Looks Like
Here is an illustration of the default layout of the Mari workspace that displays with an open project.
|
1 |
Tools Toolbar |
The Tools toolbar selects a tool for painting. See Toolbars. |
|
2 |
Menu Bar |
The menu bar selects Mari commands, many of which are also available using either shortcut keys or icons. |
|
3 |
Project Toolbar |
The Project toolbar performs common project functions, such as creating, closing, and saving projects. See Toolbars. |
|
4 |
Tabs |
The tabs switch between the following views: Projects, UV, Ortho/UV, Perspective, and Ortho. |
|
5 |
Tool Properties Toolbar |
The Tool Properties toolbar displays information about the selected tool. See Toolbars. Note: The illustration above shows the Select tool's Tool Properties toolbar as the Select tool is selected in the Tools toolbar. |
|
6 |
Canvas Toolbar |
The Canvas toolbar sets the view options for the UV and 3D views. |
|
7 |
Palettes |
The palettes contain controls for viewing and changing different aspects of the geometry on the canvas. |
|
8 |
Palettes Toolbar |
The Palettes toolbar allows quick access to your Mari palettes. See Configuring Your Workspace. |
|
9 |
Status Bar |
The Status bar displays information about the project generally, progress of long operations (such as baking), icons, and basic tool help for the current tool. It also displays how much of your cache disk has been filled. See Status Bar. |
|
10 |
View Transform Toolbar |
The View Transform toolbar displays a number of options for managing your monitor's colorspace in Mari. See View Transform Toolbar . |
|
11 |
Canvas |
This is where you view and paint your geometry. |
|
12 |
Navigation Toolbar |
The Navigation toolbar displays a number of options for managing navigation in Mari. See Toolbars. |
|
13 |
Paint Buffer Toolbar |
The Paint Buffer toolbar clears all un-baked paint and reset the paint buffer transform. See Toolbars. |
|
14 |
Project Controls Toolbar |
The Project Controls toolbar displays a set of four tools: • Selection - lets you switch between three selection modes. • Default Shaders - displays one of the four default shaders in the Shaders palette and the last-selected user shader. • Lighting - lets you change the lighting on the object. • Paint Buffer Symmetry - displays the four options for the Paint Buffer Symmetry functionality. See Toolbars. |