Groups, Pass-Through, and Mask Stacks
Multiple layers can be grouped together either by selecting the existing layers and creating a group with them, or by creating a new group without any initial layers and moving layers into them later. Layers can also be moved out of a layer group by simply dragging them back to the main layer stack or into another group.
Creating Groups
| 1. | To add an empty layer group, either: |
• from the Layers menu, select Add Empty Layer Group,
• right-click any layer in the Layers palette and select Add Empty Layer Group from the dropdown menu, or
• in the Layers palette, click ![]() .
.
| 2. | To create a group from existing layers: |
• with layers selected, from the Layers menu, select ![]() Group Layers,
Group Layers,
• right-click the selected layers and select ![]() Group Layers from the dropdown menu,
Group Layers from the dropdown menu,
• from the Layers palette, click ![]() , or
, or
• Press Ctrl+G.
Tip: You can also drag existing layers into the group.
Removing Groups
To remove a layer group:
• From the Layers palette, right-click one or more layer groups and select  Ungroup Layers,
• From the Layers menu, select  Ungroup Layers, or
• Press Ctrl+U.
The layer group is deleted and the layer order is preserved.
Using Pass-Through with Groups
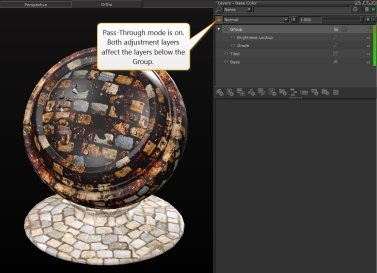
You can use the Pass-Through mode with groups to make the layers within them affect the layers below the groups. The steps below show you one way to use the Pass-Through mode in a particular scenario:
| 1. | In the Layers palette, click the Add Procedural Layer |
| 2. | Click the Add Adjustment Layer |
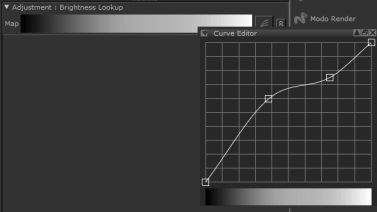
• Change the brightness value of the Brightness Lookup adjustment layer.
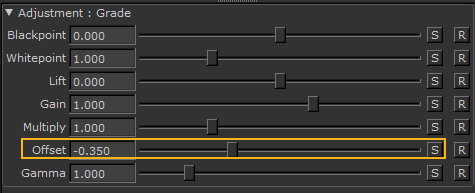
• Change the offset of the Grade adjustment layer to -0.350 for example.
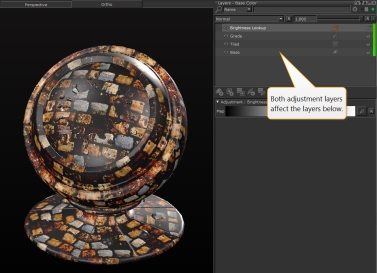
This is how your scene might look now.
| 3. | Select both adjustment layers, then click the Group Layers |
Tip: If you want to add an empty group, make sure that you haven't selected any layers in the layerstack, otherwise it creates a group with the selected layer(s) in it.
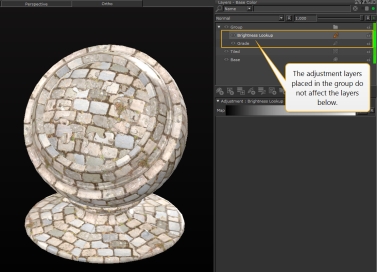
This adds a group, which contains both of your adjustment layers.
Since both of your adjustment layers are in a group, they are not applied to the layers below, the Tiled layer in this example, as they are applied to the bottom of the stack within the group, which is transparent.
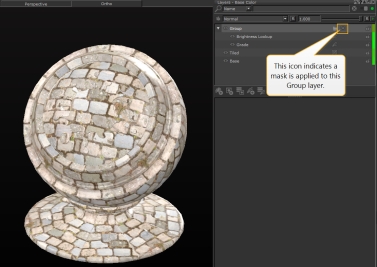
| 4. | To have more control on what the group influences, you can add a mask to your group. On the canvas, select a part of your object, in the Layers palette, right-click on the group layer and navigate to Layer Mask > Add Mask > From Selection. |
This adds a mask to your group.
To pass through the effects of the adjustment layers to the layers below:
| 5. | In the Layers palette, select the group. |
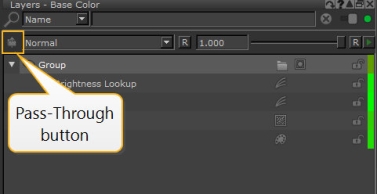
The Pass-Through ![]() button appears at the top of the Layers palette.
button appears at the top of the Layers palette.
| 6. | Click the Pass-Through |
The adjustment layers' effects are passed through the layers below on the part where the mask is applied.
Flattening Groups
Either for organizational or performance reasons, you may decide you want to flatten a group into a single layer. Layers that were part of a group appear as if they are a single layer once flattened. Once a group has been flattened, it can be added to other groups or used to create a new group as with any other layer.
To flatten a layer group into a single layer:
• with the group selected, from the Layers menu, select Flatten Layer Group, or
• right-click on the group and select Flatten Layer Group from the dropdown menu.
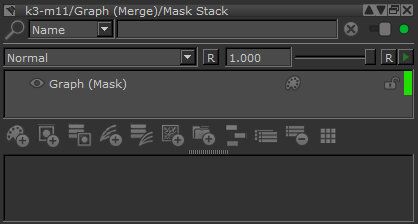
You can also create mask stacks by turning an existing mask into a mask stack. You must already have a mask attached to a layer to create a mask stack, but once you do, you can open a separate Mask Stack palette to see all the mask layers in the group.
Adding and Removing Mask Stacks
To add a mask stack to a layer, in the Layers palette, click ![]() . To create a mask stack from an existing mask on a layer:
. To create a mask stack from an existing mask on a layer:
• with the layer selected, from the Layers menu, select Layer Mask > Make Mask Stack, or
• right-click on the layer, and select Layer Mask > Make Mask Stack from the dropdown menu.
The mask stack ![]() icon takes the place of the mask icon in the layer list. Click on the icon to open the mask stack palette.
icon takes the place of the mask icon in the layer list. Click on the icon to open the mask stack palette.
To remove a mask stack:
• From the Layers palette, right-click on a mask stack ![]() and select Layer Mask >
and select Layer Mask > ![]() Remove Mask.
Remove Mask.
• From the Layers menu, select Layer Mask > ![]() Remove Mask.
Remove Mask.
Flattening Mask Stacks
Mask Stacks can also be flattened. The only difference between flattening a layer group and flattening a mask stack is when a mask stack has been flattened, the group icon disappears from the layer and is replaced with the mask icon again. All the mask layers that were part of the mask stack now exist in one single mask.
To flatten a mask stack into a single mask:
• with the layer selected, from the Layers menu, select Layer Mask > Flattened Mask Stack, or
• right-click on the layer with the mask stack and select Layer Mask > Flatten Mask Stack from the dropdown menu.
The mask stack icon reverts back to the normal mask icon and the mask stack is now only a single mask.
Merging Layers
Merging layers is similar to flattening layers, but can be done with any type of layer. Instead of flattening a group of layers into a single layer, merging allows you to combine the textures from two or more layers into a single layer, including any masks or adjustments that might have been applied to them. However, be aware that this is a destructive process, and the results may not be the same as anticipated in the layer stack.
Note: You cannot merge a layer with a layer group that has not been flattened. If you want to merge a group with another layer or layers, you need to first flatten the group.
| 1. | To duplicate layers, in the Layers palette, click |
The layer is duplicated as a copy.
| 2. | To merge layers, right-click on the selected layers, and select Merge Layers. |
The selected layers are merged into a new layer.
