Hiding and Locking
You can show or hide objects, patches, and faces based on whether they are selected, and you can also invert the visibility of objects, patches, and faces. For example, you can select a patch or area on an item, and then hide everything not selected. Similarly, you can lock objects and areas based on whether they are selected or not.
Hiding Objects, Patches, and Faces
| 1. | In the Object |
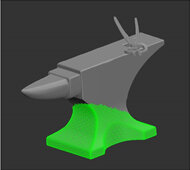
| 2. | From the Selection menu, select Hide Unselected. |
Mari hides everything except your selection.
You can clear the selection, and the other areas or objects remain hidden.
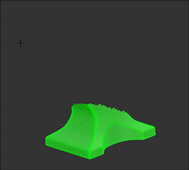
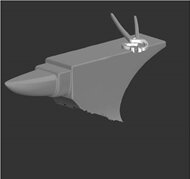
| 3. | Conversely, from the Selection menu, select Hide Selected. |
Mari hides only the selected areas or objects.
| 4. | To show the hidden objects, patches, or faces again, from the Selection menu, select Show Selected, Show All, or Show Entire Object, to restore visibility of objects, patches, or faces. |
| 5. | You can invert the visibility on all of the objects in the scene based on the current selection mode. From the Selection menu, select Invert Visibility. |
|
Selection Mode |
Invert Visibility Option |
|
Object |
Any objects currently visible are hidden. Any hidden objects are made visible. |
|
Patch |
For each object in your scene, any patches currently visible are hidden. Any hidden patches are made visible. |
|
Face |
For each object in your scene, any faces currently visible are hidden. Any hidden faces are made visible. |
Note: The Invert Visibility option works per selection mode.
For instance, if you have hidden some, or all the faces or patches in an object, then using the Invert Visibility option in a different selection mode on the object, has no effect on the hidden areas of the object. The invisible patches, faces, or objects remain hidden until you make them visible in the mode they were hidden.
Locking Objects, Patches, and Faces
| 1. | In the Object |
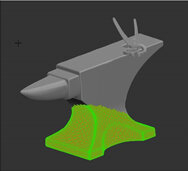
| 2. | To lock the selection so that you can't paint on the locked areas, from the Selection menu, select Lock Selected. |
Mari locks the selection. Try painting a few strokes over the model, the paint does not “stick” to the locked areas.
| 3. | As with hiding, you can also lock the inverse of your selection by selecting Lock Unselected from the Selection menu, or if you want to lock the whole model in order to work on something else, you can Lock All. |
| 4. | To unlock the selection, from the Selection menu, select Unlock Selected, or unlock the whole geometry by selecting Unlock All. |
| 5. | If you’ve locked multiple patches, faces, and even objects and want to quickly unlock everything in your project, select Unlock Entire Object from the Selection menu. |
Tip: You can also show/hide and lock selections from the right-click menu on the canvas.