Perlin Node
Access: Nodes > Procedural > Noise > Perlin
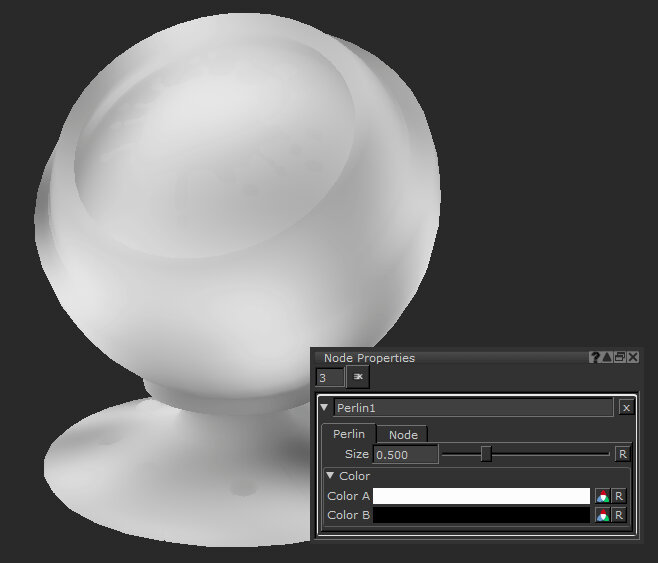
The Perlin node is a procedural noise node that creates a basic two color soft and random texture. The Perlin node is great for masking or adding variety when paired with a Merge node.
|
Perlin node with its Size being changed. |

The Perlin node generates noise in 3D space, but you can manipulate this by entering an input into its Position input.
Perlin Node Inputs
Position - The node works in the 3D space, but by adding a node to the Position input you can manipulate how the Perlin noise is applied. Some nodes can be used to manipulate the Perlin noise. For example, the UV node allows you to use an object's UV space rather than 3D space. You could also use the Position node.
Perlin Node Properties
|
Size
Default: 0.500 |
Changes the pattern frequency of the noise.
Size at 0.500.
|


Color
|
Color A
|
Changes the first color.
|
||||
|
Color B
|
Changes the first color.
|


Perlin: Node Graph Workflow Example
Perlin Noise Mask Breakup
This example uses a Perlin node with an existing mask to add a dirt effect. The Mari noise nodes are great ways to create quick masks, or add breakup to pre-existing masks.

This is the existing setup: some simple block colours shown through the flat Base Color and the Shaded view through a BRDF shader.
Adding Dirt to the Asset
| 1. | Add a Merge node with default settings. |
| 2. | Add another texture, which in this example is a Tiled node with a sandy texture plugged into the Over input |
| 3. | Add a mask to define where the dirt will go. |
| 4. | Feed the Merge node into the Base Color input. |
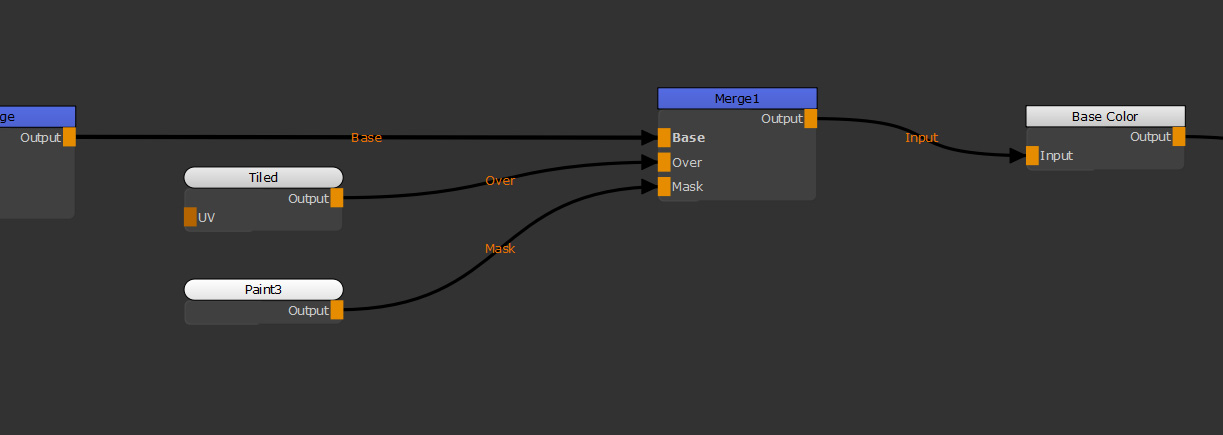
Our initial Node Graph setup for merging in a dirt texture.

The result of feeding the Merge node into the Base Color.
Adding Color Breakup Without Hand Painting
You can multiply a noise node into the node tree of your mask to add some dirt to your asset without hand painting. By using a Merge node you can add extra detail to your textures by using a mask input.
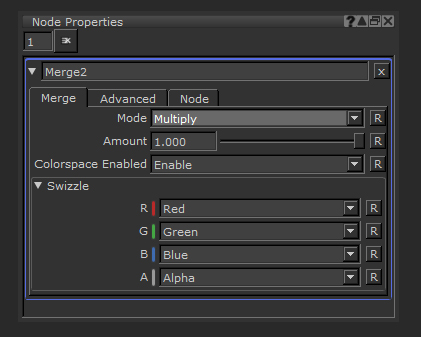
The Merge node properties.
Using the Multiply mode takes the dark values of the Perlin node and blends those values into your dirt mask. You can adjust the blend Amount property to change how much the blend is multiplied by.
The multiplication erodes the node that is added to the base input to break it up and make it look dirtier.
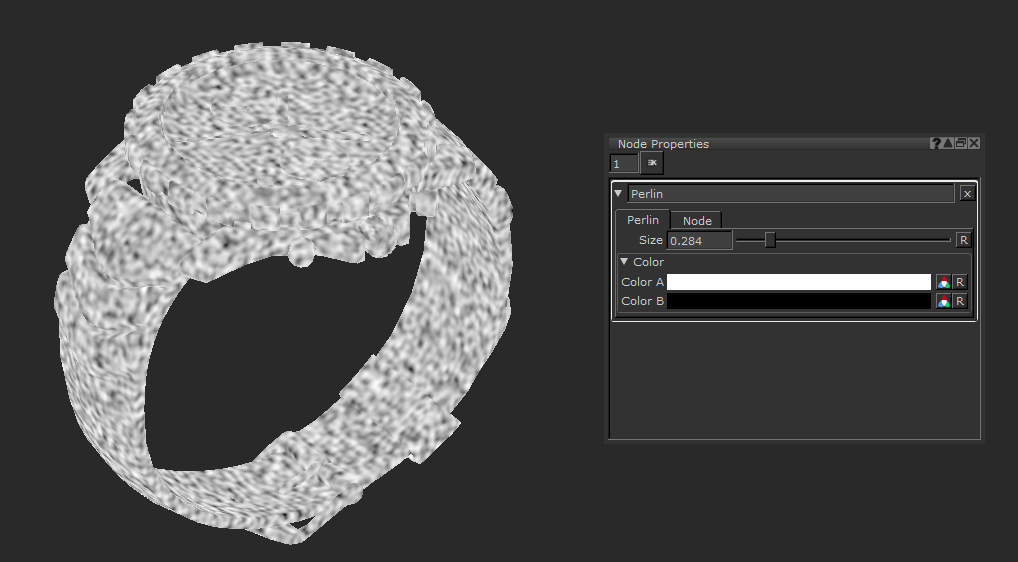
Viewing the Perlin node on the model.

Using a second Merge node on the mask to add Perlin breakup.
Tip: You can also experiment with the other blend modes, like Overlay or Add to get different effects for different situations.
The results of applying Perlin.
Perlin Noise Channel Breakup
Another good use of the Perlin node and other noise nodes is applying break up to different texture maps. If you have a very flat looking colored metal, or a bump map that needs a bit of undulation, using a Perlin noise overlay can add breakup in lots of different ways.
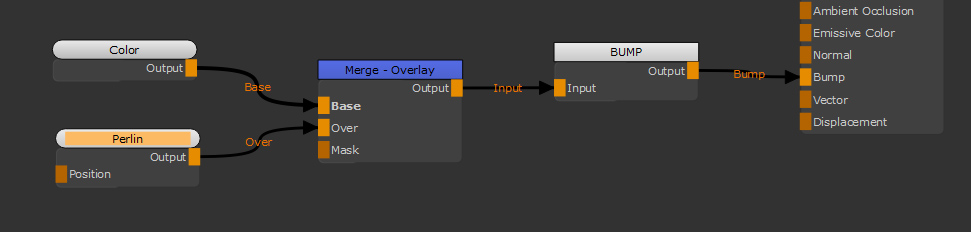
Here we have a flat color with a Perlin node being merged on top with the Overlay mode. This feeds into the Bump Channel node which leads into a Principled BRDF Shader.
You can plug a Perlin node into the Over input on the Merge node, which allows the overlay's dark and light values to show through on what you already have. This allows you to add some variety in the bump of the shader.
This demonstrates how this is used to add some variety to the bump of this shader.
Making sure the Size is relative to the object is important to sell the scale. Perlin and other noise can be used to quickly build up a procedural node tree inside Mari without having to import images to use or hand paint.