Two Point Gradient Node
Access: Nodes > Projection > Two Point Gradient
The Two Point Gradient node creates a gradient based on two locator positions relative to geometry. You can control the gradient between the start and end colors using the Mode controls and assign multiple projectors/locators to the node to create as many gradients as you require from any angle.
|
|
|
|
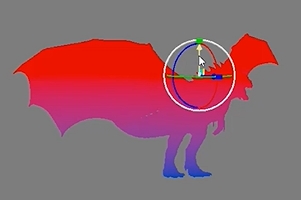
Locator A with a red Color A. |
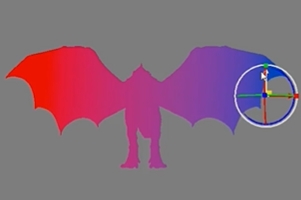
Locator B with a blue Color B. |
|
|
|
|
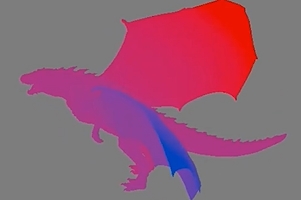
The gradient color changes dependent on distance between locator A and locator B. |
|
Two Point Gradient Node Inputs
| Color A |
Sets the start color of the gradient, which is applied to geometry closest to locator A. |
| Color B |
Sets the start color of the gradient, which is applied to geometry closest to locator B. |
|
Position |
An optional input to set the start coordinates of the gradient. |
Two Point Gradient Node Outputs
|
Output |
A two point gradient calculated from two locator positions relative to geometry. |
Two Point Gradient Node Properties
|
Mode dropdown |
Sets how the gradient between the two locators/projectors is calculated, either Linear or Radial. |
| Color A
swatch |
Sets the default start color of the gradient if nothing is connected to the Color A input. |
| Color B
swatch |
Sets the default end color of the gradient if nothing is connected to the Color B input. |
| Locator A
dropdown |
Selects the object to use as locator A. You can use one of the standard options, objects, cameras, and lights, or create a custom locator by pressing the + button. |
|
|
Click to add a locator to the scene to control the gradient applied to your geometry. |
|
|
Click to switch to the Transform Selected Objects tool so you can move the selected object around the scene. |
|
|
Click to show and hide the Locator A transform controls. |
| Locator B
dropdown |
Selects the object to use as locator B. You can use one of the standard options, objects, cameras, and lights, or create a custom locator by pressing the + button. |
|
|
Click to add a locator to the scene to control the gradient applied to your geometry. |
|
|
Click to switch to the Transform Selected Objects tool so you can move the selected object around the scene. |
|
|
Click to show and hide the Locator B transform controls. |
Related Nodes
• Camera Distance Gradient Node