Configuring Your Workspace
The Mari workspace is completely configurable. You can customize how palettes display, your own personalized sets of brushes and colors, and shortcut keys.
Palettes
Mari uses a number of palettes - windows that you can move around your workspace, with specific information and tools for working on your project. For example, the Channels palette shows all the channels in the project, and has controls for editing the channels.
To open palettes:
|
From the Palettes toolbar, select |
or Select from menubar |
or right-click on the menubar or toolbar and select |
|---|---|---|
|
<palette name> |
View > Palettes > <palette name> |
<palette name> |
To move, resize, and arrange palettes:
|
To... |
Do this... |
|
Undock and move a palette |
Grab and drag it by its title bar to anywhere on your screen. (Or click |
|
Dock a palette to the window |
Move it to one of the edges of the Mari window. A dotted line displays along the edge where it can dock. |
|
Dock a palette to another palette |
Move it over another undocked palette. A dotted line displays where it can dock. |
|
Resize a docked palette |
Grab and drag the dotted bar along the bottom or side. |
|
Resize a floating palette |
Drag an edge or corner. |
|
Stack palettes |
Drag and drop them directly on top of one another. |
|
Hide/show and expand |
Press the Space bar while hovering over the canvas to toggle between showing and hiding the currently open palettes. You can also press the Space bar while hovering over a palette to expand it. Note: You can't expand a palette if you selected an item in it. |
Palettes Toolbar
The Palettes toolbar allows quick access to your Mari palettes. The description of the Palettes toolbar and its controls can be found below.
Displaying the Palettes Toolbar
By default, the Palettes toolbar displays on the right of the application, but you can also place the Palettes toolbar on the left, or at the top or bottom like any other Mari toolbar. You can choose to display the Palettes toolbar with its icons only (see image above on the left) or the extended Palettes toolbar with its icons and palette names (see image above on the far left) by toggling the Show/Hide 
 buttons. You can display the extended Palettes toolbar only on the left-and right-hand side of the application.
Opening/Maximizing Palettes
Palettes open in one of two modes from the Palettes toolbar; Pinned or Floating. The palettes have three open states; docked, floating, and temporarily floating states. From the Palettes toolbar, choose in which mode to open palettes and then click on them:
• Use the Pin Palette  mode to open palettes in a docked and/or floating state so that they remain visible while you work on your project. To find out how to dock or make your palettes float, see Choosing and Organizing Palettes.
The palettes open where they were last closed in docked or floating state.
Note: In Pin Palette mode, palettes do not display the Pin/Unpin Palette button as switching currently-opened, docked palettes to temporarily floating state is impossible.
• Use the Float Palette  mode to open palettes in a temporarily floating state for you to edit some options before resuming painting. Your palette opens when you click on its icon or name and disappears when you move your cursor away from the palette.
If a palette is already docked in the application, it maximizes or minimizes it. If a palette is stacked under another palette, it displays it on top of the stack.
While in Float Palette mode, you can open a palette in a temporarily floating state and then decide to pin the palette using the Pin/Unpin Palette button.
Note: Switching between Pin Palette and Float Palette modes doesn't affect the palettes that are already open.
When a palette is closed, its background in the Palettes toolbar is dark gray, and when it is open it is darker gray.
Closing/Minimizing Palettes
The behavior for closing palettes varies depending on the palette opening modes and palette open states:
• Pin Palette mode - clicking the palettes' icon or name closes floating palettes. Clicking the palettes' icon or name minimizes the docked palettes.
• Float Palette mode - clicking the palettes' icon or name closes floating and temporarily floating palettes. Clicking the palettes' icon or name minimizes the docked palettes.
Note: To know more about organizing your palettes, see Choosing and Organizing Palettes.
Shelves
The Shelf palette lets you store customized “shelves” of brushes, colors, and images. You can also share them with others.
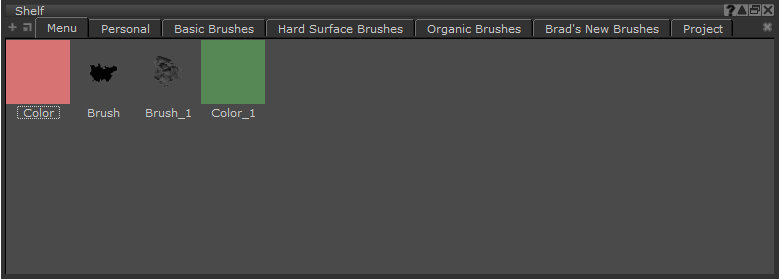
Mari has the following kinds of shelves:
• The Menu shelf stores seven items available from the F9 on-screen menu. These items must be numbered from 1-7 to appear.
• The Personal shelf stores items you select and configure for all projects.
• The Basic Brushes shelf stores a set of predefined basic brushes.
• The Hard Surface Brushes shelf stores a set of predefined hard surface brushes.
• The Organic Brushes shelf stores a set of predefined organic brushes.
• Customized shelves you create store items you select and configure for all projects.
Video: To display the Shelf menu when painting, press and hold K. Watch the demo.
This video shows the workflow using Mari 3. Even though the Mari 4 workspace is different, the workflow remains the same. To have a look at the main UI differences, see Mari 3.3 vs 4.0.
Customizing Shelves
To add an item (brush, color, or image) to a shelf, drag it onto the shelf.