Paint Buffer Symmetry
You can mirror paint strokes in the paint buffer. On the Project Controls toolbar, you can access the Mirror Painting modes. They control whether you want your paint strokes to be mirrored on the paint buffer axis and, if so, how the paint strokes should be mirrored. If you can't see the Project Controls toolbar, right-click on the toolbar area and choose Project Controls from the dropdown menu.
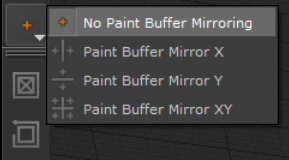
The four Mirror Painting modes are included below, with example paint strokes illustrating the symmetry for each option:
|
Symmetry Option |
Description |
Example |
|
|
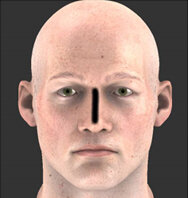
Mari’s default paint buffer setting is to have paint buffer symmetry disabled. |
|
|
|
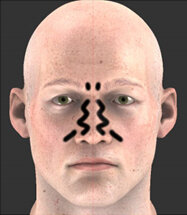
Mirroring left and right divides the paint buffer vertically. Paint strokes created on either side of the buffer mirror the same strokes on the other side. |
|
|
|
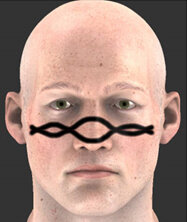
Mirroring top and bottom divides the paint buffer horizontally. Paint strokes created on either side of the buffer mirror the same strokes on the other side. |
|
|
|
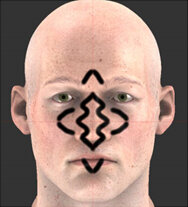
Mirroring four ways divides the paint buffer into quadrants. Paint strokes created in any of the four quadrants mirror in the other three. |
|
Painting in the paint buffer with symmetry enabled only applies to the actual paint strokes. If mirroring is used while in Paint Through mode or while using the Clone Stamp tool, only the paint strokes are mirrored; not the texture being painted through or cloned.
Paint buffer symmetry also mirrors only the paint buffer; it does not project paint onto the opposite side of the geometry.
Video: Have a quick look at the Painting and Symmetry in Mari video.
This video shows the workflow using Mari 3. Even though the Mari 4 workspace is different, the workflow remains the same. To have a look at the main UI differences, see Mari 3.3 vs 4.0.