Image Groups
Image Groups are a way to organize images within the Image Manager, so you can easily navigate and find your textures. Image Groups only exist within projects, so you can create specific groups dependent on what you need for your project.
Image Groups can be useful for organizing your images ready for Multi-Paint.
Creating an Image Group
To create an Image Group from images already in your Image Manager:
| 1. | Select the images you want to include in the group. |
| 2. | Right-click and in the context menu select Create Group. |
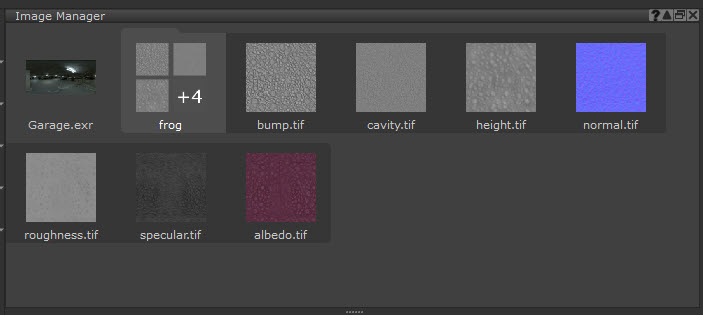
The images will now appear in the image manager as a Group, with preview thumbnails.
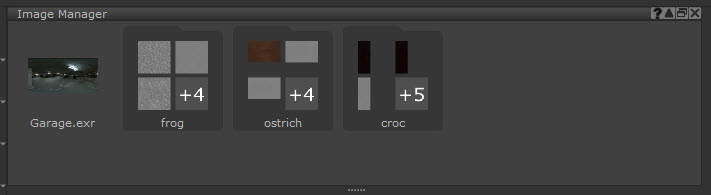
Image group opened up in Image Manager:
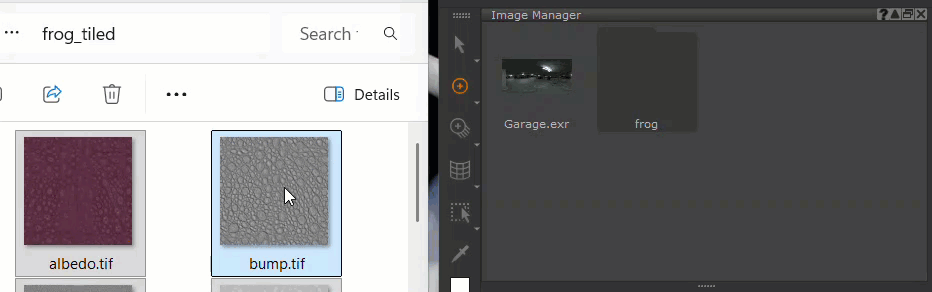
You can also add external images by dragging and dropping a folder from your file browser directly into the Image Manager. This will automatically create a folder with the images.
Managing Image Groups
• You can Add to Group and Remove from Group in the right-click context menu to add or remove images from group. You can also rearrange images within the Group for organization.
• You can drag and drop images that are in the Image Manager in or out of groups.
• You can rename your Image group by right-clicking the image group and selecting Rename Item.
Using Image Groups with Multi-Paint
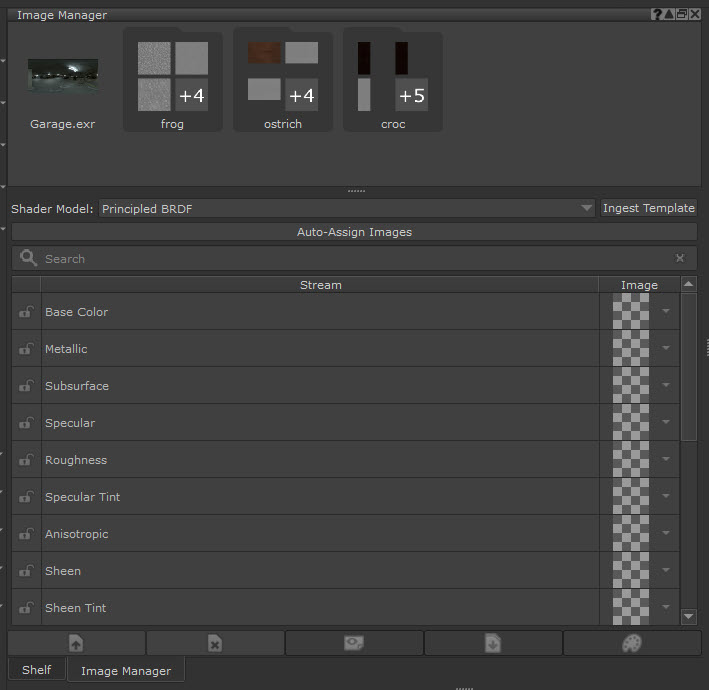
If you have an Image Group you want to use with Multi-Paint, there are different methods to assign your images to specific shader streams. When you click on an Image Group, a properties panel will appear. You can use this panel to pre-assign Image Group streams ahead of inputting them into the Multi-Paint palette. Alternatively, you can let Mari automatically assign the streams based on naming conventions.
Image Manager with Image Groups properties panel:
Automatically Assigning Channels in Multi-Channel Paint Node
Once you have an Image Group that you want to use for Multi-Channel painting, drag and drop the Image Group into the Multi-Channel Paint node’s Multi-Paint palette. Mari will assign the images to the Multi-Paint streams based on the naming conventions of the images.
Assigning Image Groups to Shader Channels
You can assign a shader model to the group and manually specify images that correspond to the appropriate stream. Once you’ve assigned the images, drag and drop the Image Group into the Multi-Paint palette, and the images will be projected in the appropriate streams at once.
Note: Ensure that your Image Group and Multi-Channel Paint node are using the same Shader Model for accurate assignment.
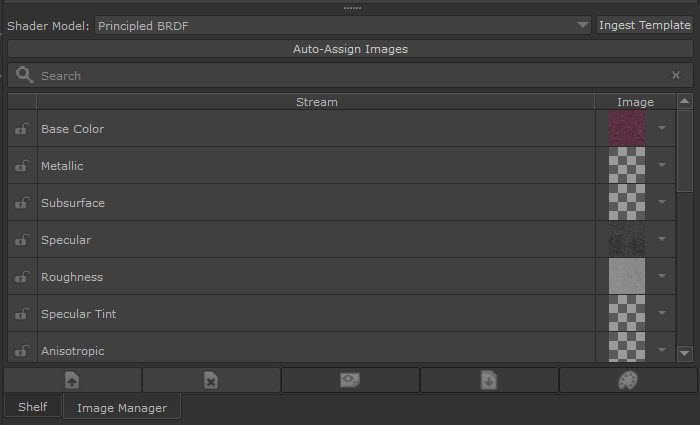
To assign a Shader Model to an Image Group:
| 1. | Click on an Image Group. The Image Group properties panel will appear in the Image Manager. |
| 2. | Define the Shader model you want to use. |
| 3. | There are two methods to assigning images to streams: |
• Auto-Assign Images - Click the Auto-Assign Images button and Mari will automatically assign the images to the most appropriate stream based on the image’s naming conventions.
• Manually assign images - You can use the search bar to easily locate a specific stream. Click the arrow icon in the Image column to choose the image you want to assign to the stream.

| 4. | Once you have set your images to your desired streams, drag and drop the image group into the Multi-Paint palette. You can now start painting. |

Ingest Template Dropdown List
If your textures are coming from a specific vendor, you can choose the desired preset from the Ingest Template dropdown list. Mari will assign the appropriate images to each stream according to their naming conventions.
When you click the Ingest Template button, a sub-menu opens with the following options:
• Apply to Current Shader Model - matches images to streams based on file names in the selected preset. This will only apply for the Shader model selected in the dropdown.
• Apply to All Shader Models -matches images to streams based on file names in the selected preset. This will be applied across all shader models.
Locking Streams
You can lock specific streams of an Image Group mapping by clicking the padlock icon to the left of the stream row ( ). Once locked, you can use the Auto-Assign tool and the locked stream will not be altered. You can still manually change the stream by using the image dropdown and picking a new image.