Channel Node
Access: Nodes > Misc > Channel
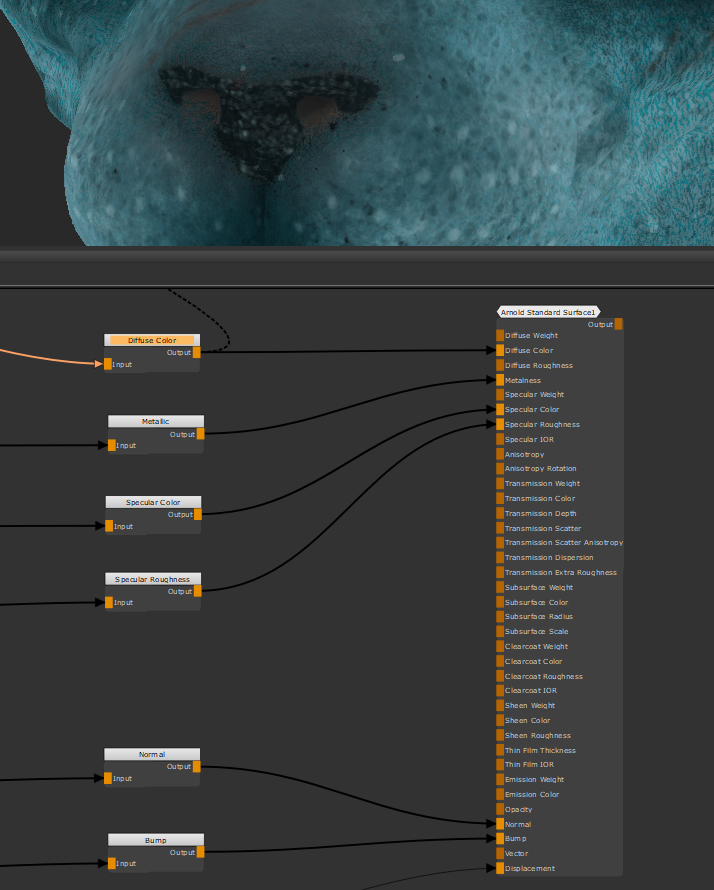
Multiple Channel nodes being used with an Arnold Shader node.
The Channel node is an important node for Mari because it's essential for getting textures out of the software and into the renderer you need to use. The Channel node usually comes at the end of your node tree, where your textures are going to be exported from. It defines the size, bit depth and view transform of your texture maps.
Channel Node Inputs
Input - Defines the textures and values that are be read and ultimately exported as texture channels from your Mari project.
Channel Node Properties
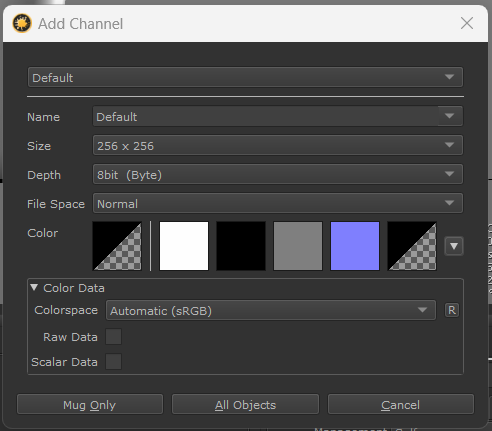
The Add Channel dialog.
|
Size dropdown list |
Chooses the resolution of the images when exported. |
|
Depth dropdown list |
Chooses the bit depth of the images that are exported. |
| File Space
dropdown list |
This defines how values are exported. The default of Normal changes nothing. For Vector, the data will be treated as vector data and remapped. Vector_Y_Flip does the same but inverts the Y component. Normal_Y_Flip changes nothing but inverts the Y component. |
| Color | You can select the leftmost Color square to spawn color picker, or use any of the preset colors (white, black, mid grey, normal, transparent alpha). Any saved Preset Colors can also be accessed here via the |
Color Data
|
Colorspace dropdown list |
If the |
|
Tip: You can limit the number of colorspaces available to artists using the Python API registerConfigUiAllowlist() function or the MARI_COLORSPACE_OCIO_UI_ALLOWLIST environment variable. See Help > SDK > Python > Documentation from Mari's UI menus or Environment Variables That Mari Recognizes for more details. |
|
|
Raw Data checkbox |
A toggle to define if the data is raw or in a different color space. Disabling this allows you to change the color space dropdown, potentially resulting in a conversion when displayed and exported. |
|
Scalar Data checkbox |
Defines if values going through the channel are color or Scalar Data. If you enable this the view transform will be changed to None. |
Channel Node Workflow Example
Setting up Channels for Export and Lookdev
In Mari, it's important to set up channels for every texture map you wish to export, and have them connected so that they are always displayed with the correct view transform. A benefit of having them as Channel nodes is that from there we can hook them up to a shader to show all our material channels at once.
Tip: For a deeper look at material workflows checkout the Material Node documentation.

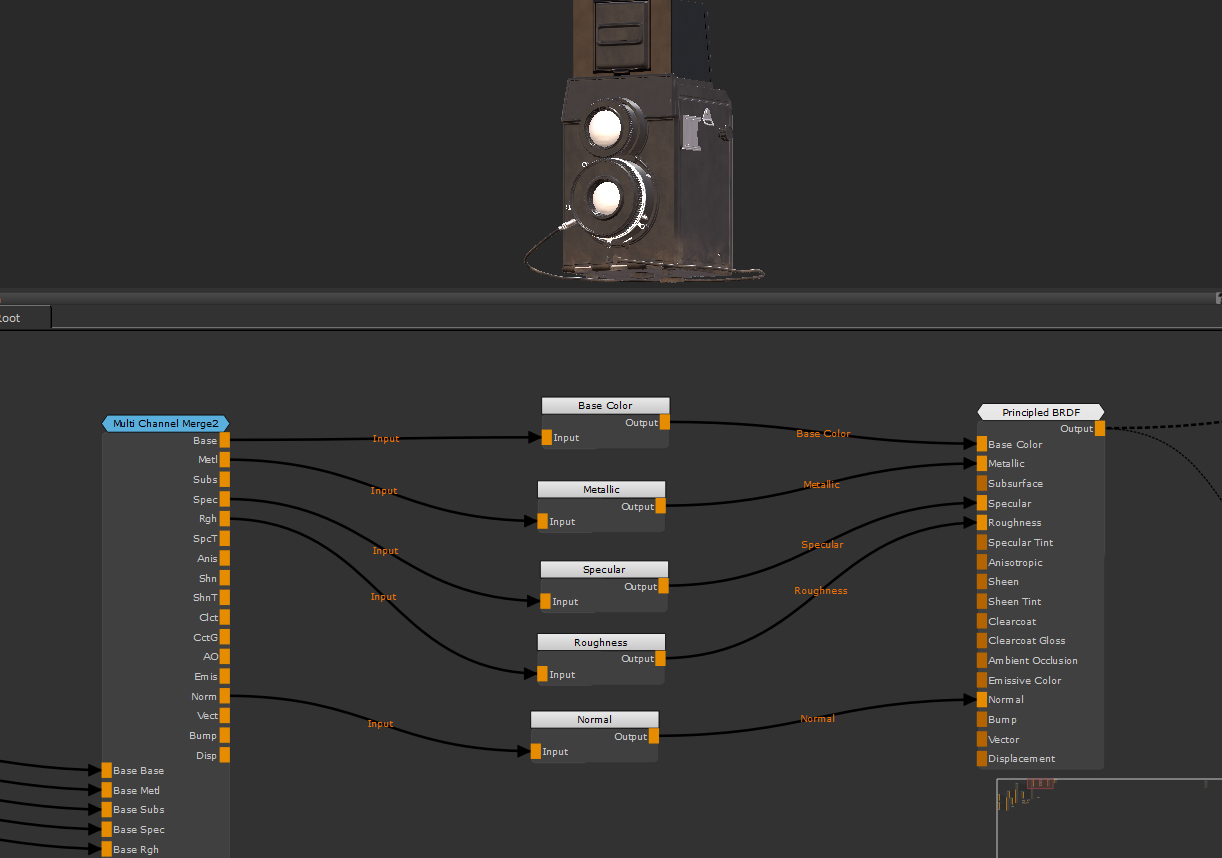
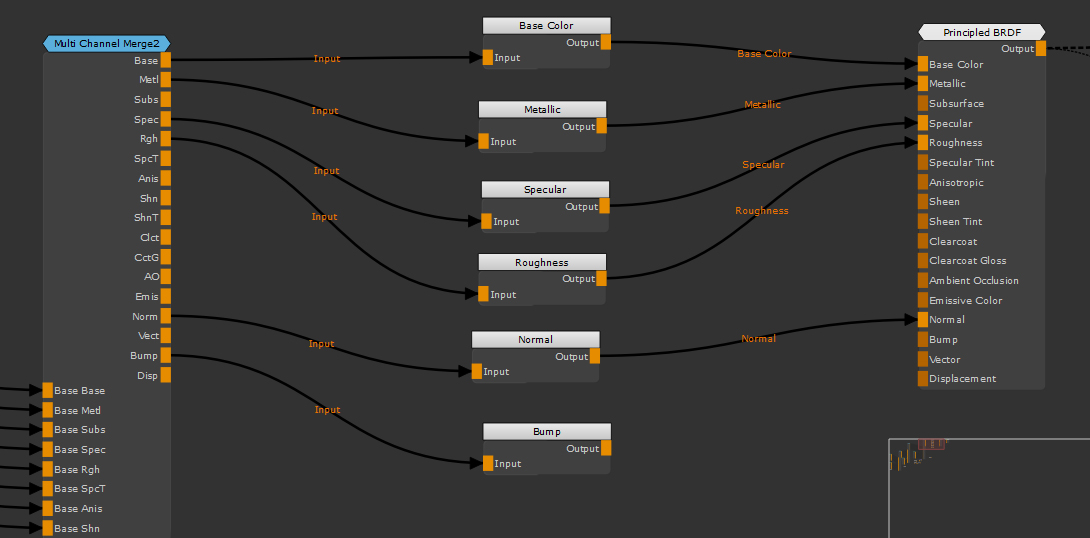
The Node Graph of this textured asset using a material based workflow.
In the example we have our final Multi-Channel Merge node which is outputting multiple ready for export texture channels, however our renderer will not need all of them. We already have most of them connected toChannel nodes, but have yet to set up a channel for our Bump Map. In the viewport, the shader we are viewing is looking quite flat too, so it will be great to get the bump hooked up.
Note: It’s important to hook up your Channel nodes before adding them to the Shader so the view transform is correct.
First a Channel node needs to be added. When this is done a dialog pops up requesting the properties of the new channel. You need to make sure when selecting a channel that the settings are correct to your project. Since this is going to a bump channel, the Depth has been changed to 16-bit.
Tip: Mari exports the Size you set here by default, so make sure that is set up correctly to whatever size texture you are inputting.
The Channel node creation UI dialog.
Since a Bump map’s information is pure data, we don't want it to be affected by the view transform inside of Mari. Clicking the Scalar Data checkbox under color data will correctly display the Bump map. Being aware of this is important when creating new channels.
Connecting the Material node’s Bump output to the Bump Channel node.
Whatever is plugged into the input of the Bump Channel node will export as a bump map for us when we use the Export Manager. Hook up the Bump channel from the Multi Channel Merge node and then plug that into the shader afterwards.

Everything hooked up and working.
Now that’s all plugged in we can see the Bump when viewing our shader, which is looking more realistic. We can also export that properly now which is the main purpose for adding Channel nodes.