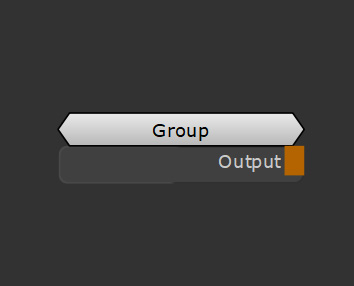
Group Node
Access: Nodes >
A gizmo created using a collection of nodes inside a Group node.
The Group node is a way to group multiple nodes together. This means you can organise your Node Graph, and also export groups of nodes as gizmos. Gizmos are a way to reuse functions you create in other Mari projects and share with other users.
Group nodes can have multiple inputs, and in Mari 4.5 you have the ability to have multiple outputs as well. Since you decide what goes inside of the Group node you can also have no inputs at all.
Tip: To jump inside of a Group node, press Ctrl+Enter or Ctrl+double click the node.
Tip: You can also create a group from a selection of nodes by right clicking and selecting Group, or pressing Ctrl+G.
Group Node Inputs
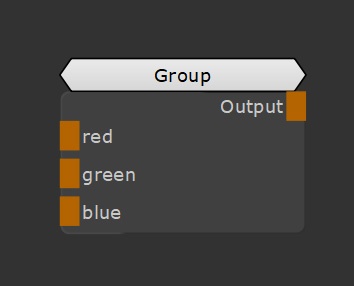
The Group node can have as few or as many inputs as you like. All you need to do is create an Input node (right click in the Node Graph and select Nodes > Misc > Input) inside of the group and a new input appears on the Group node. By renaming the node, you rename the input.
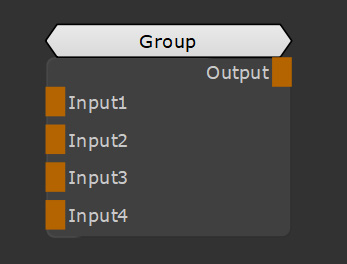
A Group node with four inputs added inside of it.
Group Node Properties
A Group node by default has no properties. However, you can promote properties from the nodes inside of the group to be able to access them from the Group node.
The spanner icon promotes the variable it is next to, to outside of the group.
By clicking the spanner icon on a property of a node inside the group, you promote it to outside. It then becomes a property for the Group node. This saves you or another user from jumping inside the group every time you want to change something.
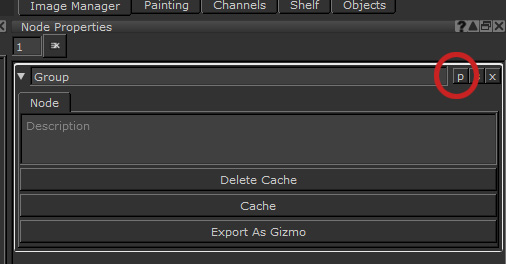
Tip: You can also choose what to promote from outside the group by clicking the p icon on the top right of the group Properties.
The p icon.
Group Node Workflow Example
Creating your own Gizmos with the Group Node
Groups of nodes can be saved out as Gizmos, files that can be saved to be reused by you or yourself in any Mari project.
We’re going to set up a set of nodes that pack multiplied masks together as a single channel packed color texture and then save that as a Gizmo. That way anytime we have to channel pack three masks together we can just use our group of nodes we save as a Gizmo rather than recreating it each time.
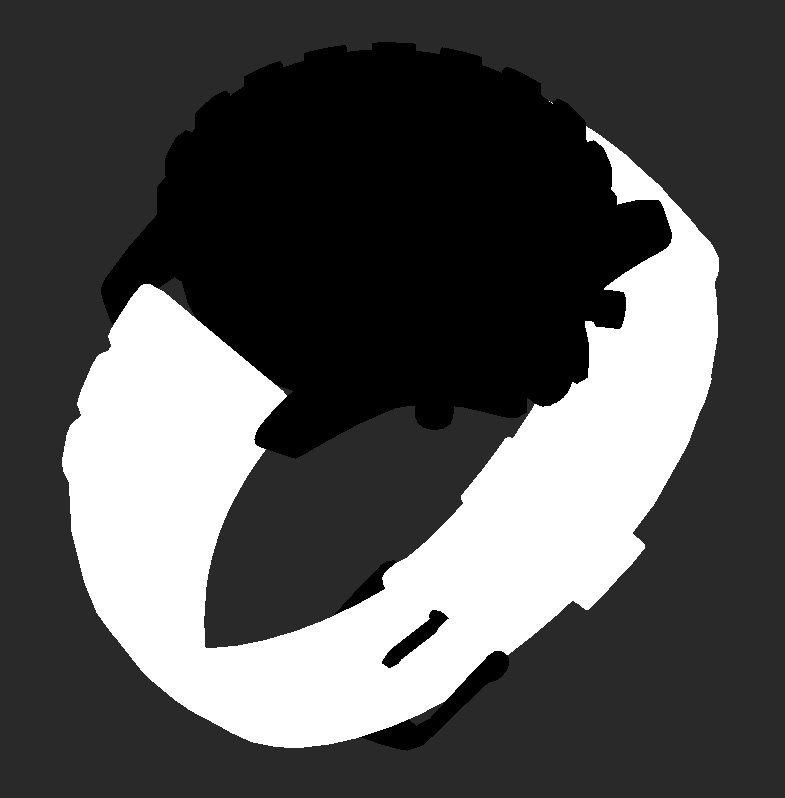
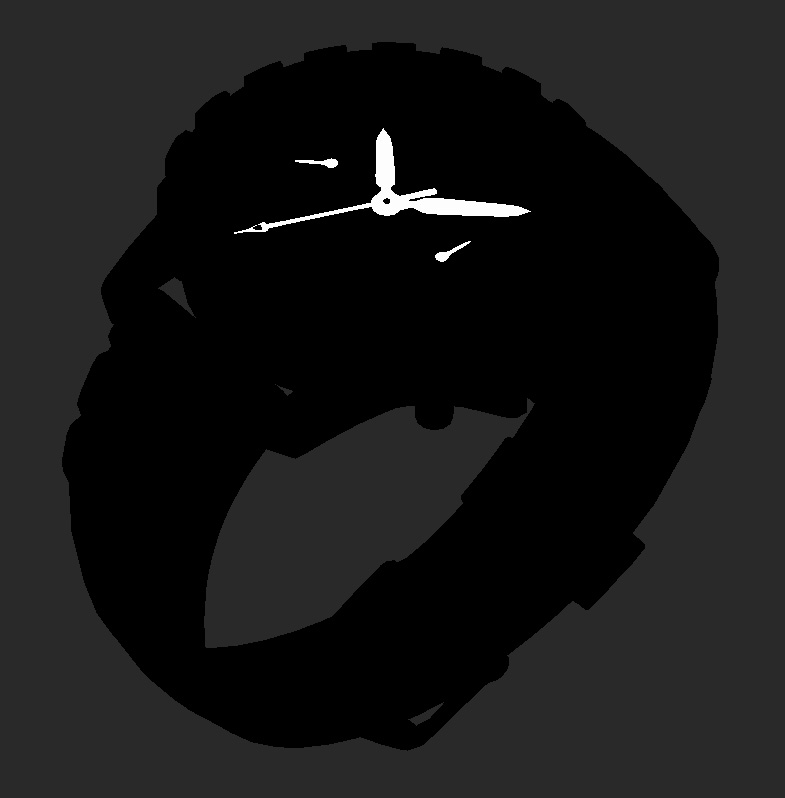
Below are three masks from a watch asset that need to be outputted for render IDs. We have one for the rubber strap, one for the metal of the watch, and the third is the watch hands. By having masks for different areas, lookdev artists can tweak different parts of an object or render.
|
|
|
|

First, we need to make a Group node.
Once that is created we need to create some inputs for our three masks to be plugged into the group.
Tip: To edit the Group node you need to Ctrl + double-click to jump inside.
In there we have just an Output node. We are going to create three Input nodes.

Adding three inputs inside the Group node.
It’s a good idea to rename them because when we jump back out of that Group node into the Node Graph, the name of those inputs appear.
Tip: Renaming your inputs makes it easier to identify which input does what outside of the Group node.
To get these masks packed into a single image we need to put these three gray-scale images into the R, G and B channels of an image. To do that you can use a Color Switch node.
The Color Switch node allows you to strip out the channels of an image you don’t need leaving you with a single colour that you can then blend together. See Color Switch node.
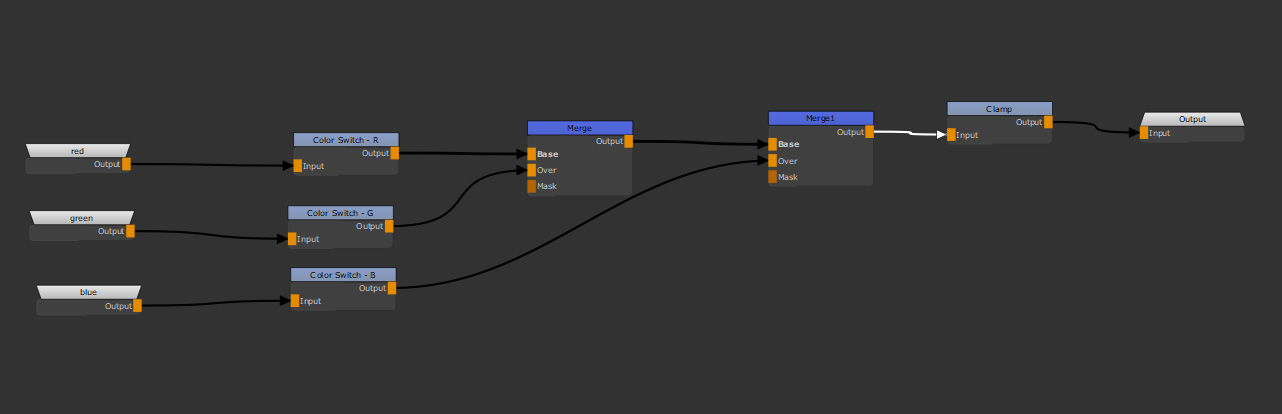
The nodes used to channel pack the input masks.
By using a Color Switch node you can turn each mask into pure red, green and blue. Then you need to merge them together.
To merge three masks together:
| 1. | Create two Merge nodes, both set to the blend mode Add. |
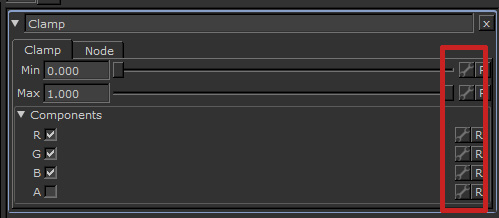
| 2. | Add a Clamp node to make sure no values go under 0, and none go over 1. |
This adds the values of the base and over inputs correctly and give the following result.
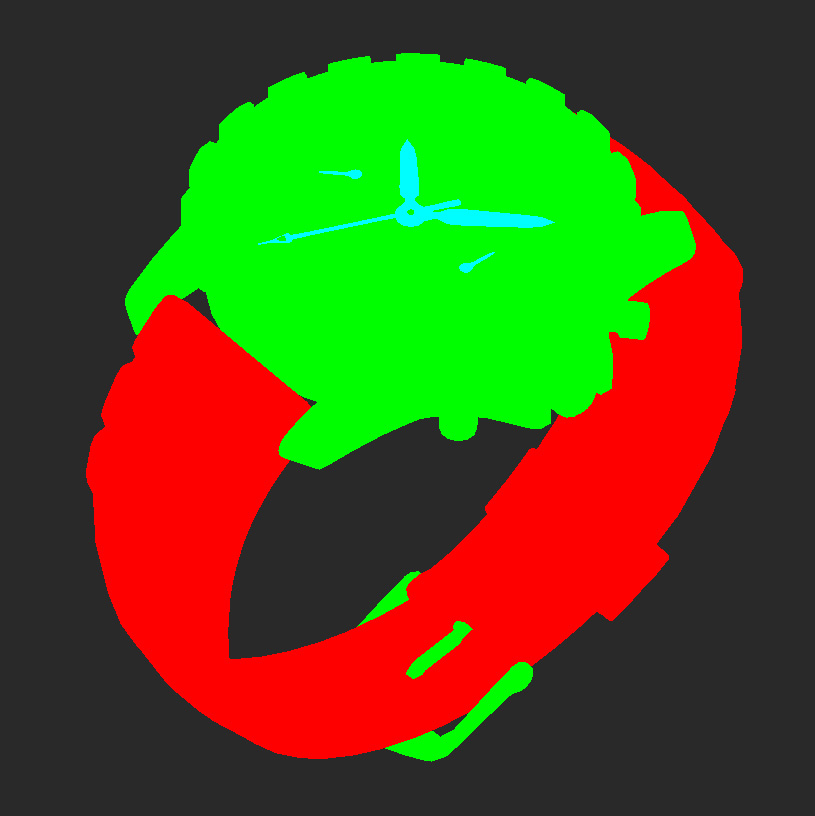
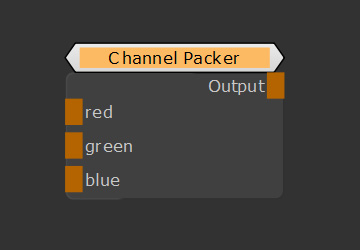
The finished channel packed masks output from the Group node.
Now we have a group that works, it’s time to export it as a Gizmo. First lets rename the Group node to describe what it does for easy reference in the future. Channel Packer sounds like a good name for this group of nodes.
After that, click on the Group node and look at the Node Properties palette.
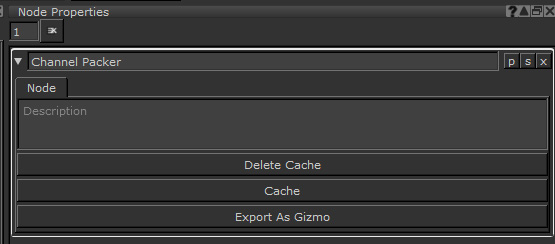
The Group node’s properties Export as Gizmo allows you to save the group to disk as a .mng file.
The Export as Gizmo option brings up a dialog that allows you to save the group as a .mng file. If you save this in your Mari documents file in a folder called Gizmos, then Mari automatically loads it next time you open the software. All you need to do then is press Tab on your keyboard and start typing in whatever you called your gizmo (Channel Packer in this case) and Mari allows you to drop it down into any project you are working with.
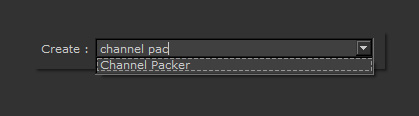
Mari loading the Gizmo automatically in the node Create menu.
This is really powerful as it not only saves you time if you want to use it again but you can also share the Gizmos with other users to load in their Mari projects.
To see how to deconstruct a channel packed texture see the Shuffle Node.