Working with Materials in the Layers Palette
Once you've created your materials or if you are using the default Mari materials stored in the Mari Materials tab of the Shelf palette, you can apply materials to your scene using the Layers palette.
Note: Mari Materials located in the Shelf palette only work with the Principled BRDF shader.
Note: To find out how to create material presets using the Material Ingest Tool, refer to Creating Materials with the Material Ingest Tool, or if you prefer to create your own manually using the Node Graph, refer to Working with Materials in the Node Graph.
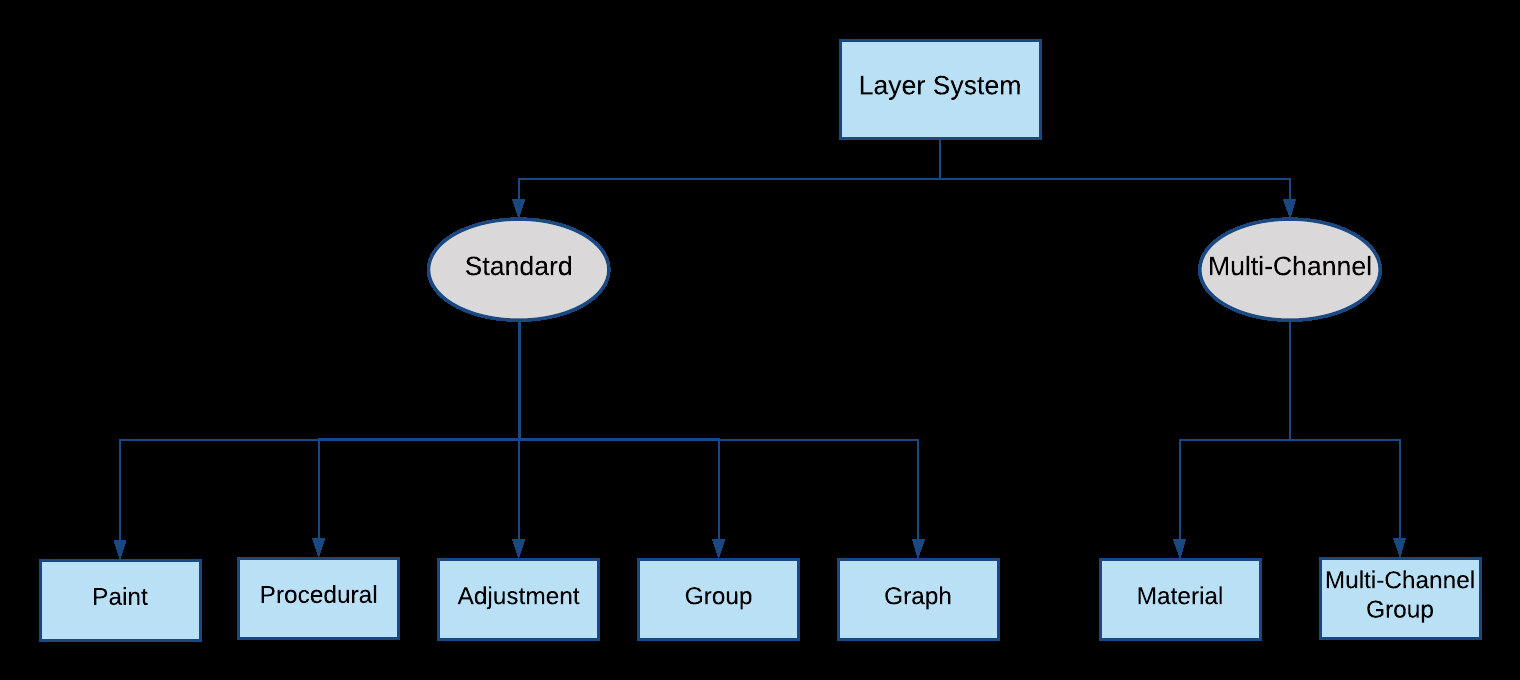
Layer System
Materials are shared across all channels and the way to add them to your projects is with multi-channel layers. Multi-channel layers are either a material or a multi-channel group. Here is a diagram showing you the layer system with standard and multi-channel layers using the Layers palette.
Adding Materials to Your Scene
You can add materials, which are a type of multi-channel layer, through the Layers palette or by dragging materials from the Shelf palette and dropping them on the asset directly.
Note: To properly apply materials to your scene, ensure that:
• You've selected the required user shader in the Shaders palette, for example, Principled BRDF.
• You have channels created and connected to the appropriate inputs of the shader that match the streams/material outputs of your materials. See Creating Multiple Channels from Presets for auto-creating and connecting channels. To check the streams/material outputs of your materials, in the Layers palette, click the Material ![]() icon of the material layer. This opens the material subgraph in the Node Graph palette.
icon of the material layer. This opens the material subgraph in the Node Graph palette.
Note: To get the best visual result, ensure you have an environment light. See Configuring the Lighting.
Adding Materials to Your Assets from the Shelf Palette
Dragging a material from the Shelf palette to the canvas applies it to the current object. Alternatively, you can use a selection tool to add the material with a mask of the selected region.
Note: Dragging a material from the Shelf palette to the layerstack applies it to the current object. This method does not allow you to add the material with a mask of the selected region.
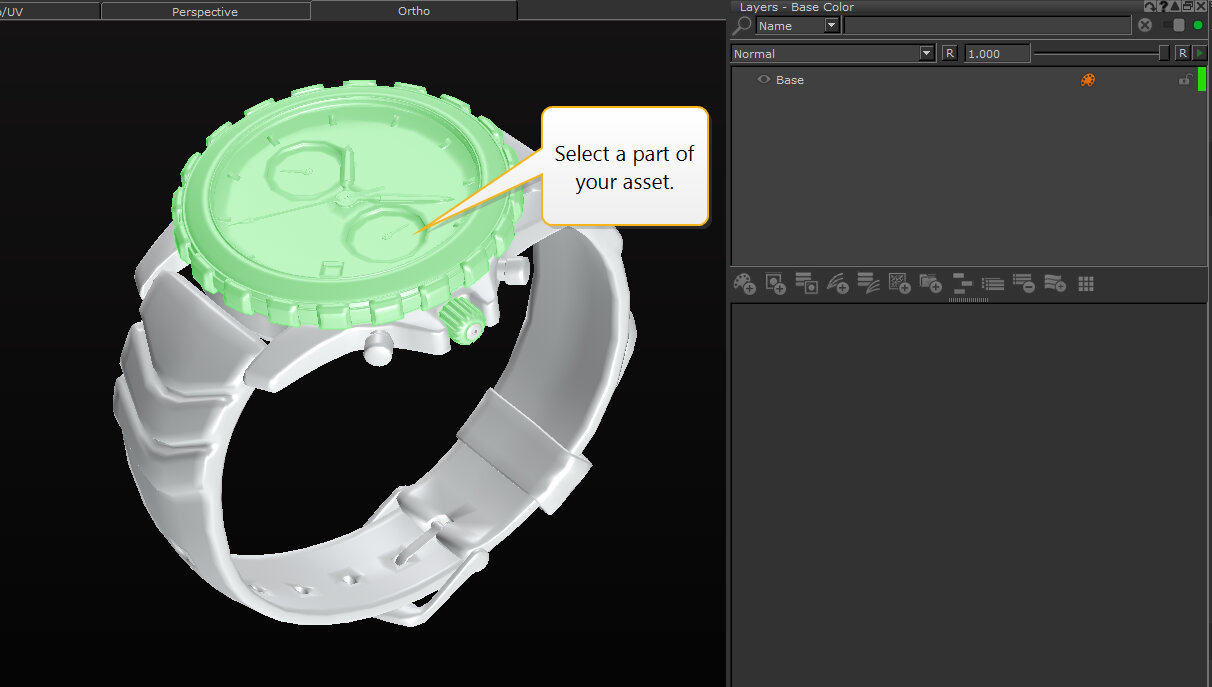
| 1. | In the Tools toolbar, select the |
This highlights the selected part in green.
| 2. |
|

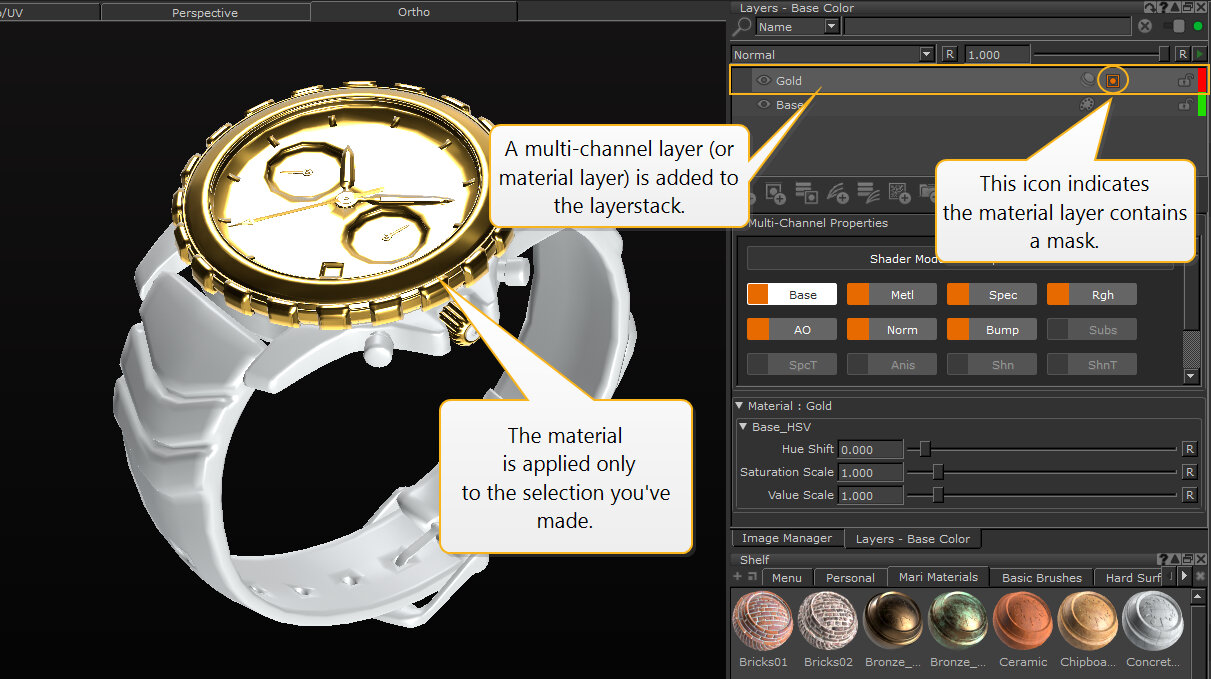
This adds the material with a mask to the selection only.
In the Layers palette, this adds a multi-channel layer with a mask applied on the selected part of your asset.
Adding Multi-Channel Layers through the Layers palette
You can add materials to your scene using multi-channel layers from the Layers palette:
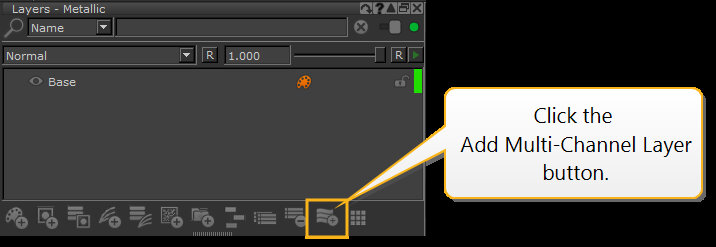
| 1. | In the Layers palette, click the Add Multi-Channel Layer |
| 2. | Navigate to Materials > Mari Materials, or any other shelves to which you added materials, then select a material. |
This applies the material to the entire asset (see canvas) and adds a multi-channel layer to your layerstack.
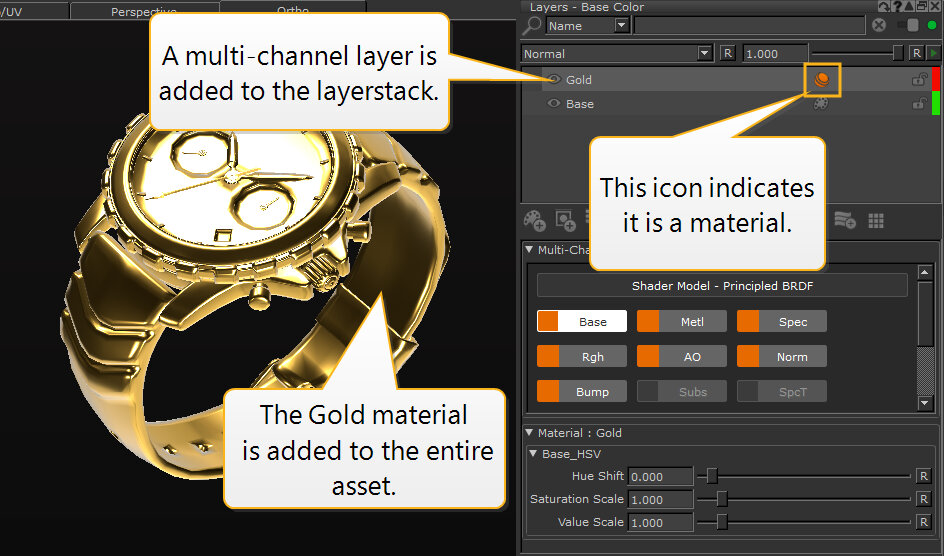
Note: A material layer is not a paintable layer but you can use masks to choose how to apply the material to your asset.
You can also convert a material layer to a paintable layer. In the Layers palette, right-click on the required layer and select Convert to Paintable.
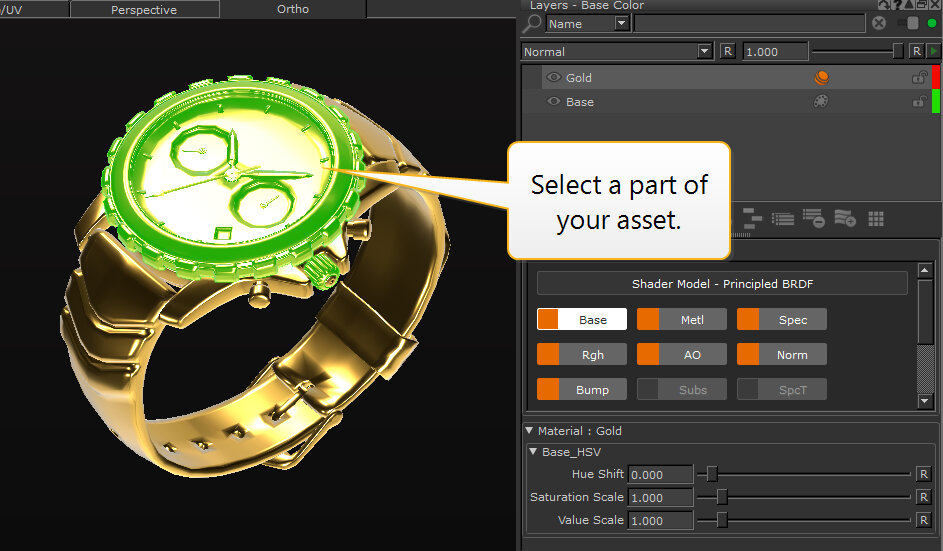
If you want to apply a material to parts of your asset only, you can use masks:
| 3. | In the Tools toolbar, select the |
This highlights the selected part in green.
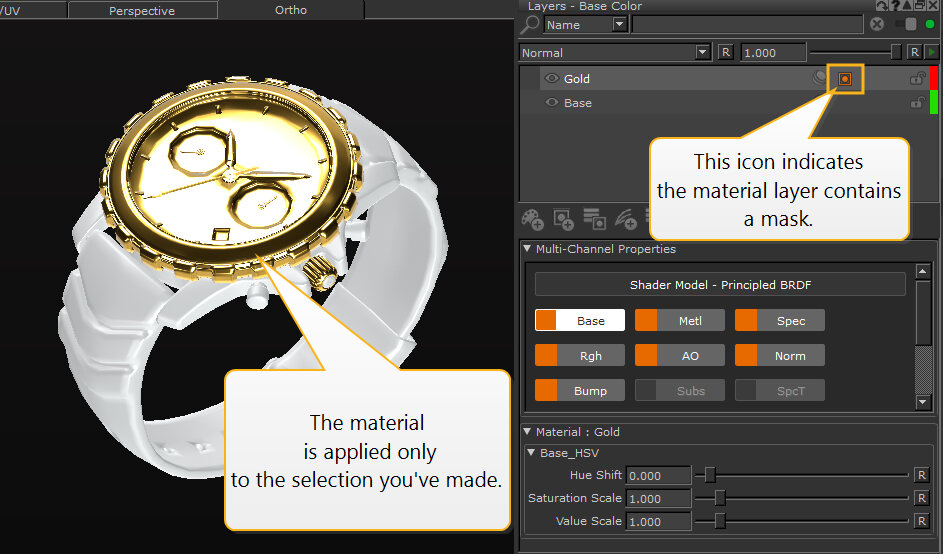
| 4. | In the Layers palette, right-click on the required multi-channel layer and navigate to Layer Mask > Add Mask > From Selection. |
This adds a mask to the multi-channel layer, applying the material to the selection only.
This mask is used across all sibling streams/channels.
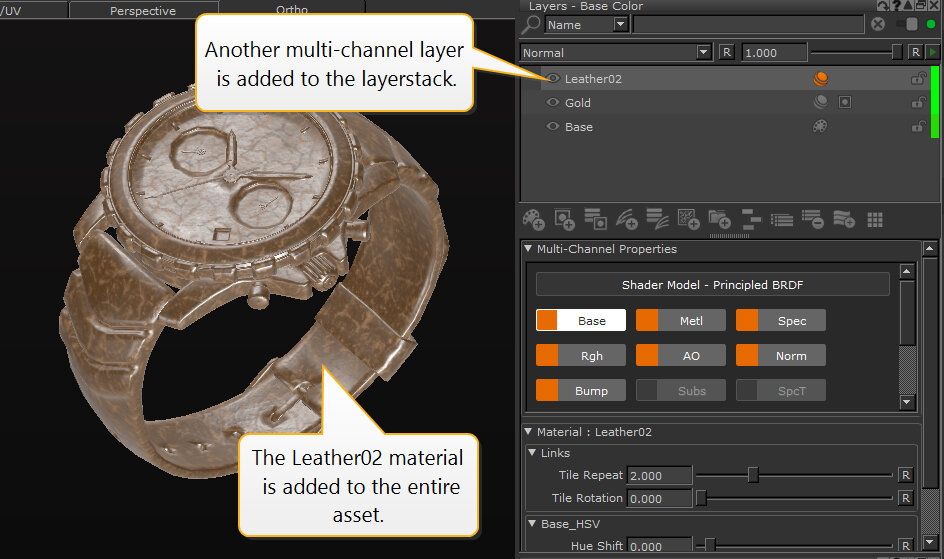
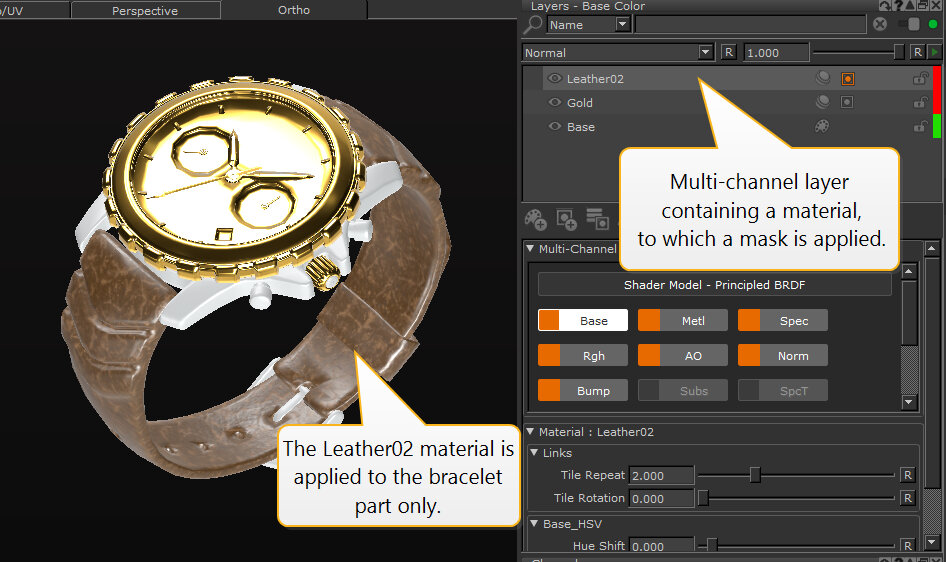
To add another material, to the bracelet part of the watch for example, do the following:
| 5. | In the Layers palette, click the Add Multi-Channel Layer |
This applies the material to the entire asset (see canvas) and adds another multi-channel layer to your layerstack.
| 6. | On the canvas, select the bracelet part. |
| 7. | In the Layers palette, right-click on the new multi-channel layer. |
| 8. | Navigate to Layer Mask > Add Mask > From Selection. |
This adds a mask to the multi-channel layer, applying the material to the bracelet part only.
Using Pass-Through with Multi-Channel Groups
Multi-Channel Groups work the same way as standard groups except that they are meant to work with materials, which are shared across all channels. See Groups, Pass-Through, and Mask Stacks for more information on standard groups. You can use Multi-Channel Groups to build material stacks for instance, and use most layer masking operations.
Pass-Through mode can be used with multi-channel groups the exact same way as with standard groups. The steps below show you one way to use the Pass-Through mode with materials contained in a multi-channel group.
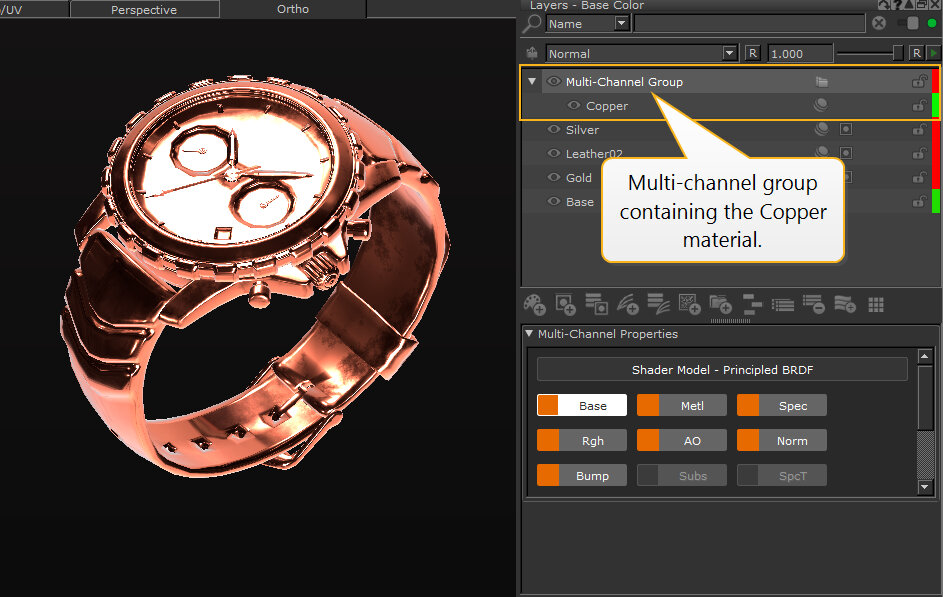
| 1. | In the Layers palette, add a new material on top of your current materials. Click the Add Multi-Channel Layer In this example, the Copper material is used. |

| 2. | In the Layers palette, select the material layer at the top of the layerstack, then click the Add Multi-Channel Layer |
Tip: If you want to add an empty multi-channel group, make sure that you haven't selected any layers in the layerstack, otherwise it creates a group with the selected layer(s) in it.
This adds a multi-channel group to your layerstack, which contains the Copper material layer.
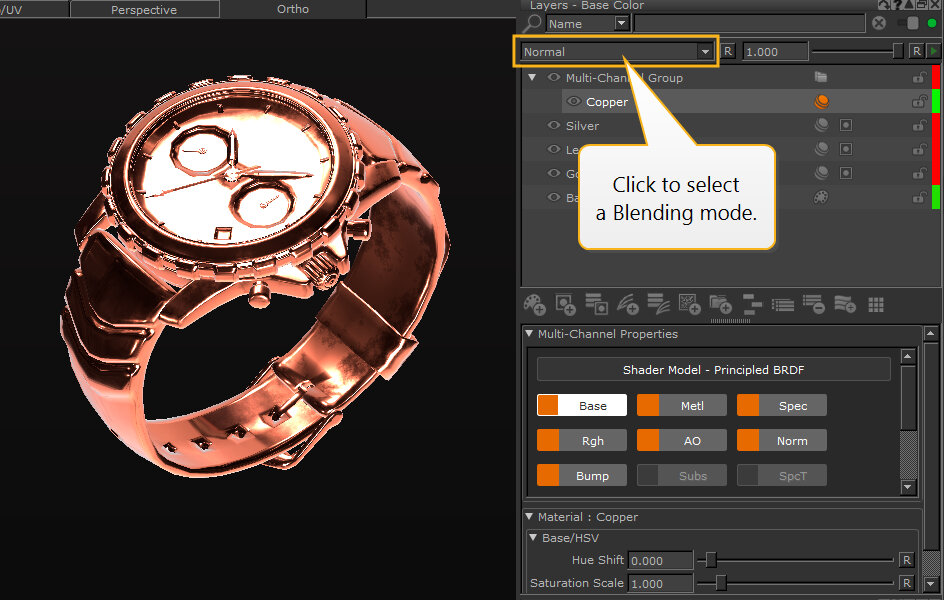
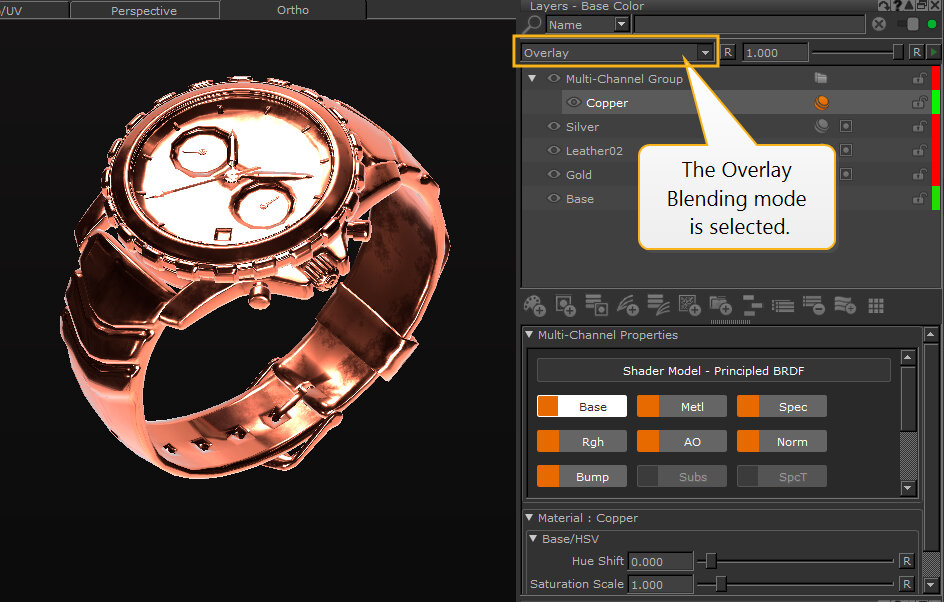
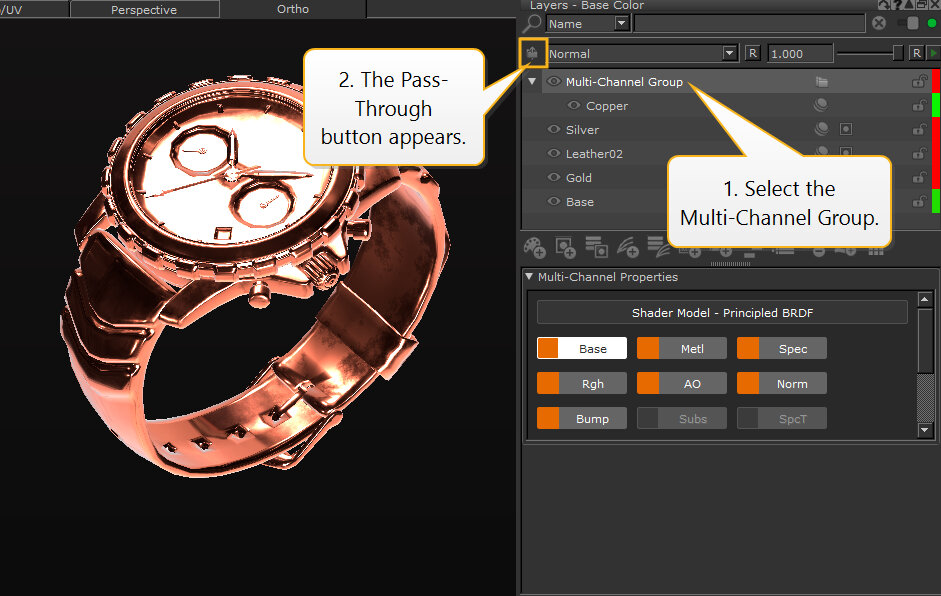
| 3. | Select the Copper material layer and choose a blend mode. For this example, navigate to Contrast > Overlay. |
|
|
| The blending mode is set to Normal. | The Overlay blending mode is selected. |
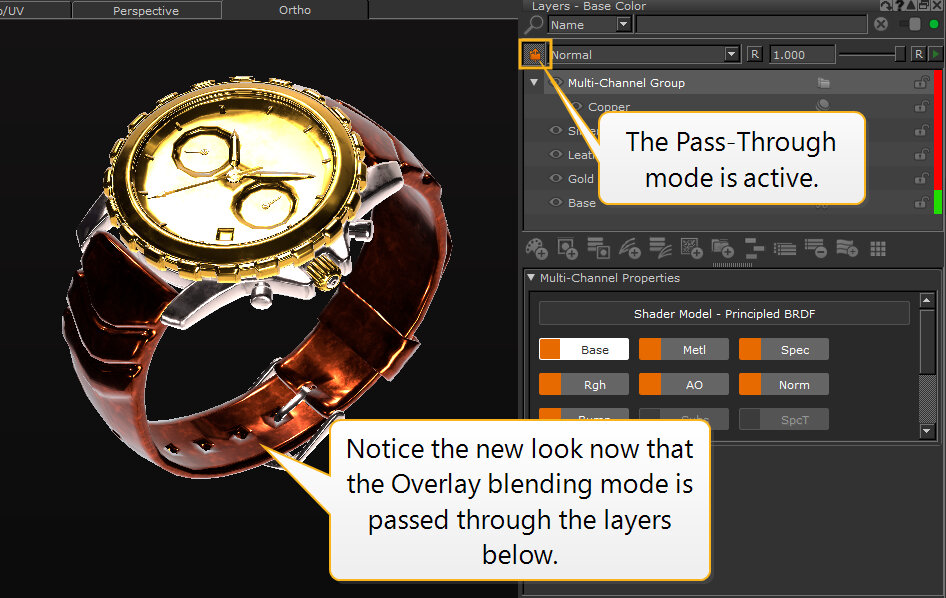
Since the Copper material layer is in a multi-channel group, the Overlay blending mode is not applied to the layers below, as it is applied to the bottom of the stack within the multi-channel group, which is transparent.
To pass-through the blending mode properties to the layers below:
| 4. | In the Layers palette, select the multi-channel group. |
The Pass-Through ![]() button appears at the top of the Layers palette.
button appears at the top of the Layers palette.
| 5. | Click the Pass-Through |
The Overlay blending is passed through the layers below.
Note: The Pass-Through mode works per channel/stream and is not shared across all channels like materials are.
Controlling Multi-Channel Properties
From the Layers palette, in the Multi-Channel Properties section, you can switch between channels and enable or disable streams/shader inputs.
Switching Channels
In the Layers palette, in the Multi-Channel Properties section, click on the channel name to select the channel.
Notice that the channel is selected in the Channels palette.
Enabling and Disabling Streams/Shader Inputs
In the Layers palette, in the Multi-Channel Properties section, click the orange toggle button to disable the streams/shader inputs, and click the gray toggle button to enable them. Alternatively, in the layerstack, Shift+click the Eye ![]() button to enable/disable the stream of the current channel.
button to enable/disable the stream of the current channel.
In the example below, the streams/shader inputs of the Silver material are being enabled and disabled. Notice the changes on the canvas.

Note: This does not affect the material layer's visibility and only changes the state of the selected streams/shader inputs, which is reflected on the canvas.
Controlling Material's Exposed Properties
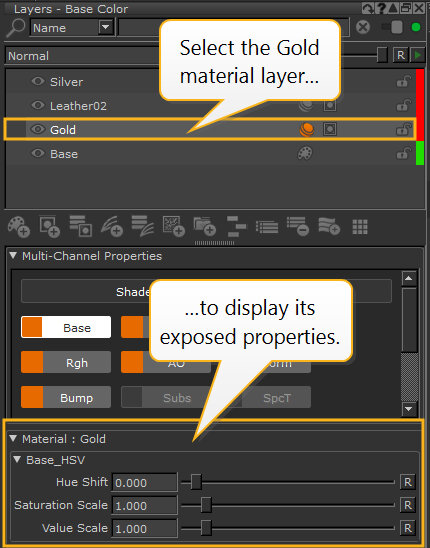
The materials' exposed properties or controls are displayed at the bottom of the Layers palette under the Multi-Channel Properties section.
Click the required material layer (or also known as multi-channel layer) to display its exposed properties or controls. You can then change the values of the properties with the different controls. For example, use the slider to change the Hue Shift value of the Gold material.
Note: With the Node Graph workflow, you can expose the properties of the nodes contained in your material node and then link them to create controls to change the Material node's properties. See Working with Materials in the Node Graph for more information.
If you are using the Node Graph workflow, the materials' exposed properties are displayed in the Node Properties palette. See Working with Materials in the Node Graph.