Clone Stamp
To clone from an existing current layer:
| 1. | If you haven't already, select the Clone Stamp |
| 2. | In the Tool Properties toolbar at the top of the screen, select the clone source from the Source dropdown. |

The list includes all channels in your project, plus Painting (clone from the unbaked paint) and Image (clone from an external image). The default value for Source is Current Paint Target.
Tip: If you can't see the Tool Properties toolbar, open it by right-clicking in the toolbar space at the top of the window and selecting Tool Properties from the bottom of the dropdown list.
| 3. | Select Current Paint Target, select the layer you want as a source, then hold down Ctrl/Cmd and click on the model's surface to set the source point. |
Mari highlights the source point with a cross.

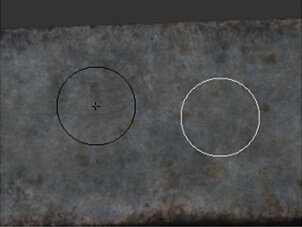
| 4. | Paint normally. As you paint, Mari copies the texture from around your source point in the source channel: |
• The white circle is your brush.
• The black circle is the source area - as you move your brush, this circle shows you the texture you'll be cloning from.
You can select any preset brush to use with the clone stamp tool, or edit the brush as normal (see Configuring Brushes).
To clone from the paint buffer:
| 1. | To set the clone source in the unbaked paint (that is, the contents of the paint buffer), from the Tool Properties toolbar at the top of the screen, select Painting from the Source dropdown. |
| 2. | Ctrl/Cmd-click to set the source point. Paint normally: |
• As above, the white circle is your brush.
• The black circle is the current source area.
Tip: Bear in mind that if a particular area doesn't have any unbaked paint on it (that is, there is no data in the paint buffer for that area), no clone data is available from the area. It's as if you're trying to paint from an area that doesn't have anything on it.
If you're trying to clone and getting nothing, check that there actually is unbaked paint on the area you're cloning from!
To clone from surface directly into the buffer:
| 1. | To clone from the surface straight up into the paint buffer directly over the clone point, select the layer to clone from as normal. When you set the source point, hold down Shift+Ctrl, or Cmd+Ctrl for Mac, and click on the model. Paint normally. As you paint, Mari copies the area you paint from the layer surface into the paint buffer. |
| 2. | If you are cloning from the current channel and layer, you won't see any visible effects, as Mari is just copying the paint right on top of itself, but you can then switch tools and edit the paint and then re-bake. This lets you make fine adjustments to the paint already baked into a layer, or to clone sections of paint from one layer to another (for example, to clone from a displacement channel into the diffuse channel to get the basic details of the surface contours to paint). |
To clone from an image:
| 1. | To clone from an external image, drag the image from the Image Manager (or from a shelf) onto the main canvas. |
The image opens up in a separate window. You can zoom the image in and out by holding down Ctrl/Cmd+Alt, clicking and dragging.This sets the clone source to Image automatically.
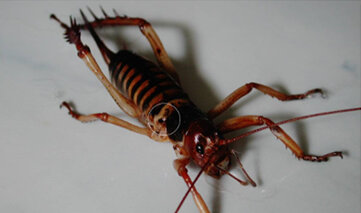
| 2. | Click in the separate image window to set the source point. The white circle in this window shows where the current clone source is, as you move the mouse. |

| 3. | Paint in the main Mari window as normal. |
Tip: Experiment with the various options and modes of clone stamp. Try using a custom brush, with an unusual texture, lower alpha, and so on to find which settings work best for you.
