Exporting EXR Files for Render
You can use the Export Manager Dialog to set file options when exporting EXR files, allowing your images to work better with renderers.
How to access these options:
| 1. | From the top menu bar, select Channels > |
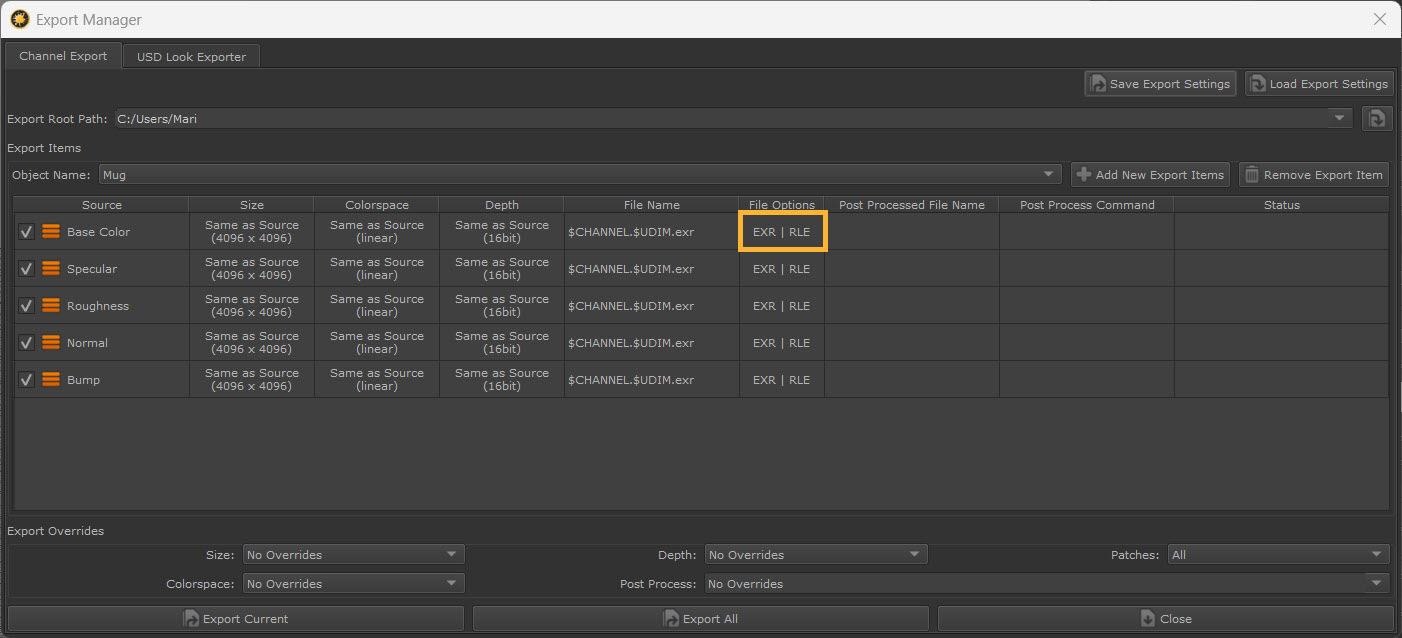
| 2. | This opens the Export Manager Dialog. Select a location for your export in the field Export Root Path. |
| 3. | If you don't already have you export items loaded, select Add New Export Items and pick which channels or bake points you'd like to export from. |
| 4. | Double click on an EXR file. |
| 5. | The Set File Options Dialog will display. Choose a compression type from the Type dropdown menu. |
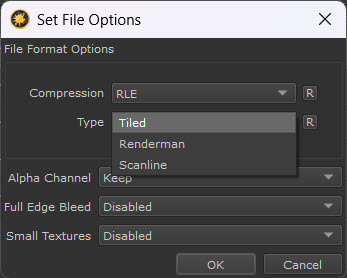
• Tiled:
Default. EXR files will be saved in the tiled format without mipmaps. The tile size is 256x256.
• Renderman:
EXR files will be saved in the Renderman compliant format. The tile size is 32x32 and mipmaps will be generated.
• Scanline:
EXR files will be saved in the scanline format. Currently only available via PythonAPI with an opt-in flag.
| 6. | Once you have chosen an option, select OK. |
| 7. | Configure other export settings and overrides if needed, then select Export Current or Export All to export your EXR(s) to the chosen location. |