Selecting Colors from a Picker or Image
| 1. | Open the Colors palette: |
• right-click on the toolbar, and select Colors from dropdown menu, or
• from the View menu, select Palettes > Colors.
The Colors palette displays colors and color pickers.
| 2. | Select a color: |
• manually set the numeric values (either type them into the text fieldes or move the sliders) for the various color attributes - red, green, blue, alpha; or hue, saturation, and value, or
• click in a color field in the tabbed area.
The control dynamically updates as you change the settings.
Note: Picking values for HDR images outside of the range as defined by the color picking OCIO colorspace, may result in clamped values.
| 3. | Click to navigate through the tabs available. These include: |
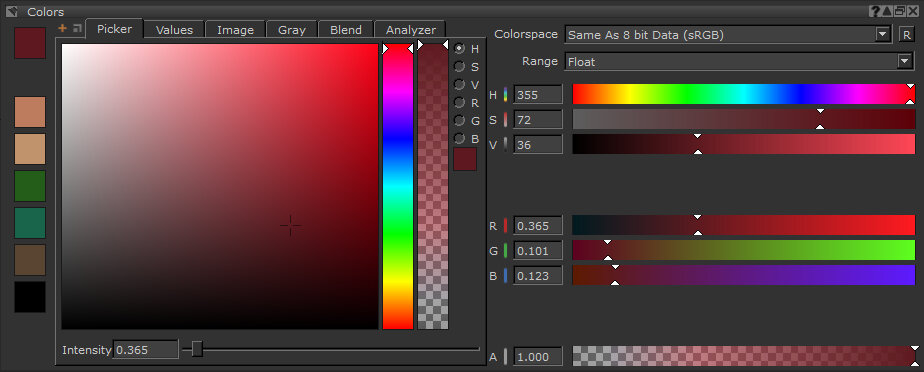
• Picker - to select between Hue, Saturation, Values, Red, Green, or Blue in the Color field and the Color slider. You can also set the intensity.

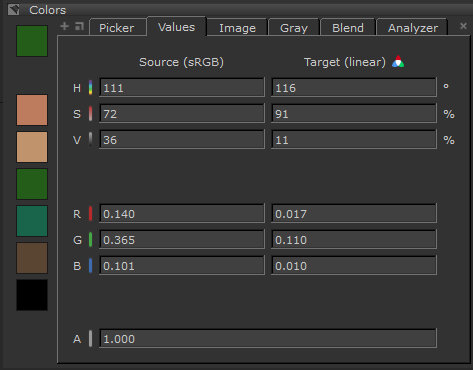
• Values - to pick from Byte (8-Bit) or Float (32-Bit) color values.
• Image - to pick a color from an image (right-click to load an image, or drag an image from the Image Manager palette).

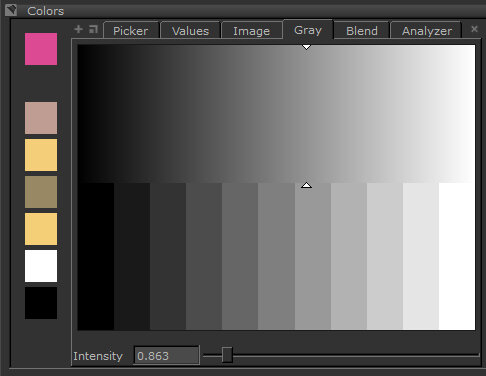
• Gray - to select grayscale values (including preset gray settings, at the bottom, in steps from black to white).
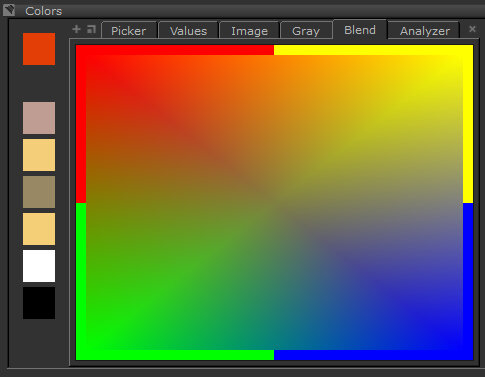
• Blend - to pick from a field blending four colors. Click any of the color swatches (foreground color or recently used colors) and drag-and-drop them to any corners of the color field. Then click in the color field to pick from the blend.
Tip: By default, Mari opens the following tabs: Picker, Values, Image, Gray, Blend, and Analyzer. You can add additional color tabs: Color History, Colorspace, and Sliders.
To open other tabs, click ![]() .
.
To open a tab as a floating window, click ![]() .
.
You can also pick colors from images by double- clicking on them.
| 4. | To display the Colors quick palette when painting, press and hold J. |
Video: Watch the demo.
This video shows the workflow using Mari 3. Even though the Mari 4 workspace is different, the workflow remains the same. To have a look at the main UI differences, see Mari 3.3 vs 4.0.
The Colors quick palette displays under your mouse cursor. The bar at right shows the selected color (without a border - so you can compare directly with what's already painted). You can also change the intensity of the color, if you are trying to match the color intensity of an HDR image.

Tip: If you intend to paint on an HDR texture with a color from the color picker, ensure that you have not ticked the Clamp checkbox in the Painting palette, and that you are painting in a 16- or 32-bit channel.
| 5. | To pick colors from an image directly from the Image Manager or a shelf, double-click on the image. When the image window opens, click within the image to set the foreground color. |
Tip: See also Storing Resources Using Shelves for instructions on making a custom shelf with small icons of selected color swatches.
Try the steps below to select new colors:
• Pick a color from the Colors palette. Notice as you drag the cursor across a field, or slide a slider, the Foreground swatch changes and the RGB values change.
• Load an image into the Image tab in the Colors palette, and pick a color from it.
• Create a custom, floating Blend window with different colors than the defaults.