Multi-Paint
Mari’s Multi-Paint mode enables you to paint into up to eight different streams from a single Multi-Channel Paint node. This means you can be painting into your color stream, whilst simultaneously painting into the bump and displacement streams. This is a great tool for speeding up the painting process, and can be really helpful when you want to use texture packs, as you don’t need to manually edit each stream and spend time matching up the different images.
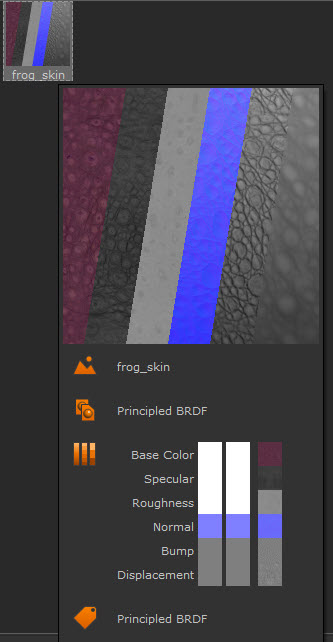
Once you’ve created a Multi-Channel Paint node, you can edit and control these streams for that node via the Multi-Paint palette, found in the Palettes toolbar. This palette enables you to control the color or image applied to each individual stream during the painting process.
The Multi-Paint Palette's settings are stored by shader model. This means if you are using a Multi-Channel Paint node that is using BRDF, and you switch to a different Multi-Channel Paint node in your node graph that is using 3Delight Principled, the panel will update to reflect the new node's settings and shader model.
You can also set up Multi-Paint Presets to save time when creating Multi-Channel Paint node. These presets save specific stream settings that will automatically populate the Multi-Paint palette when applied.
To use the Multi-Channel Paint node in your project, just merge the node into your network using a Multi-Channel Merge node in the same way that you would work with a Material or standard Paint node.
Tip: Multi-Paint mode can be used alongside Paint nodes, and you can switch between single-channel painting and multi-channel painting by selecting the node you want to paint on.
Experiment: Multi-Painting is a complimentary workflow that can be easily added into existing projects where you might already be using the standard paint or material network. Try adding Multi-Paint in your existing projects!
To find out more about the Multi-Channel Paint node, go to Multi-Channel Paint Node. The following sections of this page will cover how to utilize the Multi-Paint Palette.
Multi-Paint Palette
The Multi-Paint palette is the place to add and edit the specific streams you want to paint into. You can select a maximum of eight streams per Multi-Channel Paint node.

Using the Multi-Paint Palette
|
Action |
Access By... |
Description |
|---|---|---|
|
Adding/ Removing Images |
||
| Add images to the palette |
• Drag & drop image from Image Manager • Drag & drop image from File Browser • Click the checkered box in Image column ( • Drag & Drop Image Group from Image Manager |
Drag and Drop/ select specific images into specific streams. When you drag & drop an Image Group from the Image Manager, the images will auto-populate to streams based on the image names, or by the presets applied in the Image Group’s Ingest Template Dropdown List. |
| Clear image from Palette |
• Right-click > Clear Image |
Clears the image for a specific stream. To clear all images and Stream settings, go to Reset Streams . |
|
Managing Streams |
||
| Search available streams | Use the Multi-Paint Search bar  |
The streams available to search will correspond to the shader model defined when you created the Multi-Channel Paint node. |
| Select active streams | Select / deselect a stream by toggling the active button:  |
Select up to eight active streams per Multi-Channel Paint node to paint into. |
| View all / selected streams | Toggle  button button |
Swap between viewing all streams from the shader model or the streams you have selected for Multi-Paint (up to eight). |
| Select Foreground / Background color | Left-click the Color tile and select color from the pop-up window. | Select the foreground and background color for 2 different painting color options. |
| Swap Foreground/ Background color | Toggle swap color button:  |
Swap between foreground and background color to change which color to use whilst painting. |
| Select Primary Stream |
Click Primary Stream button:
Active: Not active: |
The primary stream defines which image or color will be displayed when you use the Paint or Paint-through tool. |
| Select stream Blend mode | Click Blend Mode dropdown for the specific stream. 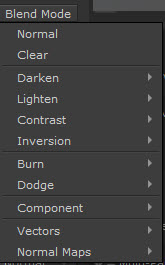 |
You can define the Blend Mode for each stream - these can be different from each other. Learn more about Blend Modes read Paint Blending Modes. |
| Reset Streams | Click Reset icon ( ) )
|
Will reset all streams to their default settings, including clearing all images. |
| Batch Edit streams | Left-click Ctrl+ the streams you want to edit. Then right-click over the streams to choose the batch-editing option. |
Batch edit the selected streams. The batch-editing options are: • Batch Edit Foreground Color • Batch Edit Background Color • Batch Edit Image • Batch Edit Blend Mode |
|
Preset Workflows |
||
| Save a Preset | Save Preset button ( ) ) |
Saves the current settings as a Multi-Paint preset. Learn more at Multi-Paint Presets. |
| Apply a Preset | Apply Preset button
( ) ) |
Auto-fills the Multi-Paint palette with the selected Multi-Paint preset. |
 ) and select image from Image Manager

Multi-Paint Tools
The following painting tools are available in Multi-Paint:
|
Paint tools |
|||
|
|
|
|
|
|
|
|
|
|
|
|
|
|
|
|
|
|||
Multi-Paint Presets
You can create and save custom Multi-Paint Presets so you don’t have to repeat set up every time you create a new Multi-Paint node.
To create a Preset:
| 1. | Select your chosen streams and Color/ Image/ Blend mode settings. |
| 2. | Click the Save Preset icon (). |
| 3. | Name your Preset. |
| 4. | Select a shelf to save the Preset on. |
| 5. | Click Save. |
Your preset will now be available when you click the Apply Preset button in the Multi-Paint palette. This will open a dropdown menu with all the Preset options. You can hover over the Presets to open up information on the streams and a preview of the image thumbnails.
Multi-Paint and Image Groups
You can drag image groups directly into the Multi-Paint palette and they will automatically populate the palette using image naming conventions.
Find out more information about using Image Groups with Multi-Paint at Image Groups.