Creating a Layered Shader
Layered shaders create a layer stack that allows multiple shaders to be blended together. When the layered shader is selected, the layer stack appears as a separate tab on the Shaders palette. This allows you to create different shaders within a layer stack that you can mask, adjust, and have independent control over.
For example, you can create a layered shader in order to create a shader for a wood material and another shader for a metal material on the same object. Each of these shaders can then be modified to create a specific look that may not be possible to achieve with an overall shader.
| 1. | To add a layered shader, either: |
• right-click in the Shaders palette > Add New Shader > Layered
• select Add New Shader > Layered from the Shading menu, or
• click the ![]() icon in the Shaders palette and select Layered from the dropdown menu.
icon in the Shaders palette and select Layered from the dropdown menu.
The Masks Format dialog appears.
| 2. | Select a Size and Depth for the channel created for the layered shader's layer stack. The options for the channel size and depth are the same as those found in the section to Creating and Deleting Individual Channels in the Channels section. |
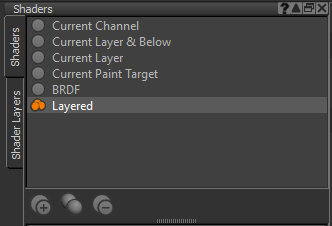
The layered shader is created in the Shaders palette, and a Shader Layers tab is visible on the left side of the palette, when the layered shader is selected.
| 3. | Click on the layered shader to select it and adjust the Inputs and attribute fields in the lower pane of the Shaders palette. |
| 4. | Once you have made the adjustments you want to make, click on the Shader Layers tab to see the shader's layer stack in the Shaders palette. This tab looks similar to the Layers palette or a mask stack palette. |
Note: In the event that there are multiple layered shaders in the Shaders palette, there is still only one Shader Layers tab. Selecting a layered shader ensures it is that layer stack that is shown in the Shader Layers tab. To see the layer stack of another layered shader, simply select it before clicking on the tab.
| 5. | Add shaders to the layer stack by clicking the |
| 6. | Similar to the Layers palette, you can add masks and mask stacks to the shaders, so that certain shaders in the stack only apply to certain areas on your model. For more information about how to mask layers, refer to Layer Properties. |
| 7. | To make it easier to find shaders in a large layer stack, you can assign color tags to individual shaders. Select a shader from the stack and click the |
| 8. | If you want to remove a shader from the layer stack, select the shader and click the |
The shader is removed from the layer stack.
| 9. | If you right-click on a shader layer, you can do most of the things you can also do with layers in the Layers palette, for instance, adding adjustments and groups. |
Tip: For more information about layer stacks, mask stacks, and similar functionality on the Layers palette, refer to the Layers section for more information.