Curve
The Curve tool allows you to create a spline curve by clicking down a series of control points through which the curve is interpolated. This is a hermite curve type and can be very useful for creating modeling guides, quickly roughing out a shape, or setting up an outline for lofting with the extrude, lathe, or other multiply tools.
You can find the Curve tool in the Basic sub-tab of the modeling toolbox, or in the menu bar, under Geometry > Curve Palette.
To use the tool:
| 1. | Right-click the |
Alternatively, you can access it by opening the Curve Palette, found in the menu bar under Geometry > Curve Palette.
| 2. | Click in the 3D viewport to position your control points. |
Adding new control points to the curve is simple. Clicking anywhere on the screen, so long as you are not selecting an existing control point, creates a new control point in the curve.
Note: The new control point is added after the currently-selected point. Therefore, if you wish to add a point to a specific location on the curve, first select the point before it.
| 3. | Once you have clicked to create several control points, you can also click directly on an existing control point to drag it around, allowing you to change the shape of the curve. |
Tip: To create a closed curve, right-click on the first control point. Modo adds a curve segment between the first and last control points.
Curve Properties
Once you drop the tool by pressing the spacebar key, interactive editing within the tool itself is lost but you can re-activate the editing ability by selecting the curve in Polygons selection mode.
The following Curve options are available for adjusting the Curve tool:
|
Curve |
|
|---|---|
|
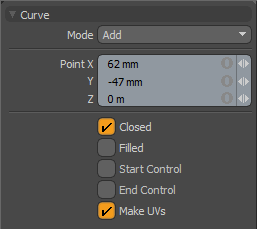
Mode |
Allows you to change the behavior of mousing. The following options are available. Add, Edit, and Delete. • Add - The default setting. The tool behaves as described above. • Edit - The ability to add control points is removed and the focus of the tool is entirely on editing the existing control points. The Delete mode provides a simple method for deleting existing control points. • Delete - Clicking on a control point removes it from the curve.
|
|
Point X, Y, Z |
The X, Y, Z values of the currently-active point can be set precisely by typing in the desired 3D coordinates. |
|
Closed |
When enabled, adds an automatic curve segment between the first and last control point positions, producing a closed curve. |
|
Filled |
When the Closed option is enabled, then you can additionally enable the Filled option to create a render-able flat surface that is defined by the outlining curve itself. The resulting surface can be tagged like a polygon for adding material definitions. |
|
Start Control |
This toggle converts the first point in the curve to a control point that does not contribute to the actual curve length, but acts as a handle so that the curvature at the new first point can be modified. When activated, the curve length from the control point to the next point is drawn in the handle color to indicate that it's no longer part of the geometry, but simply a handle. |
|
End Control |
This toggle converts the last point in the curve to a control point that does not contribute to the actual curve length, but acts as a handle so that the curvature at the new end point can be modified. When activated, the curve length from the control point to the next point is drawn in the handle color to indicate that it is no longer part of the geometry, but simply a handle. |
|
Make UVs |
This toggle activates auto-generation of UV texture coordinates along the curve. |