Shear
The Shear tool combines the Transform tool with a Linear falloff.

Using Shear
You can find the tool in the Deform sub-tab of the Model layout, on the left side of the screen. You can also activate the tool in the menu bar, under Edit > Deform.
| 1. | Activate the tool, then click in the 3D viewport. |
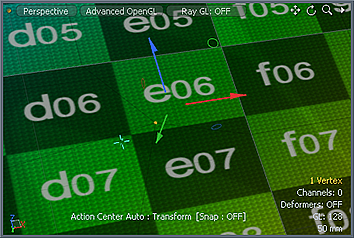
Modo sets the Linear Falloff perpendicular to the pointer's position and automatically scales to match the currently-selected geometry. The transform handles also appear in the viewport
Tip: To precisely place the falloff, you can either use the handles to manipulate the falloff after it has been auto-sized, or right-click and drag away from the handles to reset the falloff and drag it out interactively.
| 2. | Drag on the handles to move the geometry. |
The Linear Falloff modulates the result of the Move operation.

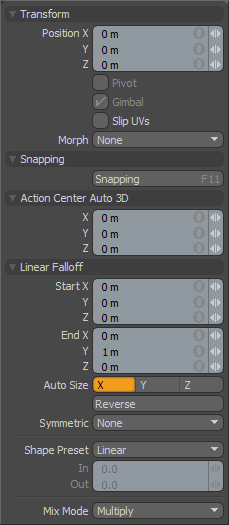
The following options are available for the Shear tool:
|
Transform |
||||
|---|---|---|---|---|
|
Position X/Y/Z |
Applies specific offset distance values (calculated from the position the object was in when you activated the tool). When you adjust an object interactively in the viewport, Modo displays the current offset distance to give you useful feedback. |
|||
|
Pivot |
Disabled for the Shear tool. |
|||
|
Gimbal |
Disabled for the Shear tool. |
|||
|
Child Compensate |
(Only available in Items mode) When enabled, ignores any transform values for child items. When disabled, passes along transform values to any child items of the current selection. |
|||
|
Slip UVs |
(Only available in Component modes) When enabled, edits applied to the geometry do not change the existing UV map. UV values are generally fixed to specific vertices; therefore, further edits to the geometry may warp, deform, or otherwise distort the UV values in undesirable ways. When this happens, you may need to adjust the map or to redo it altogether. To avoid this undesirable result, you enable Slip UVs so as to not disturb any existing UV mapping applied to the geometry.
|
|||
|
Morph |
(Only available in Component modes) Determines how Modo treats stored morphing information when applying transforms (such as the Move, Rotate, or Scale transforms) to geometry. There are three options for controlling how Modo deals with the morph map vertex data when applying any transforms. • None - Transforms selected (visible) morphs independent of their source, but does not affect unselected morph data.
• Transform - Transforms morph data along with the base mesh.
• Keep Positions - Converts morph data into an absolute morph map. All vertices retain their pre-transformed positions. Note: In previous versions of Modo, to transform a morph along with its base, you needed to select it in the Vertex Map list. If you didn't, when Modo recalled the relative morph map data, it would produce distorted, undesirable results; therefore, it was easy to accidentally spoil a model. To remedy this problem, current versions of Modo have three options to deal with the morph map vertex data. |
|||
|
Snapping |
See the Applying Snapping topic for details about this feature. |
|||
|
Linear Falloff |
||||
|
Start X/Y/Z |
Defines the starting position of the falloff at a specific location. This point and everything beyond it receives the maximum amount of influence attenuating toward the End position. |
|||
|
End X/Y/Z |
Defines the end position of the falloff at a specific location. This point and everything beyond it receives no influence from the falloff. |
|||
|
Auto Size |
Scales the Start and End points of the falloff automatically to match the bounding box size of the selected elements along one of the three axes: X, Y, or Z. |
|||
|
Reverse |
Inverts the Start and End points to reverse the influence of the falloff. |
|||
|
Symmetric |
Mirrors the influence area of the falloff automatically. • None - Disables the symmetric function.
• Start - Mirrors the influence of the falloff symmetrically across the Start position.
• End - Mirrors the influence of the falloff symmetrically across the End position. |
|||
|
Shape Preset |
Controls the strength of the falloff's influence along the extent by using a shape preset. • Linear - Attenuates the falloff evenly across its range.
• Ease-In - Strengthens the falloff toward the start position.
• Ease-Out - Strengthens the falloff toward the end position.
• Smooth - Strengthens the falloff toward the center of the falloff.
• Custom - Fine tunes the strength of the falloff based on the In and Out values. |
|||
|
In/Out |
Determines the strength of the falloff nearer to the start or end position. |
|||
|
Mix Mode |
Defines how each falloff interacts with the other(s) in instances where there are multiple falloffs applied to a transform (by using Add in the Falloff menu). |
|||

