Search is based on keyword.
Ex: "Procedures"
Do not search with natural language
Ex: "How do I write a new procedure?"
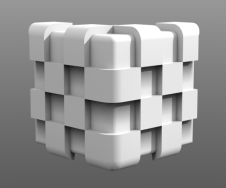
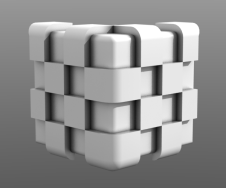
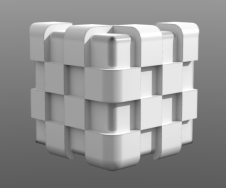
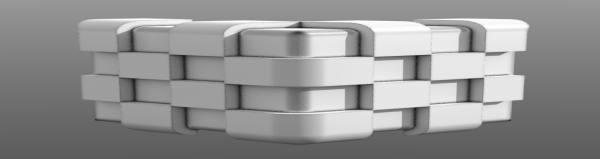
Occlusion
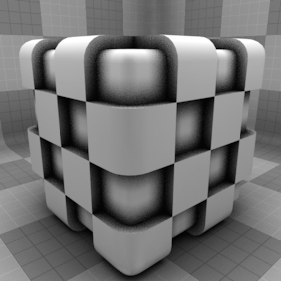
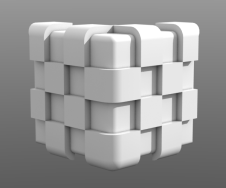
Occlusion is a technique for calculating the shading of surfaces based on how occluded they are. Depending on the settings, any receding or recessed areas are shaded darker (or lighter). Modo also has a render output called Ambient Occlusion, that produces similar results, but does not take surface attributes into account. Occlusion is a simple and fast way to simulate global illumination without the overhead of calculating any scene lighting, as it only takes into account surfaces and how they adjoin to each other. Occlusion makes its calculations by firing a number of somewhat random rays and calculating shading for a pixel based on how many rays intersect with neighboring surfaces. There are a number of settings with which you can control how the occlusion layer shades the surface, producing a wide variety of effects. It's also useful to change the layer effect where the contributions of other layers can be controlled by the occlusion layer.
Note: For information about adding and working with Shader Tree item layers, see the Shader Tree topic.
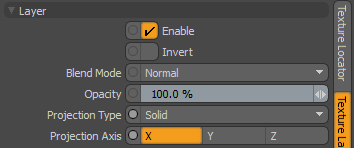
Layer Properties
|
Layer |
|
|
Enable |
Toggles the effect of the layer on and off. This duplicates toggling visibility in the Shader Tree. When disabled, the layer has no effect on the shading of the scene. However, Modo saves disabled layers with the scene, and they are persistent across Modo sessions. |
|
Invert |
Inverts the colors (RGB values) for the layer to produce a negative effect. |
|
Blend Mode |
Affects the blending between different layers of the same effect type. With this, you can stack several layers for different effects. For more about blending, see Layer Blend Modes. |
|
Opacity |
Changes the transparency of the current layer. If there are layers below this layer in the Shader Tree, reducing this value increasingly reveals the lower layers. Reducing the value always dims the effect of the layer. |
|
Projection Type |
Defines how a material us applied to a 3D surface. Types vary significantly in their effects. For a guide to each Projection Type see Projection Type Samples. |
|
Projection Axis |
The material is projected down this axis. This applies to Planar, Cylindrical, Spherical, Cubic, Box, and, Light Probe projection types. |
Occlusion Properties
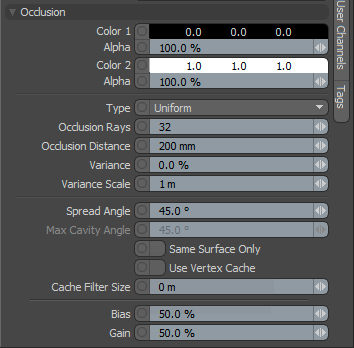
Occlusion
Color/Value 1: Specifies the color of the shading in the occluded areas. This color ramps toward Color 2.
Alpha: Specifies the level of transparency for Color 1.
Note: You can adjust the Alpha value using the Color Picker.
Color/Value 2: Specifies the color of the shading in the non-occluded areas. This color ramps toward Color 1.
Alpha: Specifies the level of transparency for Color 2.
Type: Determines the occlusion calculation method, controlling the way rays are fired from the surface at each pixel location. Each type produces different results.
• Uniform: Fires rays in all directions in the hemisphere.
• Up: Looks for occlusions above the shading point.
• Down Slope: Looks for occlusions above the shading point and in the surface plane.
• Reflection: Looks for occlusions in the direction of the reflection. This is determined by the camera's position (when rendering) where a ray is fired and when it hits a surface, it bounces off at the angle of incidence and if it hits another surface after bouncing, it's considered occluded. Useful for faking soft reflection among other uses.
• Concavity: Occludes where the surface is concave, as determined by the Max Cavity Angle value.
• Convexity: Occludes where the surface is convex, as determined by the Max Cavity Angle value.
• Concavity & Convexity: Occludes in both the convex and concave areas of a surface as determined by the Max Cavity Angle value.
• Thickness: This is effectively an inverse Ambient Occlusion: Ambient Occlusion fires rays outwards from a point on the surface and records the average distance from there to the surface it hits. Thickness, on the other hand, fires rays inwards from a point on the surface and records the average distance from there to the back-facing surfaces it hits.
Note: For the Thickness occlusion type, we recommend using a Spread Angle of 180 degrees and a Cutoff Angle of 0-10 degrees.
• Curvature: Produces occlusion where there's curvature in the geometry.
|
|
|
|
|
Uniform |
Up |
Down Slope |
|
|
|
|
|
Reflection |
Concavity |
Convexity |
|
|
|
|
|
Concavity & Convexity |
Thickness |
Curvature |


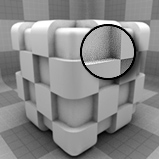
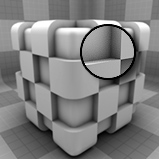
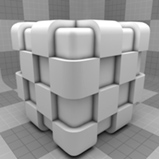
Occlusion Rays: This setting specifies the number of semi-random rays Modo shoots out from a surface when shading a pixel for Ambient Occlusion. Generally, the higher the number of rays, the more accurate (and smoother) the Occlusion calculations are, low numbers introduce noise as variations in neighboring pixels become more evident.
Note: Occlusion rays fired from the base of the source surface don't hit the back side of polygons by default. In order for occlusion rays to hit the back side of surfaces, their materials need to be double sided.
|
|
|
|
|
Occlusion Rays 32 |
Occlusion Rays 128 |
Occlusion Rays 512 |

Occlusion Distance: Specifies the length of the rays that are fired from a surface. If you have a complex object with overlapping elements, limiting the ray range is a good way to control to what degree surfaces are shaded, it also helps to push the shading further into or away from recessed areas.
|
|
|
|
|
Distance 5 mm |
Distance 20 mm |
Distance 80 mm |
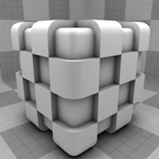
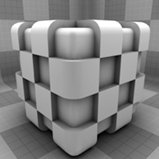
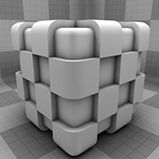
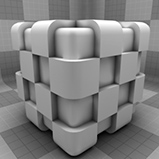
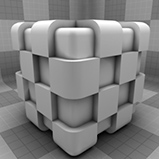
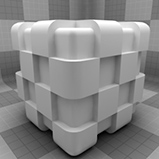
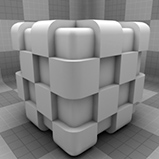
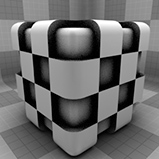
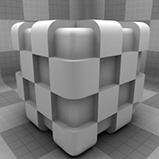
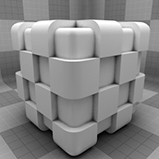
Variance: Adds a perlin noise function modulating the Occlusion Distance, meant to vary the strength of the occlusion effect. Value determines the amplitude of the function where greater values produce stronger, more obvious results (try values above 100% ).
|
|
|
|
|
Variance 0% |
Variance 50% |
Variance 100% |


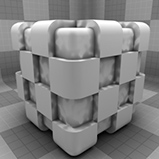
Variance Scale: This value determines the scale (size) of the noise function applied to the variance operation.
|
|
|
|
|
Scale 5 mm |
Scale 15 mm |
Scale 25 mm |
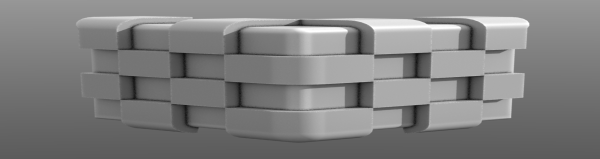
Spread Angle: Determines the maximum amount of spread for each shading position in the direction determined by the Type setting. At each shading position, a number of rays (determined by the Occlusion Rays option) are fired in a semi-random pattern, starting in the normal direction from the shading surface and angling out the amount determined here (half each side away from the normal), so at 180° Spread Angle, a full hemisphere of rays is fired from each shading position. The wider the Spread Angle, the more likely a recessed area is considered occluded, also a higher number of rays is necessary to produce a smooth result.
Max Cavity Angle: Used with only the Concavity/Convexity options, this value determines the angle of difference between adjoining surfaces that determines if the surface is concave or convex.
Cutoff Angle: This parameter is used to discard occlusion hits that are too close to the original orientation. So if the occlusion sample hits lie in the same plane as the original sample (plus or minus the cutoff angle) it ignores them. We don't recommend changing this number.
Same Surface Only: When this option is enabled, occlusion is only calculated for the surface that the shader is applied to, ignoring all other surrounding polygons. When disabled (the default), surrounding polygons are taken into account in shading calculations.
Use Vertex Cache: When this option is enabled, the occlusion sample values are stored in the geometry's vertex, producing a faster but somewhat softer result; as values are interpolation between the vertices. The Cache Filter Size option can be adjusted to control the softness of the result.
Cache Filter Size: This option works with the Use Vertex Cache option to control the number of vertex values that are interpolated to produce the final result. For each vertex, all the adjoining vertex values are interpolated that are within the user-defined range. Larger filter sizes produce smoother results.
Bias: Increasing this value causes the texture to favor the primary color or value over the secondary, whereas decreasing the value causes the secondary color or value to be favored.
|
|
|
|
|
Bias 0% |
Bias 50% |
Bias 100% |
Gain: This setting is similar to a contrast control that affects the falloff of the gradient ramp between the Color/Value 1 and Color/Value 2. Setting the Gain to 100% creates a very sharp contrast whereas setting the value to 0% reduces the contrast between the two to almost imperceptible amount.
|
|
|
|
|
Gain 0% |
Gain 50% |
Gain 100% |
Sorry you didn't find this helpful
Why wasn't this helpful? (check all that apply)
Thanks for your feedback.
If you can't find what you're looking for or you have a workflow question, please try Foundry Support.
If you have any thoughts on how we can improve our learning content, please email the Documentation team using the button below.
Thanks for taking time to give us feedback.