Search is based on keyword.
Ex: "Procedures"
Do not search with natural language
Ex: "How do I write a new procedure?"
Replicators
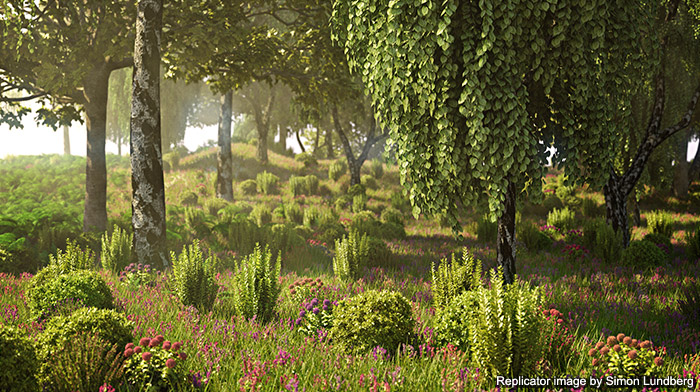
Replicators are a means of generating render time duplicates of geometry in a scene, allowing you to render billions of polygons with full support for all of Modo's shading and rendering capabilities.
The Replicator is more like a controller than an item. Unlike other items, which have visible representations in the scene, Replicators are only visible once their Prototype and Point Source options have been populated. Once defined, the Replicator controls how duplicates of the item are copied onto the target point source.
Replicators are also unique in that they require these additional elements to function. The prototype is simply any Mesh Item layer within the given scene. The point source defines the positioning of the duplicates; by default the center position of the initial mesh layer is positioned precisely at the location of each vertex in the point source item, so while you don't have direct control over the positions of replicated meshes, like with instances, you can indirectly control their locations with the point source by adjusting the vertex positions.
Creating Point Sources
A point source can be any mesh layer, so you can create one the same way you create geometry. This could even be something as simple as a flat plane created using the Box tool. If you apply a Replicator to a single polygon plane, you get four replicas at each corner (vertex position) of the polygon. In order to get additional replicas, the polygon requires additional subdivisions. To do this, increase the Segments option found in many of the primitive geometry tools, or apply the SDS Subdivide command in the Mesh Edit sub-tab of the modeling toolbox, after you've created the geometry. If you sculpt this subdivided plane, adding hills and valleys, the replicas are still positioned at each vertex, but instead of facing upward, they align themselves to the normal direction of the background vertex (which is an average of the normal direction of all the surrounding polygons) following the contours of the surface. This indirectly allows you to control position and to a degree rotation by simply using the shape of the point source geometry. Virtually any kind of geometry Modo creates can be used as a point source, including the various curves.
Note: Replicators align the center of the prototype mesh to the vertex position of the point source. Therefore, you need to make sure the prototype geometry is positioned appropriately in relation to its center. By default, this is the World 0,0,0 position for each layer. You can easily align the center in relation to the geometries' bounding box using the menu bar command Edit > Center to Bounding Box. You can also manually transform the center, while in center selection mode. For more on working with centers, see Selecting Items.
Creating Replicators
You can create Replicators like you would create any other item.
| 1. | In the Items list, click Add Item, and in the Preset Browser, select Particles > Replicator. |
This adds a blank Replicator Item to the Item List.
| 2. | In the item's Properties panel, manually populate the Point Source and Prototype fields with the appropriate items. |
You can also automatically populate these options using selection order:
| 1. | First, in the Items list or 3D viewport, select the target item to be the point source, then select the prototype item. |
| 2. | In the menu bar, click Item > Replicators > Add Replicator. |
Your geometry is instantly cloned onto the source item.
Adding Randomness
When used as a point source, most geometry produces replicas that you may find too regular in placement. In some cases this geometric uniformity to the positions may be what you need, but in most cases, a more natural, randomized placement is the goal. To achieve this, use the Variation settings of the Replicator itself to randomize the positions as an offset from the vertex position. Adding some scale and twist (rotation) randomness also helps to reduce the uniformity of the Replicas. When you need additional randomness, there are more versatile options available. For more information on the Replicator Item's properties, see Replicator Item.
You can introduce randomness by starting at the point source level. When fine control over replicas isn't necessary, you can utilize a point cloud. Point clouds are collections of vertices, with no edges and no polygons. For example, they are useful point sources for splashes of water droplets, or exploding shrapnel. Before you can create a point cloud, you need to enable their view as they are disabled by default:
| 1. | Hover the mouse over the 3D viewport and press O to open the Viewport Options panel. |
| 2. | Click the Visibility sub-tab and enable the Show Vertices option. |
You can then draw individual vertices using the Vertex tool or create geometry using a primitive tool, such as the Sphere, and then use the Remove command to eliminate all the edges and polygons, leaving only vertices behind. Then you can use the deform tools to push and pull vertices into position. The Jitter function is also a great way to further randomize the point source. Point Clouds can procedurally create a volume of particles that are assigned as point sources in the same way as any other mesh layer in the Replicator Item.
More Randomness
Sometimes randomizing the point source itself isn't desirable or viable. Modo has another option to randomize placement called a Surface Particle Generator, which randomly places points all over the surface of a target item, where the orientation of each particle is dependent on the underlying surface where it is placed. In order to take advantage of a surface particle generator, you can add one manually in the Items list.
| 1. | Click Add Item > Particle > Point Clouds > Surface Particle Generator. |
| 2. | In the surface particle Properties panel, assign the item to place the particles upon by specifying it as the target item under the Source Surface option. |
If the resulting particle should be further limited to a specific area of the target item, the Material Tag option allows the selection of a Material associated with the item, allowing for further confinement of the generated surface particles.
| 3. | Once the particles are defined, assign the surface particle generator as the point source in the Replicator's Properties tab to produce the intended result. |
To create a surface generator automatically, right-click on the Replicator item in the Items list and select Scatter Replicas from the contextual menu. Once defined, you can adjust the settings of the surface particle generator item to refine the placement of the objects. Further, the density, normal facing direction and size can be controlled for surface particle items using texture layers of the Shader Tree, by setting the appropriate effect.
You can assign randomized surface particles using the Shader Tree. This can be in cases where the Shader Tree is used for displacement, and the evaluation of the surface particles needs to take this into account (a surface particle generator doesn't take displacement on a surface into account). In these cases, using a Shader Tree Surface Generator is the preferred particle generation method. This adds a few benefits as well, since surface generators are Shader Tree-aware, meaning you can mask them with Group Items assign other Shader Tree effects to them. The surface generator can be added to the Shader Tree using the Add Layer function and then specified as the Point Source in the Replicator's Properties. Adjustments to its many attributes in the Properties panel further refine the placement of the replicas. For more information on adding and working with Shader Tree layers, see Shader Tree.
Controlling Placement
Sometimes you need specific control over the placement of replicated items. When using texture layers in the Shader Tree is not accurate enough for the intended purpose, you can draw individual points using the Vertex tool, and generate the points directly on a surface using the background constraint.
| 1. | Create a new Mesh Item layer and then specify that as the point source in the Replicator's Properties panel. |
| 2. | Draw the vertices with the tool active. Remember to hold Ctrl to draw additional vertex points while the tool is active. |
If there is also a need to control the orientation and scale of the Replicator's, a vertex transform map allows that.
| 3. | Once the map is assigned to the layer with the named Vertex Map and target particle selected, activate the Scale or Rotate tools to apply the transformation to the replicated element. |
You can only see the results of the vertex transform map when a Replicator is assigned to the target point source.
Particles and Simulations
Modo offers a complete particle dynamics system. Particles are just points, and any particle simulated can be assigned as a point source in a Replicator, providing for a virtually unlimited number of uses. Particle simulations work in their basic form by starting with adding a Particle Simulation item and then creating an emitter, a radial emitter being the easiest to work with (for more information, see Particle Emitters). Next, by assigning the particle simulation item as the point source in the Replicator, the source mesh now animates along with the simulated particles. There are much more options related to particle simulations than can be covered here, so for more information regarding working with particles and simulations, see Particles and Simulations.
Working with Groups
Another way you can make your scene more realistic when using Replicators is to replicate more than a single mesh. This can be done easily by collecting multiple elements into a group and the Replicator then randomly grabs members of the group when placing individual clones. Not to be confused with items parented to a Group Locator Item.
To create a group, follow these steps:
| 1. | Open the Groups Viewport on the right side of the screen and the select all the Mesh Item layers you wish to add to the group. |
| 2. | Within the Groups viewport, click the New Group button and define a new group. |
The opening dialog allows you to enter a name for the group with an option to make all selected items members of the named group.
| 3. | Press OK to create the group and add the selected items. |
Once the group is created, define the named group as the prototype source in the Replicator itself. Modo then randomly grabs one of the items specified in the group for each replica. This method works great for applying rocks and plants to an outdoor scene, or trees to a forest scene.
Tip: You can control the percentage that a group member is used by cloning the elements. For example, if the Group contains nine red spheres and one blue cube, the blue cube only appears approximately 10% of the time across the surface.
Animating with Replicators
You can also replicate animated items. These animations can be either through keyframes or deformers. To specify an animated item as a prototype, ensure that the item layers are properly set up as a hierarchy, and then specify the topmost parent item as the prototype in the Replicator. After this, enable the Include Child Items option to replicate all items in the hierarchy. To add additional randomization, you can use the Time Offset and Random Time Variation options.
In order to animate the Replicator itself, you can animate the settings of the Replicator and/or surface generator, or animate the point source directly. You can apply normal keyframed position and rotation transforms to the point source, but scaling also affects the replicas. In order to scale the point source properly, you need to add a morph to the item and then animate the morph over time. Please see Morph Influence for more on applying and animating a morph.
Billboards
Sometimes it can be handy to use flat polygon planes to clone an image map with a Replicator, maybe used as a forest of distant trees. Using a single polygon, assign the image map to the polygon face and then use that mesh layer as the prototype and assign the point source. To keep the planes from rotating away from the camera, giving away their flat nature, you can assign the Look-At particle modifier, keeping the faces oriented toward the current render camera item. To assign this option, select the Replicator item in the Items list and in the menu bar, click Items > Replicators > Replicator Face Camera. This assigns an additional deformer to the scene, keeping the replicas oriented correctly. Although, it may be necessary to make sure the original flat plane is facing toward the correct front direction (Z+); use the Front viewport projection type to ensure the correct orientation.
Freezing & Replicators
Replicators work well if you intend to keep your geometry within Modo, however, you may need to export geometry to an external application, or possibly you just need absolute control over the placement of a few individual clones. For such cases, Modo offers the ability to freeze Replicators and their associated particle generators, converting them to Mesh Items with only vertices. The following freeze commands are found in the menu bar under Items > Replicators
Freeze Replicator: This command converts the selected Replicator Item into a series of individual Instances that all reference the original Replicator prototype. The resulting instances all become children under a Group Locator folder in the Items List. Each instance has its own transform values for editing individual elements.
Freeze Surface Generator: This converts the procedurally generated Shader Tree Surface Generator points into a Mesh Item layer containing individual vertices for each point. Resulting vertices can be modified with any modeling tools, or edited with the particle paint tools. For more information on these tools, see Using Particle Tools.
Freeze Particle Generator: This converts the procedurally generated Surface Particle Generator points into a Mesh Item layer containing individual vertices for each point. Resulting vertices can be modified with any modeling tools, or edited with the particle paint tools.
Sorry you didn't find this helpful
Why wasn't this helpful? (check all that apply)
Thanks for your feedback.
If you can't find what you're looking for or you have a workflow question, please try Foundry Support.
If you have any thoughts on how we can improve our learning content, please email the Documentation team using the button below.
Thanks for taking time to give us feedback.