Search is based on keyword.
Ex: "Procedures"
Do not search with natural language
Ex: "How do I write a new procedure?"
Spikey

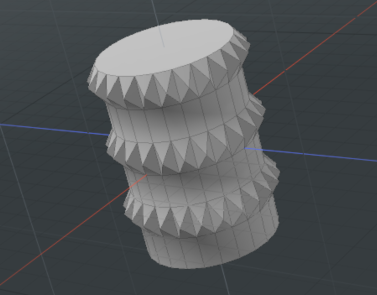
The Spikey tool is a polygon tool that takes selected polygons and adds a vertex to the center of the polygon. It then repositions that vertex away from the original polygon based on the spike strength setting to create a spike. Modo creates spikes based on polygon face normals for each selected polygon.
You can access the Spikey tool by clicking the Polygon tab of the Modo Tools toolbar.
You can work with the Spikey tool interactively in the viewport, or you can adjust options in the tool's Properties panel and click Apply.
Procedural Spike
The Spike mesh operation is the procedural equivalent of the Spikey tool.
Tip: For more information on procedural modeling and mesh operations, see Procedural Modeling.
| 1. | In Polygon selection mode, select the required polygons on your mesh in the 3D viewport. |
| 2. | On the right panel, click the Mesh Ops tab. |
Note: If you're working in a layout where the Mesh Ops tab is not visible by default, click the + button on the right of the tab names, and select Data Lists > Mesh Ops.
| 3. | Click the Add Operator button, and under Mesh Operations > Polygon, double-click Spike. |
This adds vertices to the center of each selected polygon. The Spike mesh operation is added to the Mesh Operations list on the right, and its properties are displayed in the lower right panel.
| 4. | Adjust the Spike Strength property to make the polygons protrude. |
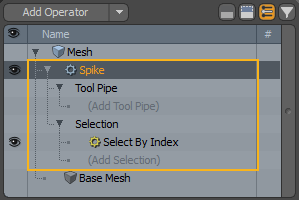
You can expand the Spike mesh operation in the list by clicking the arrow ![]() in front of it. This reveals the inputs the operation uses:
in front of it. This reveals the inputs the operation uses:

• Tool Pipe - Add falloffs and sub-tools to the operation.
• Selection - Select polygons or modify your existing selection. For more information on procedural selection, see Procedural Selection.
Spike in the Schematic
You can also use the Spike tool when working in the Schematic viewport.
Note: For more information on working with Schematic viewport in general, see Schematic Viewport.
To open the Schematic viewport:
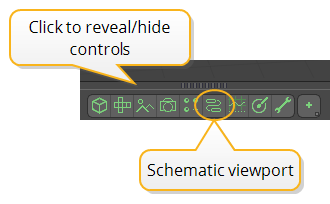
• In the Modo layout, click the thin gray line below the 3D viewport, and click the Schematic viewport ![]() button.
button.

OR
• Switch to the Setup layout from the menu bar by clicking Layout > Layouts > Setup.
To use the Spike node:
| 1. | Click Add..., and under Mesh Operations > Polygon, double-click Spike. |
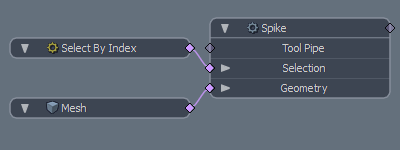
This adds the Spike node to the viewport and opens its properties on the lower right panel.

The node has the following inputs:
• Tool Pipe - Add falloffs and sub-tools to the operation.
• Selection - Select polygons or modify your existing selection.
• Geometry - Any geometry that is affected by the tool.
| 2. | Adjust the Spike Strength property to make the polygons protrude. |
Sorry you didn't find this helpful
Why wasn't this helpful? (check all that apply)
Thanks for your feedback.
If you can't find what you're looking for or you have a workflow question, please try Foundry Support.
If you have any thoughts on how we can improve our learning content, please email the Documentation team using the button below.
Thanks for taking time to give us feedback.