Search is based on keyword.
Ex: "Procedures"
Do not search with natural language
Ex: "How do I write a new procedure?"
AxF Material
AxF (Appearance Exchange Format) is a file format for exchanging digital material appearance developed by X-Rite. Modo supports the import of a subset of AxF materials and shader variants, allowing you to get full quality materials on your surfaces when using the AxF material.
Note: AxF Materials are supported by the mPath and Default renderers.
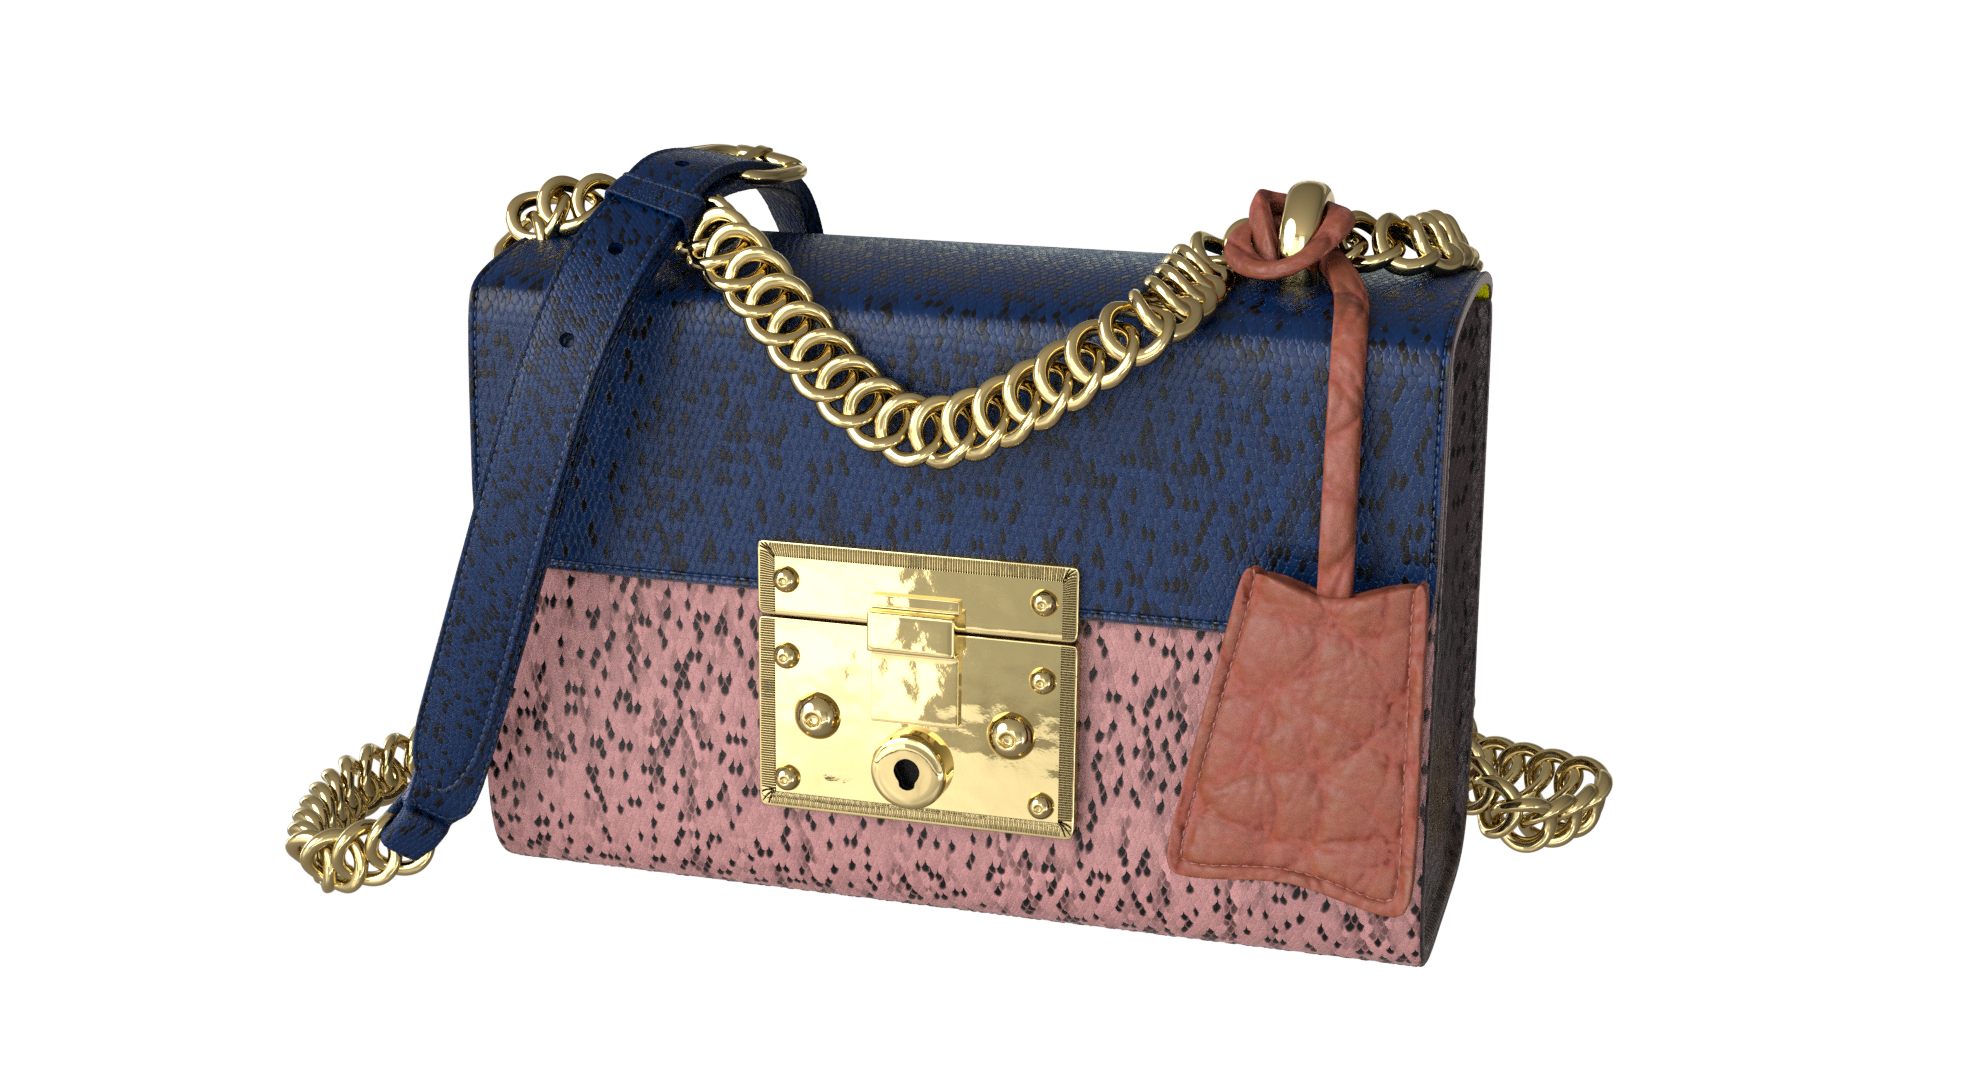
Handbag with AxF materials from the X-Rite sample library rendered using the mPath renderer.
Supported File Format Versions
Modo supports AxF versions 1.0, 1.1, 1.4, and 1.5 of the SVBRDF material type.
Supported Texture Effects
• Base Color
• Normal
• Specular Color
• Specular Lobe
• Anisotropy Rotation
• Fresnel
• Clearcoat IOR
• Clearcoat Normal
• Alpha (Transparency)
• Height (Displacement)
Supported Shading Variant
• Lambert Diffuse Shading
• GGX Specular Shading
Importing AxF Materials
To import an AxF material, you can drag and drop it into Modo from your file browser.
Alternatively:
| 1. | In the menu bar, click File > Import. |
| 2. | In the file browser, navigate to your file and click Open. |
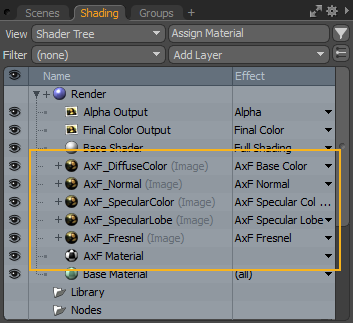
The material is added to the Shader Tree.

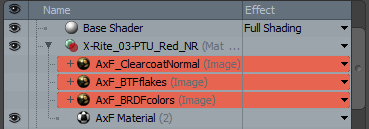
Expand the material by clicking the arrow in front of it to reveal its components.
Note: You may need to move the components out of the material folder to make the effect visible on your mesh.
Modo supports versions 1.0, 1.1, 1.4, and 1.5 of AxF materials. Other versions may contain components that Modo doesn't recognize. If a component is not supported by Modo, it is marked with red in the Shader Tree and its effect does not influence the material.
To assign an imported AxF material to your item or part:
| 1. | Select the item, or use Polygons selection mode to select the required polygons. |
| 2. | Press the M key. |
| 3. | Alternatively, click Assign Material in the Shader Tree. |
This opens the Polygon Set Material dialog.
| 4. | Select the material you imported in the Name dropdown. |
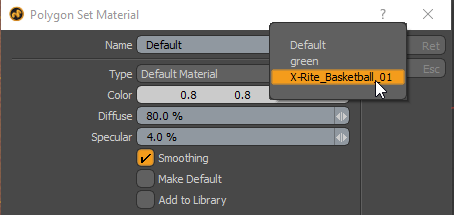
The material is assigned to your selection.

Note: For more information on assigning materials, see Assigning Material Tags.
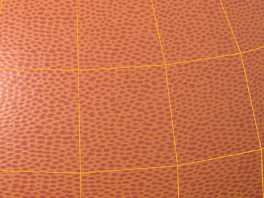
You can achieve different texture effects using the Horizontal Wrap and Vertical Wrap settings in the Texture Locator properties:
| 1. | Expand the AxF material group by clicking the arrow in front of it. |
| 2. | Select all materials within the group. |
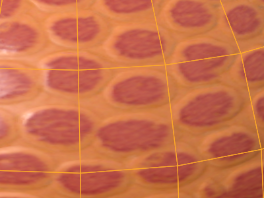
| 3. | In the Properties panel, click the Texture Locator tab and edit the Horizontal Wrap and Vertical Wrap values. |
The texture is updated with the new settings.
|
|
|
|
Horizontal/Vertical Wrap of 1.0 |
Horizontal/Vertical Wrap of 10.0 |
Creating an AxF Material
To create an AxF material, in the Shader Tree, click Add Layer > Custom Materials > AxF Material. The material is added to the Shader Tree and the layer's Properties panel displays.
Applying an AxF file to an AxF Material
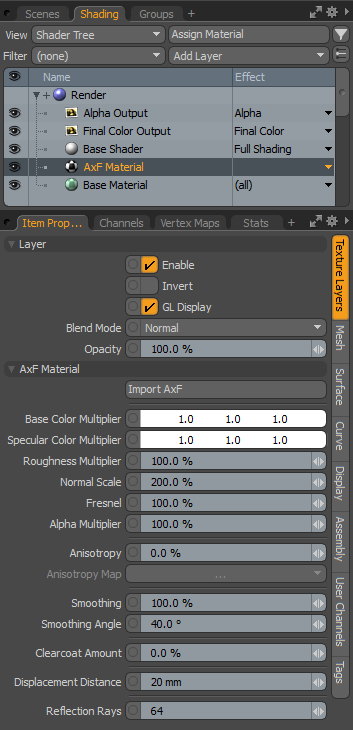
Once you've added an AxF material, you can import AxF files and apply them to the material in the Properties tab.
| 1. | Select the AxF Material in the Shader Tree and go to the Properties tab in the lower right panel. |
The Properties tab is populated with the material's properties.
| 2. | Click the Import AxF button. |
This opens a file browser.
| 3. | Navigate to the .axf file you want to import, then click Open. |
The file is loaded into Modo and applied to the selected AxF Material.
AxF Material Properties
|
Enable |
Toggles the effect of the layer on and off, duplicating the functionality of toggling visibility in the Shader Tree. When disabled, the layer has no effect on the shading of the scene. However, disabled layers are saved with the scene and are persistent across Modo sessions. |
|
Invert |
Inverts the RGB values for the layer producing a negative effect. |
|
GL Display |
Toggles the display of textures in the Camera view to improve readability and performance when working on complex scenes. When this option is disabled, textures are displayed in the Preview Viewport but not in the Camera view. For more information, see Camera Items. |
|
Affects blending between different layers of the same effect type, allowing you to stack several layers for different effects. For more on blending, see Layer Blend Modes. |
|
|
Changes the transparency of the current layer. Reducing this value increasingly reveals lower layers in the Shader Tree if present, or dims the effect of the layer itself on the surface. Note: This property does not function, because AxF Opacity is not yet supported by Modo. Currently, a value above 50% is opaque, and a value of 50% or below makes the layer invisible. |
|
|
Import AxF |
Click this button to load an AxF file and apply it to the selected AxF material. For more information, see Applying an AxF file to an AxF Material. |
|
Base Color Multiplier |
Defines an RGB value for the material's base color that is applied to the surface. When Base Color textures are applied, this parameter acts as a multiplier to the final blended texture values. |
|
Specular Color Multiplier |
Defines an RGB value that tints the specular highlight. When Specular Color textures are applied, this parameter acts as a multiplier to the final blended texture values. |
|
Roughness Multiplier |
Surfaces can be very different from each other, such as a rubber ball, a plastic cup, or a terracotta brick. These are all seemingly smooth surfaces, but on a microscopic scale their surfaces are very different. The microscopic surface variations have a direct effect on the way the light reflects off of each surface. The Roughness setting simulates these microscopic differences making surfaces appear more dull or rough, or shiny and smooth. It also affects both the specular highlight as well as ray traced and environmental reflections. When Roughness textures are applied, this parameter acts as a multiplier to the final blended texture values. |
|
Normal Scale |
Changes the normal vector on the surface affected by the AxF material to accentuate or mask surface distortions generated by the AxF normal texture effect. |
|
Fresnel |
At glancing angles (any surface that is near-perpendicular to the direction the camera is facing) many types of surfaces increase their reflectance values. The Fresnel setting increases the specular amount at these glancing angles to produce a physically plausible result. |
|
Alpha Multiplier |
Specifies the surface transparency. When Alpha textures are applied, this parameter acts as a multiplier to the final blended texture values. |
|
Anisotropy |
Millions of microscopic scratches on a surface distort highlights and reflections over their surface parallel to the directions of the scratches. The Anisotropy value affects the highlights, simulating this effect. Anisotropy is controlled by a UV map or further controlled by texture maps when the layer's effect is set to Anisotropy Direction. It can be caused by many man-made processes, such as machining metal and also appears in textiles where shiny threads spread the highlight over a surface. |
|
Anisotropy Map |
The UV map dropdown allows you to choose which map determines the anisotropic direction. The U direction (horizontal) defines the direction of the virtual scratches for positive Anisotropy values. |
|
Smoothing |
A shading technique giving the illusion that geometry has more detail than it actually does. Without smoothing, geometric faces can appear faceted or flat. The Smoothing amount is set as a percentage so that you have the flexibility to fade in the smoothing amount, or even drive it above 100% or below 0% to create interesting effects. Note: At values over 100%, the smoothing effect results in pillowing around each polygon. |
|
Smoothing Angle |
Determines which faces should receive smoothing. It sets a maximum angle tolerance between two polygons based on their normals. If the angle between the polygons is greater than the smoothing angle, no smoothing occurs. This is useful so that hard edges, such as cubes, are not smoothed across. The default value of 40° is a good general case value. |
|
Reflection Rays |
This property refers to baking with F9 or Preview render. Specifies the number of rays used for sampling reflection. A higher number of rays produces better rendering quality, but increases render time. |
Sorry you didn't find this helpful
Why wasn't this helpful? (check all that apply)
Thanks for your feedback.
If you can't find what you're looking for or you have a workflow question, please try Foundry Support.
If you have any thoughts on how we can improve our learning content, please email the Documentation team using the button below.
Thanks for taking time to give us feedback.