Search is based on keyword.
Ex: "Procedures"
Do not search with natural language
Ex: "How do I write a new procedure?"
Terminator
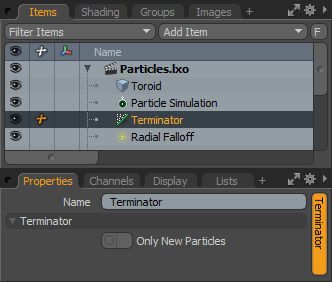
The terminator item is a filter that works in conjunction with a falloff to generate specific areas where a particle gets destroyed.
Usage
The main particle controls are found in the Particles sub-tab of the Setup interface's toolbox. Before adding a terminator, add a particle simulation on which the item can operate.
To add a terminator item, follow the steps below:
| 1. | Select the particle simulation in the Items list and click the Terminator button in the toolbox. Alternatively, in the Items list, click Add Item, and under Particles > Simulation, double-click Terminator. |
| 2. | Add a falloff by clicking Add Falloff at the bottom of the toolbox, or in the Items list in Add Item > Falloffs. The type of falloff depends on the effect you need. |
Once all the items are created, drag and drop them to the Schematic viewport and connect them appropriately. This is demonstrated below with a basic particle simulation. For more information of working with the Schematic viewport, see Schematic Viewport.

|
Option |
Description |
|---|---|
|
Name |
Displays the current item name. To change it, click on the field and type in the new name. |
|
Terminator |
|
|
Only New Particles |
When enabled, only newly generated particles are affected by the terminator. |
Sorry you didn't find this helpful
Why wasn't this helpful? (check all that apply)
Thanks for your feedback.
If you can't find what you're looking for or you have a workflow question, please try Foundry Support.
If you have any thoughts on how we can improve our learning content, please email the Documentation team using the button below.
Thanks for taking time to give us feedback.
