Installing on Mac
After installation, Modo is run from either desktop icons, the Finder, or from the Terminal using arguments.
Modo System Requirements
Qualified Operating Systems
• macOS 10.13.x, and 10.14.x, 10.15.x (64-bit only)
Note: Other operating systems may work with Modo, but have not been fully tested. If you have any problems with a particular operating system, please contact our support team.
Other System Requirements
• Macintosh with Intel Xeon/Core i5 or i7 processor or better.
• 1 GB available hard disk space (for Modo installation).
• 6 GB available hard disk space (for full content).
Core set of content: Basic sets of assemblies, aliases, brushes, colors, Matcaps, basic and sculpting meshes, profiles, paint and sculpt tools, and image links are provided with the application install. The Preset Browsers now virtually merge these built-in presets with those installed externally or saved/created by the user into a single hierarchy for ease of use.
• 2 GB of RAM.
• Accelerated Video Graphics adapter with OpenGL support capable of minimum 1280 x 800 resolution.
• For the AMD Denoisers and ProRender, we recommend using the latest AMD drivers.
• For the Intel Denoisers, we recommend using the latest Intel drivers.
Note: OpenCL is no longer supported on macOS, ensure you have a GPU that supports Metal.
• Mouse or compatible pointing device (pressure sensitive tablets supported or 3DCONNEXION 3D mouse).
• Internet connection required for product activation and access to online videos.
• Current web browser application necessary to view the Online Help.
Recommended Configuration
Article: To see hardware recommendations for all Foundry products, see Hardware recommendations for all our products.
• Mac OS X 10.13.x, or later.
• Macintosh with Intel processor.
• Accelerated Video Graphics adapter with 512MB of VRAM and OpenGL support with fragment shader support.
• 4 GB or more of system RAM.
Installing Modo on Mac
To install Modo on Mac:
• Installing Modo with the User Interface (UI), or
• Installing Modo from the Terminal.
Installing Modo with the User Interface (UI)
To install Modo using the default UI, do the following:
| 1. | Download the correct .pkg installation file from our website at www.foundry.com. |
The file is saved to your preferred download location.
| 2. | Double-click on the .pkg file to start the installation. |
| 3. | Follow the on-screen instructions in the Modo setup dialog. |
| 4. | At Installation Type, either click Install to start a standard install, or click Customize to modify the components installed. |
Clicking Customize reveals a list of the packages you can disable. By default, everything is installed.
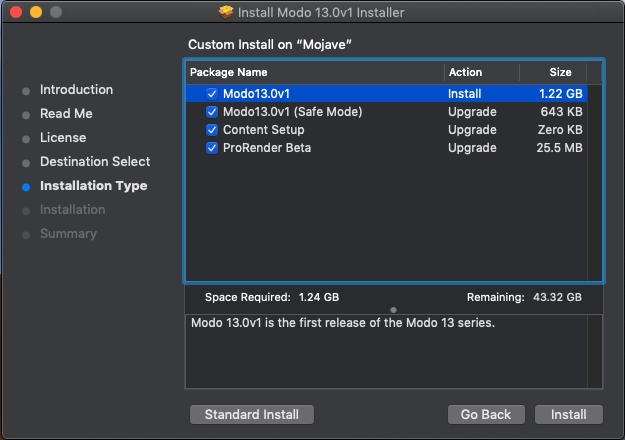
| 5. | Click Install. |
Modo is installed to the Applications folder, and Content Setup and ProRender are installed to /Library/Application Support/Luxology by default. Once installed, you can move it to any other location on your computer.
Note: If you move the Content folder to another location after the install, you need to update the location in the Modo Preferences, under Defaults > Application > Preset Browser > Content Location. For more information, see Defaults Preferences.
| 6. | Close the dialog and proceed to Launching Modo on Mac. |
Installing Modo from the Terminal
To install Modo from the Terminal, do the following:
| 1. | Download the correct .pkg installation file from our website at www.foundry.com. |
The .pkg is installed to your preferred download location.
| 2. | Launch a Terminal window. |
| 3. | To mount the .pkg installation file, use the sudo installer command with the directory where you saved the installation file. For example, if you saved the installation file in Downloads, use the following command: |
sudo installer -pkg /Users/user1/Downloads/Modo13.0v1_macOS.pkg -target /
Modo is installed to the Applications folder, and Content Setup and ProRender are installed to /Library/Application Support/Luxology by default. Once installed, you can move them to any other location on your computer.
Note: If you move the Content folder to another location after the install, you need to update the location in the Modo Preferences, under Defaults > Application > Preset Browser > Content Location. For more information, see Defaults Preferences.
| 4. | Close the dialog and proceed to Launching Modo on Mac. |
Article: For information on installing .lpk files commonly used by kits designed for Modo, see Q100339: How to manually install .lpk files on OSX.
Launching Modo on Mac
To launch Modo on Mac OS X, do one of the following:
• Click the Modo icon in the Applications folder.
• Double-click the Modo dock icon.
• Using the Terminal, navigate to the Modo /Applications directory and enter modo.app to launch Modo.
If you already have a valid license, the graphical interface appears. If you don't have a license, or haven't installed one yet, the Licensing dialog appears on start up.
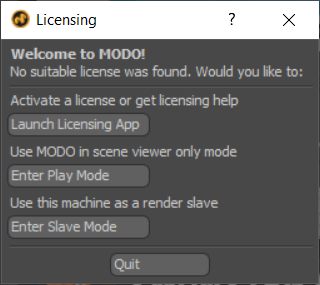
Launch Licensing App
Clicking this button opens the Licensing app where you can manage your licenses and run diagnostic tools.
For more information on how to license Modo, refer to Licensing Modo on Mac .
Running in Play Mode
Play mode places Modo in a special state where it acts as a scene viewer. In this state the interfaces are mostly disabled, but it allows you to load scenes and render and save them, both in Preview and using F9; opening the Render Display window.
One unique function of Play mode is its ability to detect scene changes and auto-reload the scene. What this means is any scene opened from over a network and previewed, when updated on another system, saves files to the scene file, reloads the scene on the networked system and updates the preview viewport. This allows the secondary system to act as a dedicated preview system without the need for a second license.
Running in Slave Mode
Slave mode is related to network rendering and places Modo in a state where other Modo installations can control its renderer. For information on how to set up Network Rendering, please reference the Network Rendering page.
Updates and Statistics
When Modo launches for the first time with a valid license, you are presented with a dialog, which enables you to set preferences to check for updates and to submit usage statistics.
Updates
Get the latest reminders to update Modo. You can have Modo automatically check for updates on every launch, daily or weekly. By default, this preference is set to Every Launch.
Usage Statistics
To help improve the quality of Modo, you can agree to submit usage data to the Modo Development team. These statistics are submitted anonymously and include details on the build number run, the system platform, the application active and idle times, and whether sessions exit successfully or not. In the event of a crash, the most recently executed commands are also submitted.
Note: Graphics card information is not submitted.
Tip: To reset your settings, open System > Preferences, expand Defaults > Application and reset the options for the following:
Automatically Check for Updates
Automatically Submit Usage Statistics
The following settings are available: Never, Every Launch, Daily, or Weekly.
Article: You can disable the Alert dialog in the Form Editor. For details on how to do this, see Q100345: How to disable all new Alert dialog boxes for the Modo 11 series onward.
Run in Safe Mode
In the unlikely event of a crash, you can run Modo in Safe Mode to help us determine what is causing the problem. When Modo runs in Safe Mode, it doesn't load any third-party plug-ins, kits, or user customizations and only runs using the contents of the Modo install directory. Safe Mode is primarily used for debugging purposes. When running in Safe Mode, a pristine configuration file is used.
Note: When exiting Safe Mode, your existing configuration file (com.luxology.modo14.1) is not overwritten.
A backup of configuration file is created at shutdown, when changes are saved. This backup file can be renamed to restore the previous state if configuration changes cause issues. When a corrupt configuration is detected, it is renamed, instead of deleted, which allows you to recover data from corrupted configuration file.
Save your configuration file and submit it to Support for debugging. Your configuration file is stored in the /Users/qa/Library/Preferences/ folder.
To run in Safe Mode:
• Open Applications > Modo, and double-click Modo14.1v2 (Safe Mode).
Note: If you have installed the Modo application in another folder, launch the Modo14.1v2 (Safe Mode) shortcut from that folder.
If Modo successfully launches in Safe Mode, click File > Config Save to overwrite your existing configuration file that was causing Modo to crash.
Licensing Modo on Mac
The following licensing methods are available:
• Log-in Licenses - log-in licensing differs from traditional node locked or floating licenses in that a single license, available as a maintenance or subscription entitlement, is valid on any activated device up to the license's maximum number of activations.
Note: Log-in licenses for Modo plug-ins Power Translators and Power Sub-D to NURBS are added alongside your Modo log-in license entitlements. If you install one of these plug-ins when the device is already authorized, please go to Help > Modo Licensing > Advanced > Deauthorise this device, and then log-in again in order to display plug-in licenses. All of your entitlements are added together.
• Activation Keys - activation keys allow you to activate and generate your actual product license key, at a later point after purchase, on the machine for which you require the license. They are provided for both node locked and floating license, and generate the appropriate license type once installed using the product's Licensing dialog or online using the Activate a Product page:
https://www.foundry.com/licensing/activate-product
• Node Locked Licenses - these can be used to license an application on a single machine. They do not work on different machines and if you need them to, you’ll have to transfer your license.
Node locked licenses, sometimes called uncounted licenses, do not require additional licensing software to be installed.
• Floating Licenses - also known as counted licenses, enable applications to work on any networked client machine. The floating license is put on the server and is locked to a unique number on that server.
Floating licenses on a server requires additional software to be installed on the server to manage the licenses and give them out to the client stations that want them. This software is called Foundry Licensing Tools (FLT) and can be downloaded at no extra cost from our website.
These instructions run through the basic options for both licensing methods, but you can find a more detailed description in the Foundry Licensing Tools (FLT) User Guide available on our website:
https://www.foundry.com/licensing
Note: If you are simply installing render nodes on a networked system, no license is required for Modo. Modo can also be run in Play mode to load scenes, navigate the viewport to look at them, and to render them (stills or animations). This allows you to render scenes on one system while continuing to work on another using your license. Play mode is available in the licensing dialog by clicking Enter Play Mode. For more information, see Running in Play Mode.
In all other instances, you need to have a license or a trial version of Modo.
To Install a Log-in License
Log-in licensing differs from traditional node locked or floating licenses in that a single license, available as a maintenance or subscription entitlement, is valid on any activated device up to the license's maximum number of activations.
• A Subscription represents the right to run a Foundry product for a set amount of time on a set number of devices.
• An Activated Device is a recognized device, such as a desktop computer, on which subscriptions can be activated.
For example, if a subscription for Modo has five activations, you can use Modo on five separate devices simultaneously. If you want to activate another device, you have to deactivate an existing one, but you can activate and deactivate devices as often as you like.
Log-in licenses require that you connect to the internet at least every 30 days to extend your activation.
To activate your license, follow these steps:
| 1. | Create a Foundry account using a valid email address on our website. |
| 2. | Launch Modo using any of the methods described in Launching Modo on Mac. |
The Licensing dialog displays.
| 3. | Click Launch Licensing App. |
License information and log-in details are displayed.
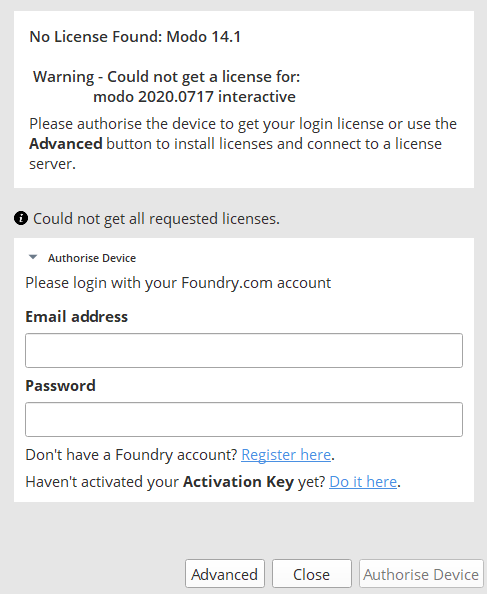
| 4. | Enter your account email address and password and click Authorise Device. |
A license is created in your home directory: /Users/<username>/FoundryLicensing/<SystemID>
Note: Replace <username> and <SystemID> with the current user and the MAC address of the device, respectively.
The license looks something like this: c58edf7e-17ab-435b-8d8a-b3a9b347ab11.lic
| 5. | Once the license is installed, click Run MODO to start using Modo. |
Note: A license is activated for a period of 38 days. Make sure that you connect to the internet once during the activation period to extend your access. You can check the activation period of your license in the Help > Modo Licensing menu.
| 6. | If you need to deactivate your license on the current machine, navigate to Help > Modo Licensing, click Advanced and then Deauthorise this device. |
Obtaining Legacy Licenses
To obtain a legacy license, you'll need your machine's System ID (sometimes called Host ID or rlmhostid). Just so you know what a System ID number looks like, here’s an example: 000ea641d7a1.
Bear in mind that, for floating licenses, you'll need the System ID of the license server, not the machines on which you intend to run the application. There are a number of ways you can find out your machine's System ID:
• Download the Foundry License Utility (FLU) from https://www.foundry.com/licensing and run it. Click System ID to display it on screen.
When you know your System ID, you can request a license for Foundry products:
• from Foundry's Sales Department at sales@foundry.com
• from the product pages on our website, such as www.foundry.com/products/modo
• by launching the application without a license, clicking Launch Licensing App and then clicking Do it to activate a license key.
To Install a License from Disk
If you've copied a license to a known location on disk:
| 1. | Launch Modo using any of the methods described in Launching Modo on Mac. |
The Licensing dialog displays.
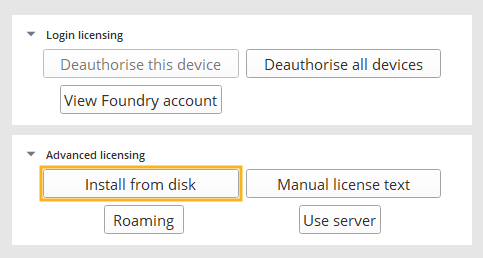
| 2. | Click Launch Licensing App and then click Advanced to display other licensing methods. |
| 3. | Click Install from disk. |
| 4. | Browse to the location of the license file. |
| 5. | Click Open to install the license automatically in the correct directory. |
Once the license is validated, Modo displays a notification dialog.
To Install a License from a Text File
| 1. | Launch Modo using any of the methods described in Launching Modo on Mac. |
The Licensing dialog displays.
| 2. | Click Launch Licensing App and then click Advanced to display other licensing methods. |
| 3. | Click Manual license text. |
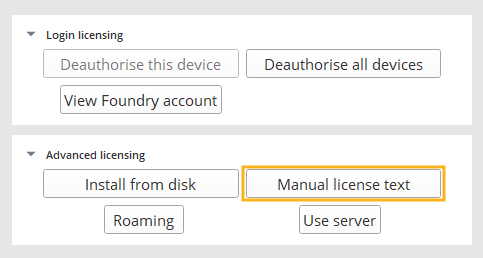
| 4. | Copy and paste the license text into the window and click Install license. |
The license is automatically installed on your machine in the correct directory.
To Install a Floating License
If you requested a floating license from Foundry, you receive your license key (foundry.lic) in an e-mail or internet download. You should also receive the Foundry License Utility (FLU) application to help you install the license key on the license server machine. The server manages licenses for the client machines on your network.
Note: The FLU is also available to download from https://www.foundry.com/licensing.
| 1. | Make sure you have saved both the license key (foundry.lic) and the FLU application in the same directory. |
| 2. | Run the FLU application. |
The license key automatically appears in the FLU window if the FLU and foundry.lic are in the same directory.
Tip: If they are not in the same directory, you can either copy and paste the contents of the license key or drag-and-drop the file into the FLU window.
| 3. | Click Install. |
This checks the license file and, provided that the license is valid, installs it into the correct directory.
| 4. | In order for the floating license to work, you will need to install the Foundry Licensing Tools (FLT) on the license server machine. |
For more information on how to install floating licenses, refer to the FLT User Guide, which you can download from our website https://www.foundry.com/licensing
| 5. | Once your license server is up and running, launch Modo on the client machine. |
The Licensing dialog displays.
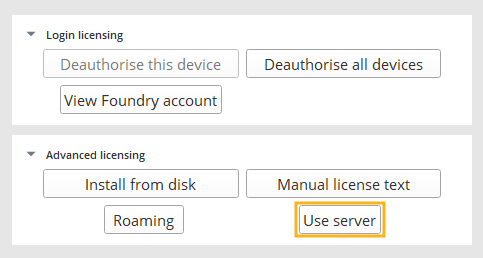
| 6. | Click Launch Licensing App and then click Advanced to display other licensing methods. |
| 7. | Click Use server and enter the server address in the field provided. The format for the server name is: <port>@<servername>, for example, 30001@red. |
Note: You must perform these steps on each client machine that requires a license from the server.
Roaming for Floating Licenses
You can check out a roaming license from the pool of floating licenses available on a server and use it offline, on the system used to check it out, for a specified number of days, up to a maximum of 30 days. After the specified time the license expires and you have to connect to the server to renew or return it.
When you claim a license to use offline, the number of licenses available on the server decreases by one until you return the license.
To start roaming:
| 1. | Make sure you're connected to your license server. |
| 2. | From the application menu bar, click Help > Modo Licensing. |
This displays the Licensing App.
| 3. | Click Advanced to display other licensing methods. |
| 4. | Click Roaming. |
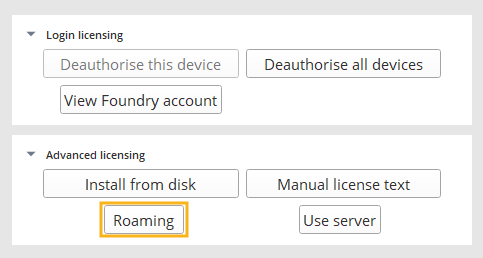
| 5. | At the bottom of the dialog, enter the number of days for which you want to check the license out, then click Roam. |
Note: The value must be between 1 and 30.
You can now run Modo offline for the specified number of days.
To return a license:
| 1. | Make sure you're connected to the license server. |
| 2. | From the application menu bar, click Help > Modo Licensing. |
This displays the Licensing App.
| 3. | Click Advanced to display other licensing methods. |
| 4. | Click Roaming and then Return Roam. |
The roamed license is ready to return.
| 5. | Click Close. |
| 6. | Close and re-open Modo for the changes to take effect. |
Deactivating a Modo License
Login-based licensing allows you to deactivate your license from one machine and then activate it on another. This gives you the flexibility to easily use your Modo Subscription or Modo with Maintenance license on different machines when or if you need to.
You can deactivate your login-based license directly in Modo or through the Foundry website.
Deactivating a License in Modo
| 1. | Launch Modo and click Help > Modo Licensing in the main menu bar. |
The Licensing dialog displays the active license installed on the machine.
| 2. | Click Advanced and then Deauthorise this device to deactivate the license and remove it from the machine. |
| 3. | Quit Modo. |
Deactivating a License on Our Website
You can also deactivate the license from your activated machine through the My Account pages on our website. This is useful if you need to use your license at home but forgot to log out of Modo at work.
| 1. | Go to the Foundry My Account - Products page and login if prompted. |
For more information about Foundry user accounts, see Getting a Foundry User Account.
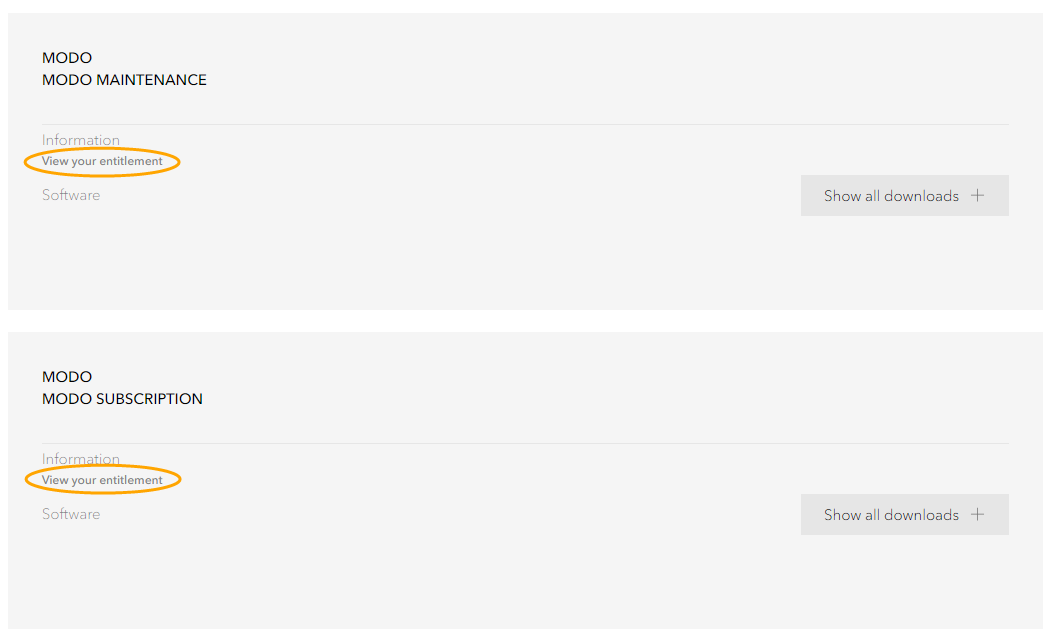
| 2. | Navigate to your Subscription or with Maintenance product and click View your entitlement. |
Tip: If you're having difficulty viewing the entitlement page log out of the website using this link, https://www.foundry.com/user/logout, and then log back in again.
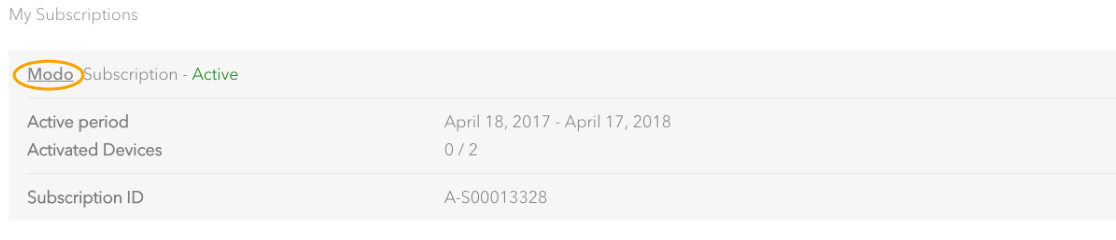
| 3. | Click Modo to see the details of your subscription. |
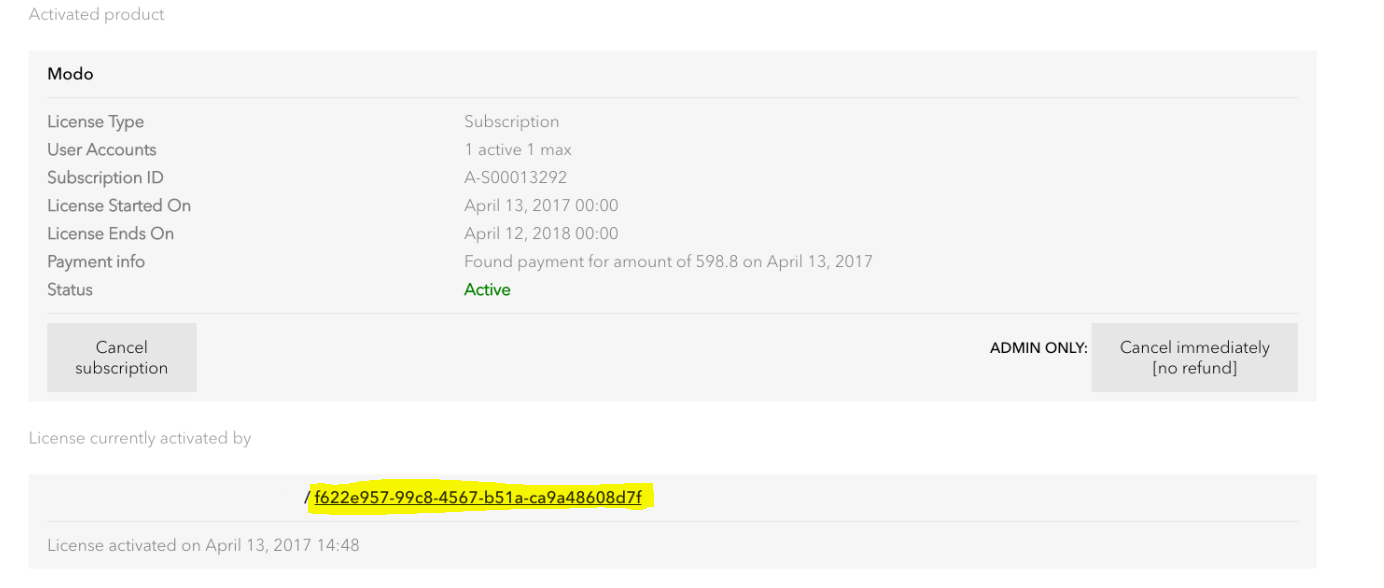
| 4. | Click on the license key under the License currently activate by section. |
| 5. | In the Activated Products section, under modo_i, click Deactivate Entitlement to remove the Modo license from that machine. |

Warning: If you click on Deactivate device, all login-based licenses (including any Nuke Non-Commercial or Mari Non-Commercial) will be removed from the machine.
Tip: For an overview of the documentation and quick access to the main topics, go to Modo Home.