Using Falloffs
In Modo, the effect any tool has upon a selected region of geometry is rigid, meaning applications of a tool happen at a constant rate across the selected range. Modo provides a way to attenuate the effect a tool has over a selection as a falloff, a gradual decrease in intensity across a defined range. Falloffs are universal in application, once activated, they are persistent until disabled, and work with all the various tools. In fact, many tools are simply pre-made combinations of a specific falloff and a transform. For example, if you add the Rotate tool to a Linear Falloff, you get a Twist tool. This is made possible using the power of the Tool Pipe.
You can define a falloff in multiple ways.
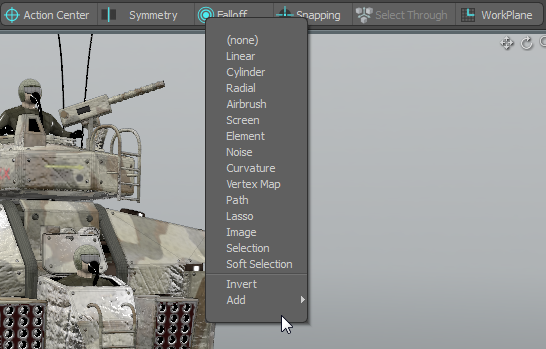
| 1. | Select one in the Falloff dropdown menu above the 3D viewport, in the Falloff selector menu, or in the menu bar under Edit > Falloff. |
The selected falloff has a checkmark next to its name to indicate its active state.
| 2. | Once you've selected a falloff, click and drag in the viewport to define the range. |
Taking its position cue from the Work Plane, the first click defines the origin or center of the falloff, and the drag action defines the size or range.
| 3. | Release the mouse button to accept the falloff. |
Any subsequent tool applications utilize the falloff until it is disabled by selecting (none) or pressing Esc.
When a falloff is active, its properties are visible in the tool's Properties panel as an adjunct to the tool's properties. Each has its own specific settings. Anytime a tool is in interactive mode, you can modify the input values and receive real-time feedback of the results. Additionally, you can adjust the tool directly in the viewport by clicking and dragging the widgets visible on the Falloff display.
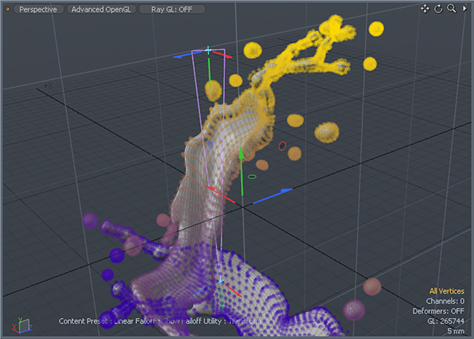
If a tool is active when setting a falloff, such as the Move or Rotate tools, the act of simply selecting the falloff type in the menu automatically scales the falloff to the bounding box size of the active selection (if nothing is selected, all geometry is affected). This functionality makes it easy to accurately apply falloffs when modeling. To better visualize the effect a falloff has over a selection, enable the Show Falloffs option in the menu bar under View > Show Falloffs. This colorizes the vertices depending on the amount of influence a falloff has over them, dark purple for no influence, transitioning toward yellow for full influence as demonstrated by the image below (with a Linear falloff on the Y axis).
Note: Commands such as Copy, Paste, or Delete are typically all or nothing type events and are therefore unaffected by falloffs.