Particle Paint Size
The particle tools (Size and Dissolve) modify particle-related attributes to give you control over settings that would be difficult to control otherwise. You can use the Particle Size function, when applied as a particle size Vertex Map, to directly control the scale of volumes and sprites on individual particles. In this case, particles can be any number of things: a mesh layer with single point vertices or a collection of single point polygons (also called point clouds). There are several ways you create a point cloud, but the most direct way is to use the Particle Paint Tool.
Note: You cannot use particle Vertex Maps to control procedural particles such as those of a Particle Cloud or a Particle Generator.
Using the Tool
The particle tools are in the Paint interface tab under the Particle Tools sub-tab of the toolbox. To use the Particle Size tool, first select the target point cloud Mesh Item layer in the Items list. You also need to create and select a particle size map in the Vertex Map list viewport. See the Working with Vertex Maps topic for information on creating Vertex Maps. Preferably, apply the volume or sprite items to the point cloud before using the Size tool because the items' viewport representations provide feedback when you apply the Size and Dissolve functions.
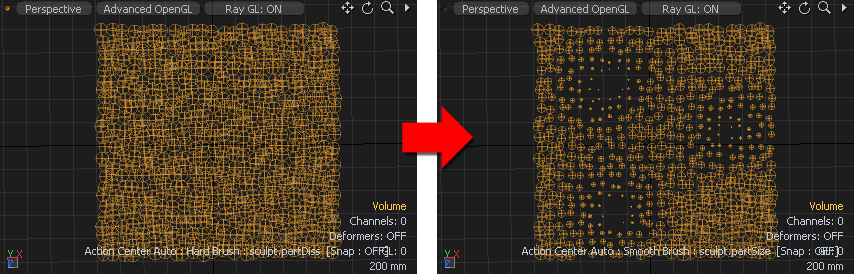
After you select the tool, its attributes appear in the Properties viewport. When you first select the tool, it has Smooth Brush as the default brush tip. You can select an alternate brush tip before proceeding or right-click in the 3D viewport to scale the brush size. Drag in the viewport to affect the particles. Pressing Ctrl negates the effects of the tool by decreasing the particle size instead of increasing it.
|
Particle: Size |
|
|---|---|
|
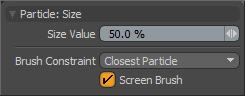
Size Value |
Controls the strength of scaling amount applied to the particles. Lower values scale the particles more slowly than higher values do. |
|
Brush Constraint |
Controls what area within the volume is affected by the brush when you paint into a volume of particles from a 2D viewport. (You can only view the 3D elements in the flat 2D space of the screen.) • Closest Particle - Affects the particle(s) closest to the viewport camera (closest to you). • Grid - Affects the particle(s) closest to the Work Plane grid. • Center Particle - Affects the particle(s) closest to the center of the volume under the brush. |
|
Particle Constraint |
When enabled, constrains each individual vertex against any foreground polygons to ensure the vertex always rests on a polygon's surface as it moves. Works in the same manner as the Constrain to Background - Point mode, but this is not dependent upon background geometry. Tip: When working with the Particle Constraint option, the constraining geometry doesn't have to be in the same layer as the point cloud. You can press Ctrl as you select additional item layers to bring them into the foreground. The edited particles conform to the foreground polygon's surface but remain within their initial layer. |
|
Screen Brush |
When enabled, flattens the particle volume so that all particles through the volume are affected by the brush regardless of how close or distant they are. When particle painting with this disabled, the volume of the brush tip in 3D space is a fixed size, and it only affects the particles within this volume (as defined by the Brush Constraint option). Particles that are further away in the volume are not affected even though the brush is passing over them. |
Tip: If you apply any Shader Tree layers defined as a Particle Size effect to the particle item, these values supersede those of the Particle Size Vertex Map.