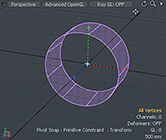
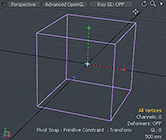
Mesh Constraints
The Mesh Constraints tools allow you to quickly apply different types of constraints on a mesh item to position geometry in a scene; Guide, Background, and Primitive. These Mesh Constraint types allow you to use visual guides to assist you in aligning mesh items in your scene, enhance curve tool handles for better transform operations, and to create a simple low polygon count model from a complex mesh.
Mesh Constraint Types
Constraints are found in the menu bar below the interface layout tabs. The Mesh Constraints button is displayed in orange when a constraint is active. Selecting any mode enables the selected constraint and its associated settings appear in the upper portion of the panel, allowing you to customize how the constraint performs. The constraint affects the modeling procedure differently, depending on the type activated.
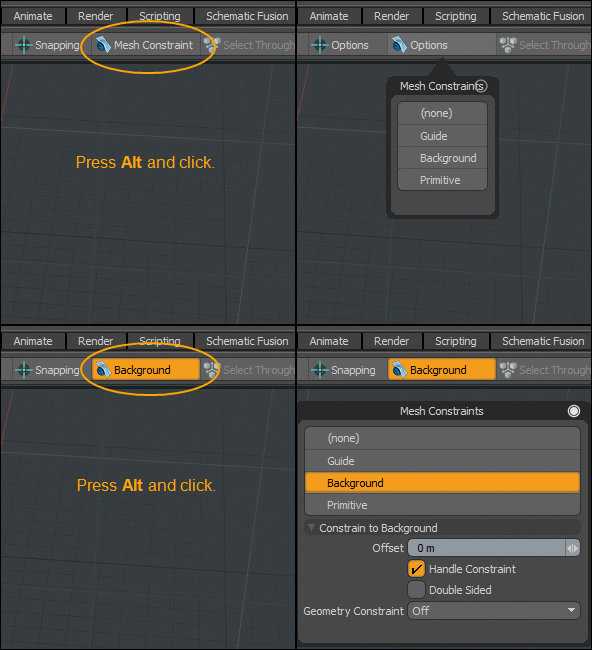
• Guide - Creates visual guide lines in the 3D viewport to use as reference or to enhance snapping.
For more information, see Constrain to Guide.
• Background - Constrains the movement or creation of objects in the foreground layer from passing through any geometry in a background layer to create an impression or the background mesh. This is useful when you have imported a complex model created in another application, such as ZBrush, and want to create a copy using less polygons.
For more information, see Constrain to Background.
For a procedural version of this tool, see Procedural Surface Constraint Tool.
• Primitive - Constrains the handles of a curve tool, such as a Tube tool, Curve, Bezier, or Pen tool, using a virtual primitive shape to position the geometry. Similar in concept to Background, however, no physical geometry needs to be present for the Primitive option.
For more information, see Constrain to Primitive.
Benefits of Using Mesh Constraints
• Define custom guide lines in the scene for visual reference or to enhance snapping.
• Add virtual primitives to a tool handle to enhance your transform actions.
• Rather than having to select each vertices and align them to the target model , the Mesh Constraint Background option automatically aligns all vertices to the surface of the mesh item onto the target model. For example, if you wanted to add a button to a jacket and have it align to the surface, use the Mesh Constraint Background option.
• Quickly create a low polygon count mesh item from a complex mesh item. Use the Background Mesh Constraint rather than applying the Automatic Retopology tool to generate a new mesh item from a complex input surface.
Activating Mesh Constraint Modes
| 1. | Below the interface layout tabs, click the Mesh Constraint button to enable the default Background constraint mode. |

| 2. | Press Alt and click Options to view the Constrain to Background options. |
The Mesh Constraints dialog opens.
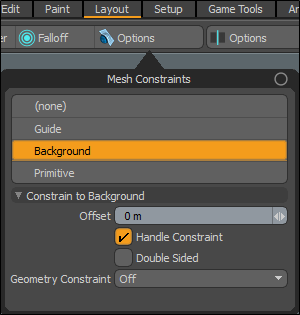
| 3. | Select one of the constraint modes: Guide, Background, or Primitive.. |
The icon button displays the name of your selected constraint mode in orange.
To disable a mesh constraint mode:
• Click the constraint button highlighted in orange to dismiss it. Alternatively, press Alt + click the Mesh Constraint button and select None from the dropdown menu.
Constrain to Background
Setting Mesh Constraints to Background constrains the movement or creation of objects in the foreground layer from passing through any geometry in a background layer. This is the most common type of constraint.
Any item layer that is visible and selected is considered a foreground layer and any layer that is visible but not selected is considered a background layer.
Tip: To see your results better, change the shading style of the mesh items in your scene by clicking the ![]() gear icon on the top right corner of the 3D viewport. Open both the Active Meshes and Inactive Meshes tabs and set the Shading Style to Shaded or Advanced. For more information, see .
gear icon on the top right corner of the 3D viewport. Open both the Active Meshes and Inactive Meshes tabs and set the Shading Style to Shaded or Advanced. For more information, see .
Background Constraint Example
The following procedure uses a Modo preset and a primitive to demonstrate how a background constraint is applied.
| 1. | Click the Preset Browser palette icon on the top left corner and double-click on a preset to add it to your scene. |
![]()
In this example we are using the Cloud Assets > Meshes > Human > Child Head 01 preset. If you have previously downloaded this cloud asset, you will find it in the Assets > Meshes > Human directory.
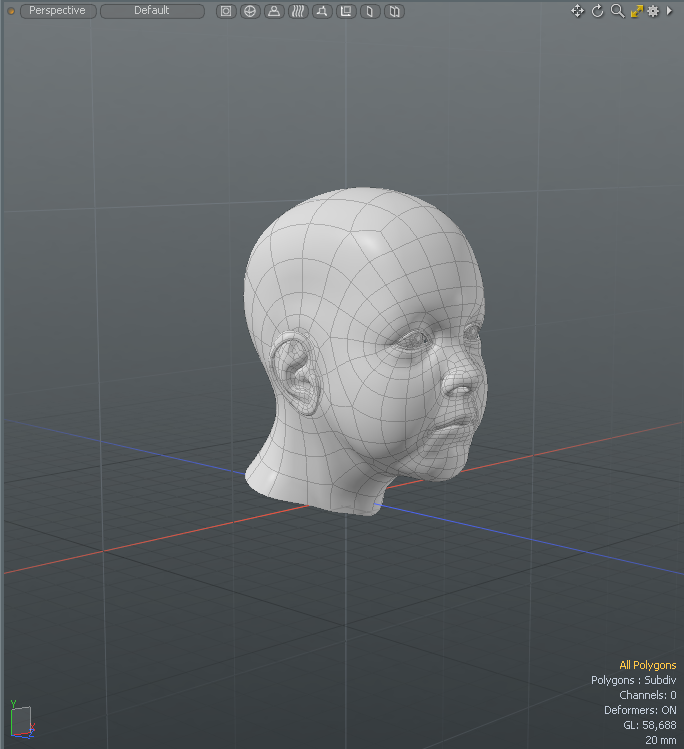
| 2. | Close the Preset Browser window. |
| 3. | On the right panel, open the Items tab, click Add Item, and select Mesh. |
Note: A foreground mesh item must be in a separate layer in the Items list. It can be placed anywhere in the Items List.
| 4. | On the left panel, open the Basic tab, click Cube, and click-and-drag in the 3D viewport to draw a plane around the preset. |
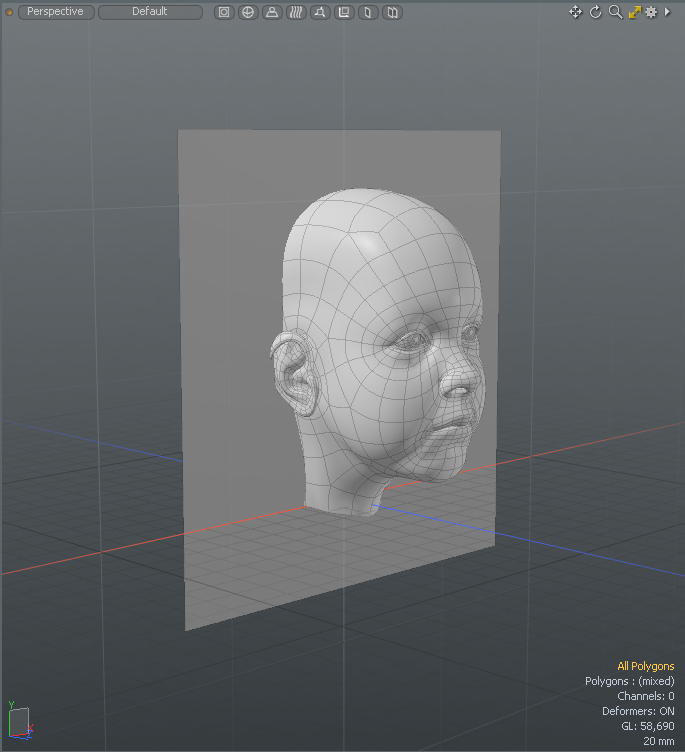
Tip: Use the move tool handles to position the plane where you want it.
| 5. | Press the spacebar to drop the move tool. |
| 6. | Under the layouts menu bar, click Polygons and double-click on the cube to select all of the polygons. |
| 7. | On the left panel, open the Mesh Edit tab. |
| 8. | Under Commands, click the Subdivide dropdown menu, and click Faceted several times. |

Tip: Subdividing the polygons a number of times provides more details for our new mesh item.
| 9. | Optional - On the right panel, open the Mesh Ops tab, click Add Operator, select Polygons > Set Polygon Type |
| 10. | Optional - Open the Set Polygon Type tab and set the Polygon Type to Catmull-Clark to get a smooth finish. |
| 11. | In the 3D viewport, press W and click-and-drag the plane to move it in front of the preset. |
Note: If snapping is on, you may have difficulties aligning the plane in front of the preset. Click the button to turn Snapping off. 
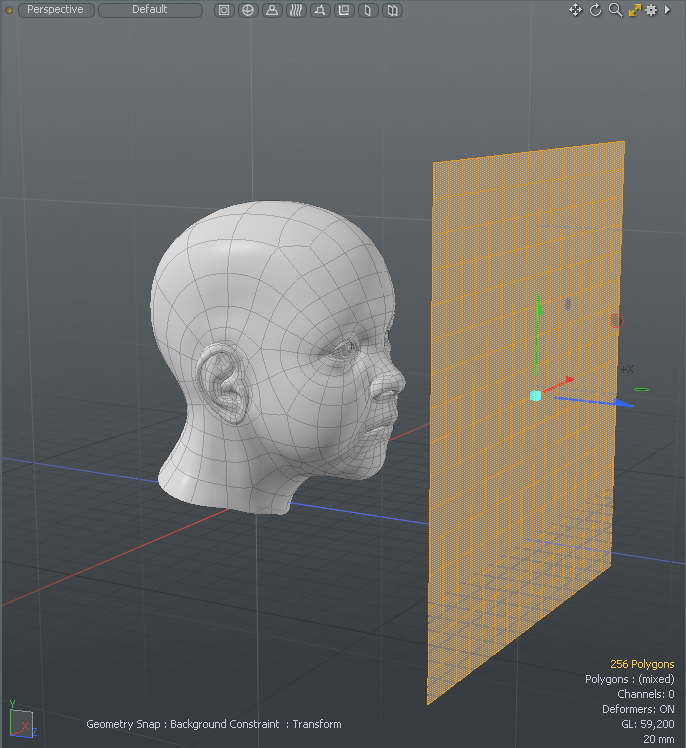
| 12. | Under the layouts menu bar, click Mesh Constraint. |
Background mode is activated and the Move tool remains active in your scene.
| 13. | On the left panel, under Constrain to Background, set Geometry Constraint to Vector. |
| 14. | Click-and-drag the plane to move the plane half way into the preset. |

| 15. | Under the layouts menu bar, click Background to disable the Mesh Constraint button. |
| 16. | Click-and-drag the plane to move the cube in front of the face. |
An imprint of the preset is created into the mesh item.

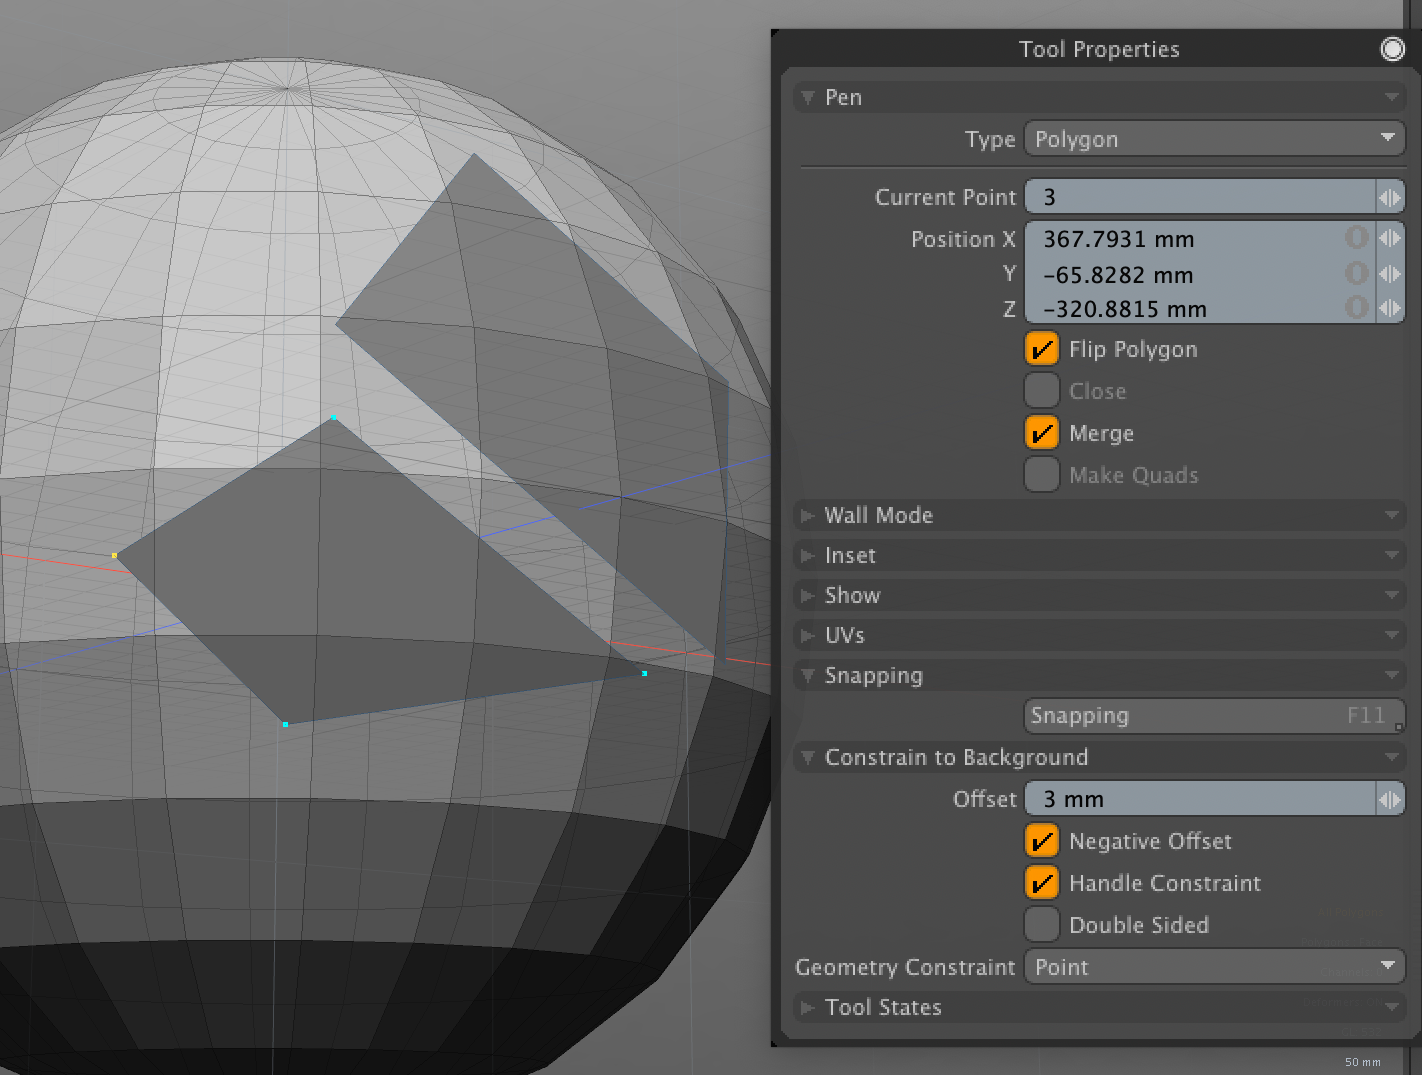
Constrain to Background Properties
|
Offset |
Allows you to define a distance away from a surface for constraint. This allows something like a tube being drawn over a background object to rest on the surface. If the tube has a diameter of 10 cm, applying a 5 cm offset rests the tube right on the surface as the tube is generated outward from its center. |
|
Negative Offset |
When enabled, this option allows you to enter a negative offset value for the background constraint. This has the effect of making the constrained geometry appear under the surface. |
|
Handle Constraint |
For tools where a curve of some type is drawn, such as the Tube tool, curves, Bezier, or the Pen tool, the handles can be constrained also by enabling the Handle Constraints setting, otherwise, only the polygonal geometry is constrained. |
|
Double Sided |
When enabled, this setting treats background polygons as double sided, so geometry can be constrained regardless of the constraining surface's normal facing direction. |
|
Geometry Constraint |
Several options are available to define how Modo searches for the background geometry to constrain against. • Off - Temporarily disables the constraint. • Screen Axis - The constraining surface is evaluated by searching in a perpendicular direction to the current view position, stopping once it hits any geometry. This is the most basic constraint type. • Vector - Uses the translation/transform direction set by the active tool. If you have the Move tool active and start dragging the handle on the X axis, the constraint checks that direction to see what background elements it hits and then stops. If performing a bend, vertices move in many directions, as each vertex has its own vector, which is effectively the direction the vertex is currently moving toward. • Point - This constraint acts like a magnet, translated/transformed vertices are kept against the background geometry ensuring they are always resting directly on its surface. |
Procedural Surface Constraint Tool
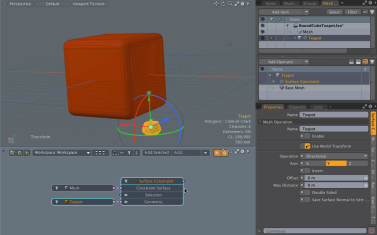
The alternative to the direct modeling version of the Constrain to Background option is the procedural mesh operation called Surface Constraint. Use this tool to procedurally constrain geometry to another piece of geometry in the scene. Surface constraints can be applied to normal mesh items, as well as more complex mesh items, such as a Static Mesh Item and a Fusion Item.
Activating the Surface Constraint Tool
• On the right panel, open the Mesh Ops tab, click Add Operator, and double-click Mesh Operations > Deform > Surface Constraint.
• Alternatively, on the top left corner of the interface, click the ![]() Schematic palette icon , click Add, and double-click Mesh Operations > Deform > Surface Constraint.
Schematic palette icon , click Add, and double-click Mesh Operations > Deform > Surface Constraint.
![]()
Example
The following is a simple example, which demonstrates how the geometry reacts when changing the Mode options of the Surface Constraint tool.
| 1. | On the left panel, on the Basic tab, press Ctrl/Cmd + click on the |
| 2. | On the right panel, under the Mesh Ops tab, click the Add Item dropdown menu, and double-click Mesh. |
| 3. | On the menu bar, click Geometry > Primitive Tools > Teapot. |
| 4. | On the left panel, set the teapot property Size to 1m and click Apply. |
| 5. | Use the move and rotate tools to position the teapot beside the cube. |
Tip: Press W to move and press E to rotate. Press the Spacebar to drop the tool
| 6. | With teapot selected, on the right panel, open the Mesh Ops tab, click Add Operator, and double-click Mesh Operations > Deform > Surface Constraint. |
| 7. | From the Create Surface Constraint Operator dialog, set the Constrain Surface to Cube, Axis to Z, enable Invert, and click OK. |

| 8. | In the 3D viewport, swelect the teapot mesh item, press W, and drag in the 3D viewport to move it into the cube. |
Surface Constraint Options
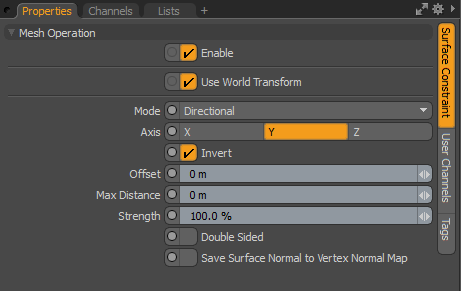
• Enable - Enables or disabled the Push tool.
• Use World Transform - Sets the coordinates from Model Space to World Space where vertices are defined relative to an origin common to all the objects in a scene.
• Mode - Controls the way the vertices of a mesh item are constrained. The following options are available.
• Directional- Forces the entire object onto the surface of another object based on a defined Axis. The vector is an infinite directional.
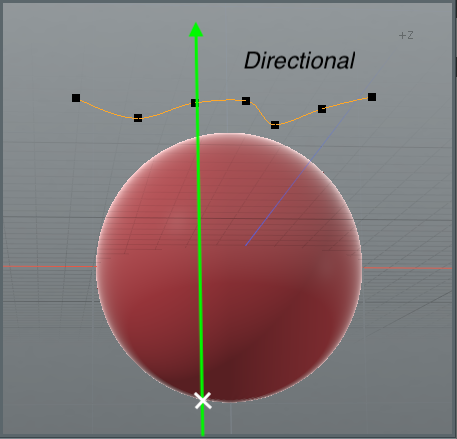
• Half Ray - Allows you to move an item around and have it’s geometry constrained to the surface of another object as it connects with that surface.

• Closest - Constrains the points of an object to another surface based on the shortest distance to that surface.

• Axis - Specifies the axis for Directional or Half Ray modes. The axis vector is defined for item transform space.
• Invert - Inverts the axis vector.
• Offset - Allows you to define a distance away from a surface for the constraint.
• Max Distance - Allows you to define a maximum distance to be constraint. If distance from point postion to surface object is greater than this value, The point is not moved. 0 m of Max Distance is for infinite distance. Point position is constrainted to object surface with any distance.
• Strength - Modulates the strength of the constraint. At 100%, Modo deforms the mesh fully at the constraint position.
• Double Sided - When enabled, this setting treats the background polygons as double sided, so geometry can be constrained regardless of the constraining surface's normal facing direction.
• Save Surface Normal to Vertex Normal Map - When enabled, the surface normal vector on constraint surface item at the constraint position is saved into vertex normal map of operating geometry mesh.
Constrain to Guide
Modo allows the creation of visual guide lines in the scene to be used as reference or to enhance snapping. You can create guide lines in 3D space and then use them as a snapping tool.
Constrain to Guide Properties
| Current Guide |
Allows you to choose which guide to create or edit by choosing from one of the ten options, each with independent settings. |
|
Enable Guide |
Enabled or disabled for snapping. |
|
Show Guide |
Visibility of the current guide. |
|
Snap to Guide |
Snapping to the guide. |
|
Lock Guide |
Once you have set the appropriate guide options, it can be helpful to lock the guide with this toggle to avoid accidentally changing the guide's path. When set, the main guide area changes from yellow to cyan. |
|
Distance |
Determines the length of the path. |
|
Position |
When using the Two Points mode of the guide function, the position option determines the start point of the guide. A straight line is drawn between this value and the end value that represents the guide line itself. When using the Planar Ray option, the Position value determines the home position for the guide. |
|
Mode |
You can define guides in two ways: Planar Ray for only planar facing guides, or Two Points for guides of any angle. • Planar Ray -You can define a single point, a plane on which the line sits, and an angle to determine the guide line. You can use the handle in the viewport to rotate the guide line. • Two Points - You can define two single points in 3D space and the guide line is created through the intersection of those two points. You can precisely position the line by dragging the two handles in the 3D viewport. |
|
Plane |
When choosing the Planar Ray guide mode, this option sets which plane (of the 3 axial planes) that the ray rests upon. |
|
Angle |
When choosing the Planar Ray guide mode, the Angle option determines the rotation of the guide around the Position point. |
|
End |
When choosing the Two Point guide mode, the End option determines the position of the second point. |
Related Videos
Custom Guides
Constrain to Primitive
Setting the Mesh Constraint to Primitive creates a virtual primitive shape onto which tool handles can be constrained to. Similar in concept to Background, however, no physical geometry needs to be present for the Primitive option.
When active, the following attributes appear in the Properties panel under the active tool.
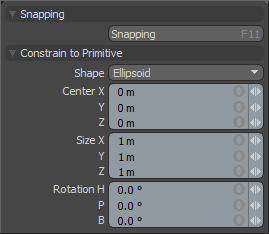
Constrain to Primitive Properties
|
Shape |
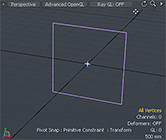
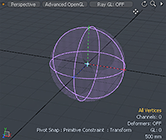
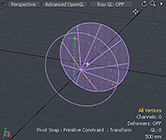
You can choose from the various primitive shapes available for constraint:
|
||||||||||
|
Center |
Defines the center position of the virtual constraint element, based on the center of the bounding box. |
||||||||||
|
Size |
Defines the bounding box, which sets the size of the virtual constraint element. |
||||||||||
|
Rotation |
Defines the rotation amount for the virtual constraint element. |
