Create and Hand Paint Decals With Mesh Paint Replica
Decals created by pressing the Decals... button in the Create tab can be manipulated using the Mesh paint Replica tool.
Not only does Mesh paint Replica allow you to hand paint decals on a mesh, but it also allows you to edit the placement, scale, offset and orientation of placed decals, as well as the ability to switch between multiple decals in the scene. This makes it easier to set up and use decals.
Note: For more information on how to procedurally generate decals with Decal Planar, see Procedurally Project Planar Decals with The Decal Planar MeshOp.
Creating a Decal
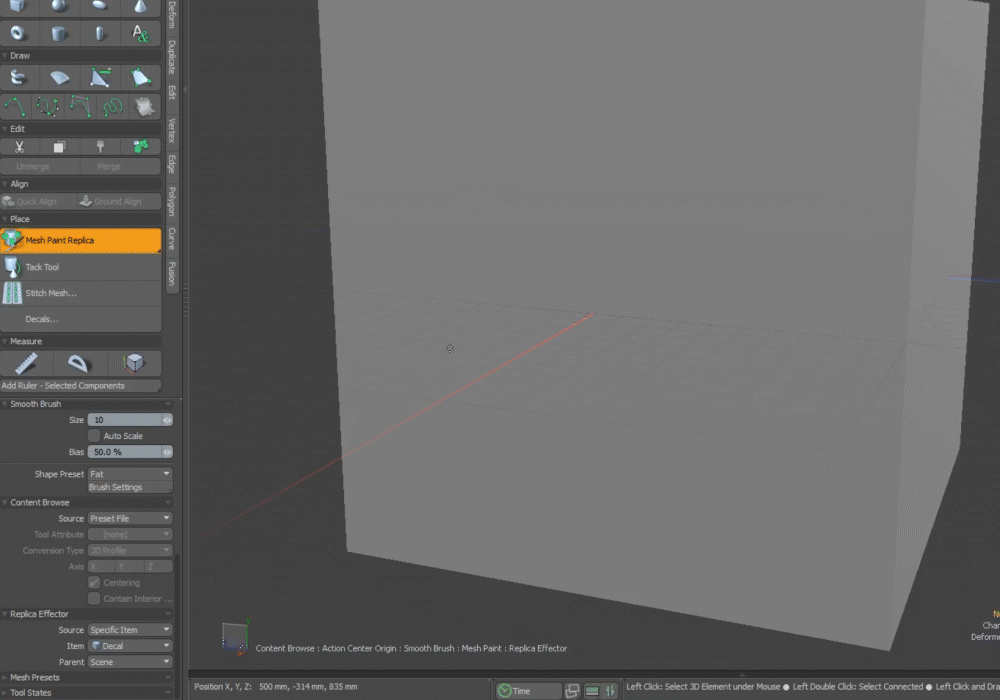
Once the Decals... button is pressed, a decal is created and the Mesh paint Replica tool becomes active/ Once active, you are able to place decals on your mesh and edit them as needed.
To create a decal with the Decals... button:
- With both the decal you wish to project and the mesh you want the decal to be applied to in the scene, press the Decals... button found in the Create tab.
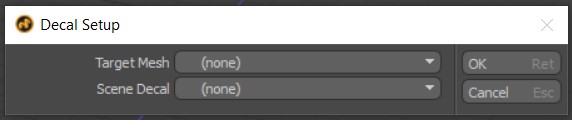
- In the Target Mesh parameter, select the mesh you want the decal to be painted on from the dropdown.
- In the Scene Decal parameter, select your decal from the dropdown.
- Click OK.
Once clicked, the following window opens:
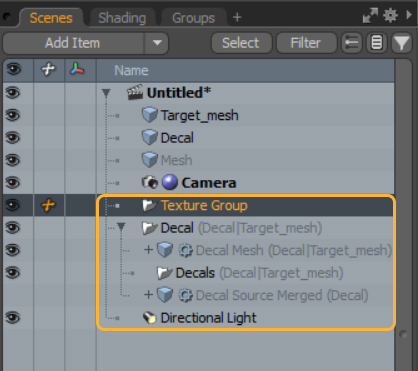
Once OK is clicked, Mesh Paint Replica is automatically activated. Once active, you can click anywhere on your mesh to place a decal. There is no limit to how many times you can place a decal on your mesh using Mesh paint Replica, and multiple decals can be created using this method.
Internally, decals created using this method are set up in the same way that they would be if they were created manually. Once a decal is created, a folder containing the Decal Planar MeshOp projecting the decal can be found in the Items List.
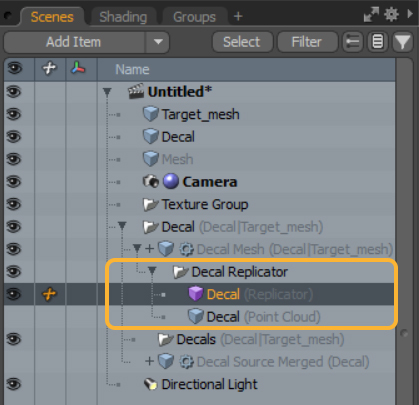
As more decals are placed on the mesh, a Replicator folder is created in the Tool Pipe of the Decal Planar MeshOp. All the decals placed by the Mesh paint Replica tool are created as Replicators. Much like instances, Replicators allow you to create geometry that is only seen at render time allowing you to create hundreds of decals without taxing your machine.
Note: For more information on Replicators, see Replicators.
Editing Your Decal
While Mesh Paint Replica is active, you can continuously edit the placement, scale, offset and orientation of your decals. This can be done by clicking Edit Mode in the tool's Properties window.
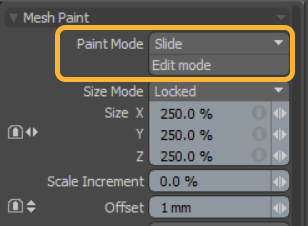
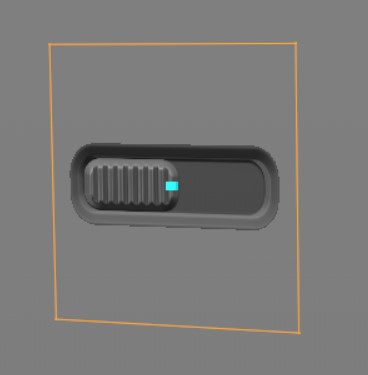
Once Edit Mode is enabled, a handle appears on your decals. Active decals that can be moved will have a green transform handle available, while decals that can be edited but are not currently selected for editing have a blue square in the center of the decal. To select a decal for editing, click on the blue square.
|
|
|
| Decal selected to be edited | Decal not selected to be edited |
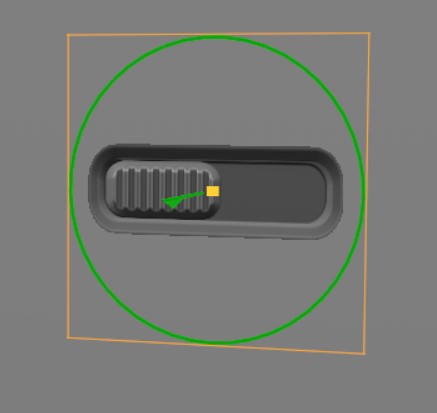
While a decal is selected, you can use the handle to Translate and Rotate the decal without needing to exit the viewport.
Within the Tool Properties for Mesh Paint Replica, there are a number of ways that you can edit your decal which can be found on the page for Mesh Paint. However, when working with Decals, there are a number of options that are specific to Decal workflows as outlined below:
| Feature | Properties |
|---|---|
|
Edit Mode |
Clicking this button activates Edit Mode, and makes all decals placed on the mesh editable. Once clicked, the Edit Button is replaced by a button called Standard Mode. Clicking this button locks all placed decals for editing, and allows you to place more decals. |
|
Offset |
Determines how far away from the surface of the mesh the plane carrying your decal sits. This is different to the Offset parameter available in the Decal Planar MeshOp. |
Switching Between Multiple Decals
There is no limit to how many decals you can create using this method, or how many decals you can place on a mesh. While using the Mesh Paint Replica tool, you can switch between decals by changing the Item dropdown found in the Replica Effector menu in the Tool Properties for Mesh Paint Replica.
Even after the Item is changed, you are able to enter Edit Mode and edit your decals. Items can be switched between whilst in Edit Mode, meaning you do not need to switch back to Standard Mode when switching between decals.
Example of a decal being created, switching over to a different decal and then entering Edit Mode to edit both of them individually.