Create Complex Models with a Single Tool Using Poly Haul
The Poly Haul tool is a collection of commonly used modeling tools that allows you to seamlessly switch between a variety of operations without having to drop and select tools manually or switch operation modes. Poly Haul is useful for blocking out models, allowing you to extrude and bevel to refine geometry quickly and easily and includes Numeric Keypad shortcuts for even faster modeling without leaving the viewport.
To get started using Poly Haul:
- Create a mesh in your Modo scene or import an asset to use as a base mesh.
- Navigate to the Polygon tab and select Poly Haul.
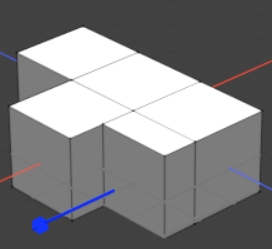
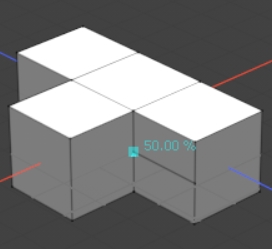
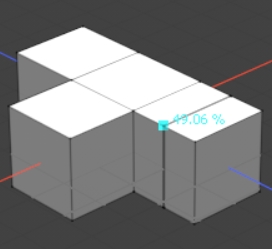
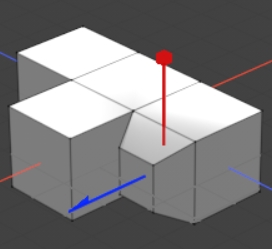
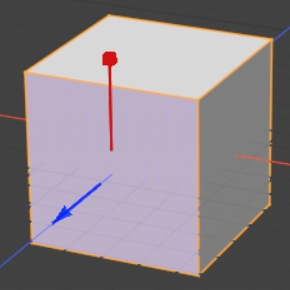
- To use Offset, click and drag a face on your model. The blue axis shows the direction of offset. Dragging toward the model in Offset mode brings the face inwards while dragging away from the model offsets the face outwards.
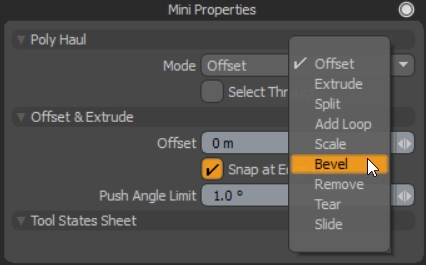
- To select another tool, press Space on your keyboard to display Poly Haul's Mini Properties.
- Click the Mode dropdown and select the required tool from the list.
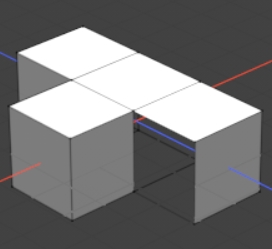
The default mode is Offset, which allows you to push and pull faces on your geometry. Unlike Extrude, Offset doesn't create any additional edge loops when used.
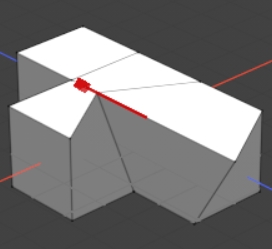
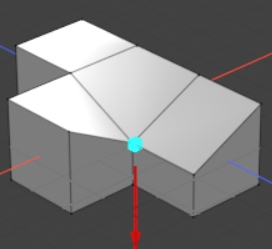
Different modes display different indicators in the viewport. For example, Bevel mode displays extrude direction and bevel axes.
|
|
|
|
Offset mode indicator |
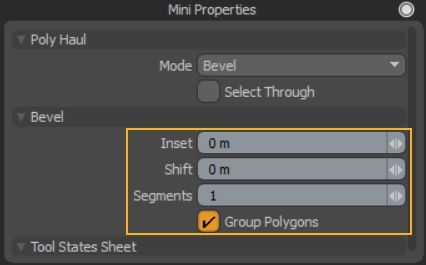
Bevel mode indicators |

The controls displayed in the Mini Properties depends on the Mode you have selected. For example, in Bevel mode you have access to the Inset, Shift, Segments, and Group Polygons properties.
Poly Haul Modes
Poly Haul gives you access to several key modeling modes without switching tools manually. The Mini Properties for Poly Haul don't include all the options available in the direct modeling tools, such as Bevel and Slide, but the most commonly used controls are shown.
|
Mode |
Num Pad Shortcut |
Function |
Example |
|---|---|---|---|
|
Offset |
0 |
Offsets a polygon along its normal axis. Similar to Extrude mode, except offset doesn't create new edge loops. When Snap at Edge End is enabled, offset polygons snap to the end of connected edges. |
|
|
Extrude |
1 |
Extrudes a polygon along its normal axis. Similar to Offset mode, except extruding create new edge loops. You can temporarily enable Extrude mode by holding Shift in Offset mode. See Polygon Extrude for more information on the direct modeling tool. |
|
|
Split |
2 |
Splits a polygon in to two parts, depending on the Position and Spin controls. Position determines where the split occurs on the edge and Spin determines which edge of the polygon is split. Similar to Add Loop mode, except the split does not continue across contiguous faces. |
|
|
Add Loop |
3 |
Splits a polygon and loops the split across any contiguous faces. Similar to Split mode, except the split continues across contiguous faces. Add Loop mode only works on quads and surface polygons with odd number of vertex. See Add Loop for more information on the direct modeling tool. |
|
|
Scale |
4 |
Scales a polygon on the X and Y axes in local space. Similar to Bevel mode, but does not extrude the polygon. See PolyScale Offset for more information on the direct modeling tool. |
|
|
Bevel |
5 |
Bevel extrudes and insets the selected polygon. Similar to a combination of Extrude and Scale modes. See Polygon Bevel for more information on the direct modeling tool. |
|
|
Remove |
- |
Removes the selected vertex, edge, or polygon. The vertices are also removed by default, but you can enable Keep Vertices in the Mini Properties to retain them. |
|
|
Tear |
- |
Tears a corner vertex off a polygon when Select Through is disabled. |
|
|
Slide |
- |
Slides a vertex or an edge along connected edges. When Duplicate is enabled, the vertex is duplicated and the selected polygon is triangulated around the duplicated vertex. See Slide / Edge Slide for more information on the direct modeling tool. |
|