To install Modo on Mac OS X:
• Installing Modo with the User Interface (UI), or
• Installing Modo from the Terminal.
To install Modo using the default UI, do the following:
| 1. | Download the correct .dmg installation file from our website at www.thefoundry.co.uk. |
The .dmg is installed to your preferred download location.
| 2. | Double-click on the file in the installed folder to install Modo. |
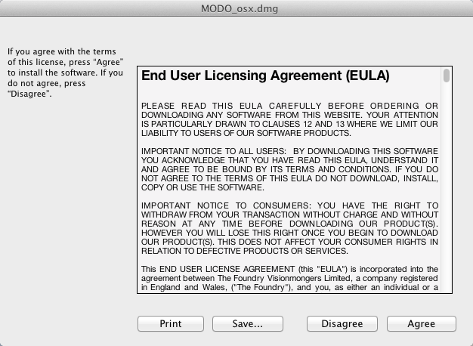
| 3. | Follow the on-screen instructions in the MODO Setup dialog. |

Accepting the EULA, opens the modo dialog.
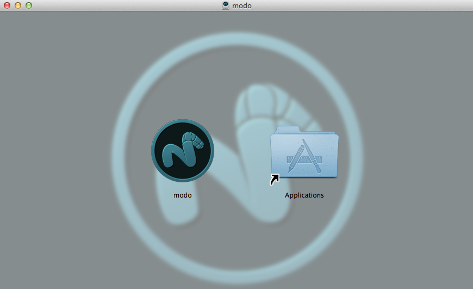
| 4. | Drag the modo icon into the Applications folder. |

The application is copied into the folder automatically and is now ready to launch.
| 5. | Close the dialog and proceed to Launching Modo on Mac OS X. |
To install Modo from the Terminal, do the following:
| 1. | Download the correct .dmg installation file from our website at www.thefoundry.co.uk. |
The .dmg is installed to your preferred download location.
| 2. | Launch a Terminal window. |
| 3. | To mount the .dmg installation file, use the hdiutil attach command with the directory where you saved the installation file. For example, if you saved the installation file in Downloads, use the following command: |
hdiutil attach /Users/user1/Downloads/Modo_901_osx.dmg
The EULA appears in the Terminal window.
| 4. | Enter Y to agree to the EULA, or N to disagree and halt installation. |
Accepting the EULA, opens the modo dialog.
| 5. | Drag the modo icon into the Applications folder. |

The application is copied into the folder automatically and is now ready to launch.
| 6. | Close the dialog and proceed to Launching Modo on Mac OS X |