Much like the sculpt and painting tools, Modo offers a variety of tools for styling fur and for creating and editing guides used in longer hairstyles. Located in the Paint layout, the Hair Tools sub-tab (along the edge of the toolbox) gives you everything needed for combing and sculpting fur into the proper do. With the Fur Vector Maps (see Effect - Texture Item) and the settings of the Fur Material item, a lot of control is afforded for getting specific looks, but for longer hair styles, guides are necessary to really control the direction and length of the fur. Before any guides can be styled and combed though, they must be created. In this regard Modo offers several tools specific to this task.
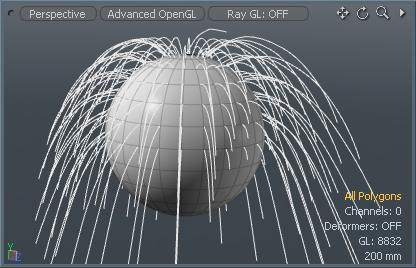
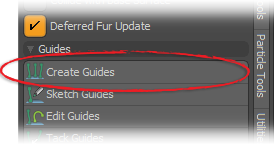
Initial guides can be easily generated using the Create Guides tool. This tool automatically generates the polyline segment type guides necessary for Fur, by virtually growing them from selected polygons. Simply click on the appropriate button to enable any of the following functions.
When using the Create Guides tool, the generated curves inherit the material tag from the selected surface, so it is best to name the target Fur surface with a proper material before activating it.
If the polygons aren't already selected, highlight the polygons that the fur should grow from and keep them highlighted. Click the Create Guides button in the toolbox to activate the tool. Next, clicking in the 3D Viewport initiates the interactive growing process, spawning one guide per vertex for all selected polygons up to the Max Number of Guides value. Clicking and hauling left or right grows or shrinks the guides in length. You can also manually set the length directly in the tool properties. When the tool is active, there are additional attributes you can use to adjust in the tool's Properties panel.
Hair Guide Create Tool
|
Option |
Description |
|---|---|
|
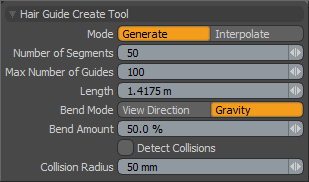
Mode |
Hair Guides can be created in two ways, either by growing from selected polygons in the Generate mode, or using Interpolate to generate new guides from existing ones. |
|
Generate |
Guide Curves are created parametrically with the various settings of the tool. Clicking and hauling in the viewport interactively adjusts the Length value, other values are adjusted numerically in each input field. |
|
Interpolate |
Guides are created one at a time on the target surface where you click. Interpolation generates a new guide curve based off of existing curves. Clicking on surface generates the curve as an interpolation (in-between morph) of nearby guides. Click and drag moves the curve over the surface (note how its shape changes to match those of nearby curves as it slides around). Shift+clicking adds new guides. When in interpolation mode, no numeric inputs are available. |
|
Number of Segments |
This setting is independent of the fur segments, specifying the number of segments used to create the guides themselves. Increasing the number of guides can allow for more detailed control, but watch out as manipulating them with too many segments can become slow and may produce less than satisfactory results. Add just as many as are needed. |
|
Max Number of Guides |
Generally, with this tool, a guide is created at each vertex position on the target selection/surface. If the surface has a lot of polygons, it may be desirable to control the number of guides created using the Max Number of Guides. If the target has less than the max number of vertex points, only that many guides are created. |
|
Length |
You can use this setting to manually set the guide length to a specific value. Clicking and hauling in the viewport interactively adjusts this value. |
|
Bend Mode |
With Bend Mode you can choose how the generated guides bend based on either the View Direction or Gravity. With View Direction, the guides grow straight from the normal direction of the polygon, but bend based on the rotation of the currently active viewport, bending away from the camera. This is cool because its possible to select a few polygons from the fur surface and create the guides with the view rotated in one direction. Then select some other polygons and create the guides with a different rotation, which can help when devising guides for hair parting seams. Gravity bend all guides toward the negative Y direction. |
|
Bend Amount |
The Bend Amount controls the how far a guide bends when it is created. A setting of 0% would grow guides perfectly straight in the direction of the vertex normal at its root, increasing this value increases the intensity of the bend in the direction defined by the Bend Mode. |
|
Detect Collisions |
When creating the guides, you might find that some are intersecting with surrounding surfaces. Enabling Detect Collisions avoids this situation by detecting surrounding surfaces realistically drooping and bending the guides around them. Best example is generating guides for long hair, you don't want the hair to intersect the shoulders, so enable this setting to drape the guides over the shoulder for a more realistic look. |
|
Collision Radius |
You still might find that fur generated from guides intersects with a surface. When Detect Collisions is enabled, the collision radius allows you to offset the guides from the surface by the specified amount to avoid the intersection. Quite often guides are used in Range mode, generating fur fibers within a certain range around the guide. It may be helpful to set the collision radius to half the range (as range is a diameter) to effectively avoid fibers intersecting the surfaces as well. |
With the Sketch Guides tool you can draw out guides directly in the 3D Viewport with a pen tool.
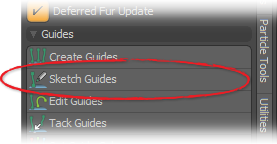
Clicking on the target surface, the guide is planted on the surface and is drawn in a plane perpendicular to the view direction, going through the surface normal.
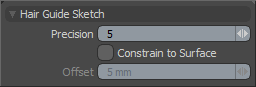
Hair Guide Sketch
|
Option |
Description |
|---|---|
|
Precision |
This value sets how finely Modo interpolates the drawn stroke, lower values produce strokes with greater numbers of points, higher values produce strokes with lower numbers of points. Think of it roughly like the distance in pixel the pointer travels before creating a new point. |
|
Constrain to Surface |
The Constrain to Surface option, when enabled, draws Hair Guides constrained directly over the target surface (like the background constraint does), the Offset value can be used to push the drawn guides away from the surface when drawn. |
|
Offset |
The Offset value works in conjunction with the Constrain to Surface option to push the drawn curves away form the surface while drawn (the first, root vertex of the guide always plants itself directly against the target surface still). |
Once Guides have been generated, the Edit Guides tool can be used to easily modify guides over their length, creating effects that would be difficult if not impossible to style manually.
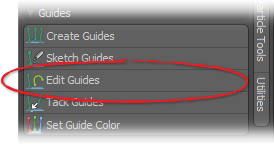
Different controls are applied depending on the selected Mode.
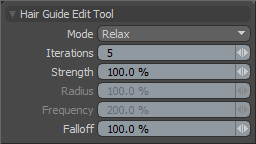
Hair Guide Edit Tool
|
Option |
Description |
|---|---|
|
Mode |
The Mode options determine what form the edits takes on the target hair guides. When the tool is invoked, it modifies all visible curves in the foreground layer(s). To target only specific curves, either select them prior to activating the tool or hide unwanted hair guides. Managing multiple groups of hair guides can be done withManaging Hair Guides controls. In general moving the mouse left and right control the Strength of the effect and up and down movements controls the Falloff amount. For Curls and Waves, holding the Ctrl key gives control to Frequency and Radius values, where Frequency controls the number of curls and Radius the amplitude. There are six types of Edit modes available: • Relax - Relaxes the guide. • Straighten - Transforms the guide back to its straight (linear) shape. • Bend - Bends the guide like it is affected by gravity. • Size - Changes the size of the entire guide while preserving the shape. • Curls - Creates curls along the guide. • Waves - Another form of curling with more amplitude on one axis than the other. |
|
Iterations |
The Iterations value determines the number of times the edit function is applied to the target. Works with Smooth, Straighten, and Bend, and works in conjunction with the Strength option to control the overall effectiveness of the selected edit. |
|
Strength |
Controls the amount of the selected edit that affects the target hair guides. Clicking and dragging the cursor left and right on the screen interactively adjust this value. |
|
Radius |
The Radius option controls the amplitude (size) of the resulting curls for both Curls and Waves. Interactively editable by holding the Ctrl key while editing, dragging the cursor left and right. |
|
Frequency |
The Frequency option controls the number of curls along the length of the guide. Interactively editable by holding the Ctrl key while editing and dragging the cursor up and down. |
|
Falloff |
The Falloff value controls the root falloff, or to what degree the root of the Hair Guide is affected by the edit. Low values affect more of the guide along it length while higher values affect more of the guide. Clicking and dragging the cursor up and down on the screen interactively adjust this value. |
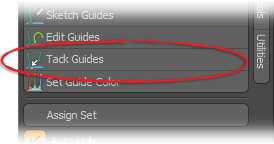
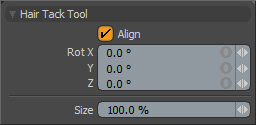
The Tack Guides tool can be used to position and rotate individually selected hair guides interactively. It works by you first selecting a target guide. This is done using the Polygons selection mode and clicking and dragging over the target guide to select, highlighting it orange. Next activate the Tack Guides tool in the Hair Tools tab of the toolbox and click on the target surface to move the guide to the new position, this moves the guides origin to the intersection of the surface and the mouse's pointer, moving interactively while the mouse is moved. With the Align option enabled the guide remains oriented in the same angle relative to the underlying surface normal. Pressing the Ctrl key interactively rotates the guide around the surface normal.
Hair Tack Tool
|
Option |
Description |
|---|---|
|
Align |
When the Align option is enabled the guide retains its orientation angle relative to the underlying surface normal. When disabled the guide retains its initial orientation. |
|
Rot X/Y/Z |
The Rotation input field allow uses to numerically enter specific rotation values for the edited guide. You can also interactively rotate the guide by pressing the Ctrl key and clicking and dragging in the 3D Viewport. |
|
Size |
The Size option controls the scaling of the edited hair guide. |
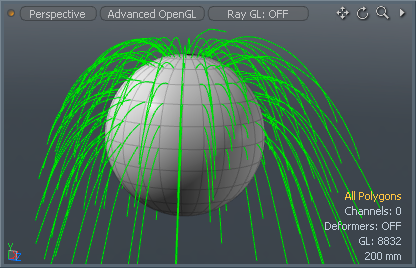
When styling fur, depending on the source surface's coloration, it can be difficult to see the guides clearly. The Set Guide Color function allows you to override the default guide color (temporarily if you wish) and set the guide's color to any arbitrary value desired.

To apply, simply press the Set Guide Color button, located below the Hair Tools sub-tab of the Paint toolbox to open the Hair Guide Color dialog.

Enable the Override hair guides color option, define a color and press OK. All guides use this color for display. To disable, open the Hair Guide Color dialog again and disable the Override option and press OK. As the color override is system wide, this can also be useful when working with guides for other means as well.
NOTE: The color display is only visible while in the Shaded and Advanced OpenGL display modes.
|
|
|
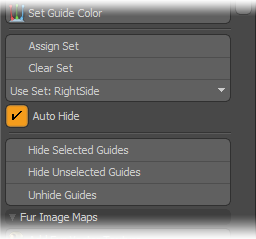
When working with many multiples of Hair Guides it can be handy to manage these guides with Hair Guide Selection Sets, this allows you to only work on specific guides, with the additional benefit of increasing performance for guide heavy setups. Take for instance all the hair on one side of a part would be styled in one way, while the hair on the other is styled a different way. Sets are simple way to group like guides together and easily manage their selection state and visibility for both sides of the part. The Selection Set controls are found directly under the Hair Guide edit and creation tools on the Hair Tools sub-tab of the painting toolbox.
Creating a set starts with selecting the target Hair Guides. Guides are selected in the Polygons selection mode. You can either lasso select around multiple guides at once, or paint select them by clicking and dragging the cursor over the guides to select. The default selection helpers work the same for hair guides as well, Ctrl to remove items from a selection and Shift to add to it. Once selected, click the Assign Set button to open the selection set assignment dialog.
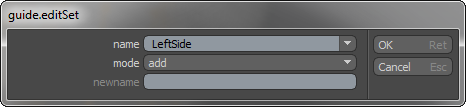
With the dialog open, you need only to specify a Name and press OK to create the set. There are also options to Remove items from the set and to Rename the set to a New Name. Once the first set is created, additional buttons appear in the interface to clear an existing set and another to set the current set. Click the Use Set button to open the small pop-up menu to select from all available sets. Click the target set to select all the associated guides. Now when editing is applied, only the selected guides are affected. When the Auto Hide toggle is enabled, only the currently selected set is visible in the 3D Viewport, hiding all other guides.
You can also manually control visibility for any given guide set with the visibility buttons, for selected hair guides there are controls to Hide Selected Guides, Hide Unselected Guides, and to Unhide Guides which makes all hidden guides visible. It should be noted that the visibility toggle buttons do not strictly require Sets, but merely work on selection, with the sets as an enhancement to the overall workflow.