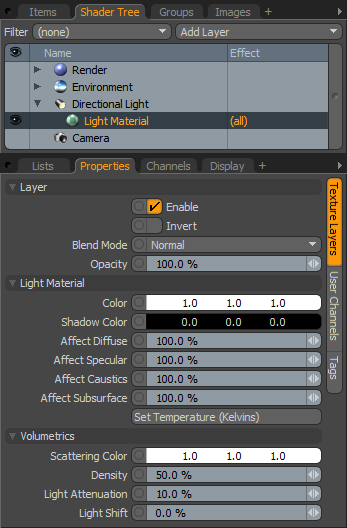
Lights derive settings for their illumination color, shadow color and how much they contribute to diffuse and specular shading from the light material item, as well as their volumetric settings as appropriate to the light. While lights are located within the Item List, the light material item is located inside the Shader Tree; outside of the camera which has no material settings, Lights are the only items the have a dual identity in Modo existing in both places. The Light Material item can be found by clicking the small arrow widget next to the light item's name to reveal/hide the material item. Selecting the item displays its properties within the Properties viewport. All lights have a set of default values that can be easily modified, providing an intuitive and flexible method for customizing a light's effect. Additional settings related to the various light items can be found within the light's properties.
Also, keep in mind that since lights are Shader Tree items, they can have additional Shader Tree item layers added to them; images can be added to produce slide projector types of effects (by adjusting the settings of the Texture Locator), and by right-clicking on the item's Effect column, different options can be selected producing a variety of different and interesting effects. For more information on light effects, see the Effect - Light Item topic.
Layer—
Enable: Toggles the layer on and off. If there is only one material attributed to the light, this disables/enables the light itself.
Invert: Inverts the RGB values for the lights material layer.
Blend Mode: Affects blending between material layers applied to the light allowing you to stack several layers for different effects. For more on blending, see Layer Blend Modes.
Opacity: Changes the transparency of the current material layer. If only one material is associated with your light, this also dims the light itself.
Light Material—
Color: The color control uses the standard Modo color component of three RGB values and provides direct control over the color of light emitted. Our brains are used to seeing pure white lights, but often times, there are many reasons to change the color for artistic affect. Also, when simulating outdoor lighting, setting a lights color to cooler values such as blue-ish tones tends to simulate mid to late day-time lighting where as warmer colors such as yellow or orange-tones is more like evening time.
Shadow Color: This setting tints the shadows produced by the associated light. In most cases this color is left as black, producing the 'absense-of-light' shadows we are all used to seeing, but other times, there can be creative reasons to modify the shadow color to either simulate a specific phenomenon, or simply for artistic effect. Some consider it good practice to tint the shadow with a complementary color to that used for the light's Color setting.
|
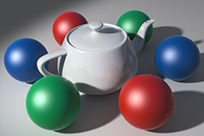
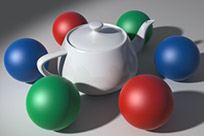
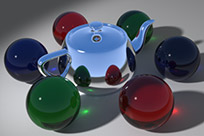
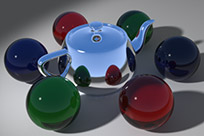
Affect Diffuse value of 100% |
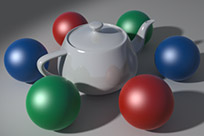
Affect Diffuse value of 66% |
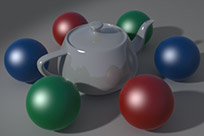
Affect Diffuse value of 33% |
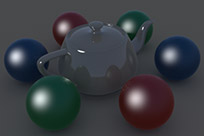
Affect Diffuse value of 0% |
Affect Diffuse: The diffuse lighting is the light illuminating a surface that is only affected by position and angle of the light source, but is unaffected by the viewers position or angle. Light that behaves this way is described as being isotropic. In simpler terms, this is the normal shading you see over a surface. This percentage value provides the ability to control how much the light's illumination contributes to the overall diffuse shading within a scene on a per light basis. You can set this value to 0% if you want to disable the diffuse shading, allowing the creation of a "specular only" light source.
|
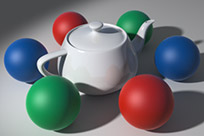
Affect Specular value of 100% |
Affect Specular value of 66% |
Affect Specular value of 33% |
Affect Specular value of 0% |
Affect Specular: The specular lighting is light that is dependent on the viewer's position and angle. Specular is meant to simulate the reflection of a bright light source upon a surface and is calculated as an angle vector between the camera and the light source itself. This percentage value provides the ability to control how much the light contributes to any specular shading within a scene on a per light basis. You can set this value to 0% if you want to eliminate specular shading produced by the light, allowing the creation of a "diffuse only" light source.
|
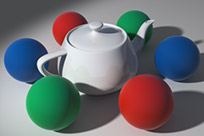
Affect Caustic value of 100% |
Affect Caustic value of 66% |
Affect Caustic value of 33% |
Affect Caustic value of 0% |
Affect Caustic: Caustics are the refraction or reflection of light, either through a transparent object or off of a reflective object and projected onto a surface. This percentage value provides the ability to control how much the lights illumination contributes to the overall caustic shading within a scene on a per light basis. You can set this value to 0% if you want to disable the light from contributing to generated caustics.
|
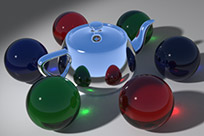
Affect Subsurface value of 100% |
Affect Subsurface value of 66% |
Affect Subsurface value of 33% |
Affect Subsurface value of 0% |
Affect Subsurface: Subsurface scattering is the appearance of light entering a translucent surface, diffusing (bouncing around) and then exiting. Typically when this happens, the exiting light is tinted by the interior of the surface producing a unique effect. The 'Affect Subsurface' percentage value provides the ability to control how much the lights illumination contributes to the overall subsurface scattering within a scene on a per light basis. You can set this value to 0% if you want to disable the light from contributing to subsurface scattering. Values beyond 100% boost the lights affect on the subsurface amount.
Set Temperature: This setting allows you to set a light's color based on the familiar kelvin scale for color temperature.
|
Some common values for K |
|
|---|---|
|
1500 K |
Candlelight |
|
2680 K |
40 W incandescent lamp |
|
3000 K |
200 W incandescent lamp |
|
3200 K |
Sunrise/sunset |
|
3400 K |
Tungsten lamp |
|
3400 K |
1 hour from dusk/dawn |
|
5000-4500 K |
Xenon lamp/light arc |
|
5500 K |
Sunny daylight around noon |
|
5500-5600 K |
Electronic photo flash |
|
6500-7500 K |
Overcast sky |
|
9000-12000 K |
Blue sky |
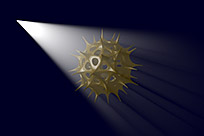
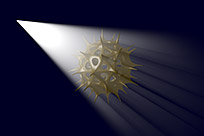
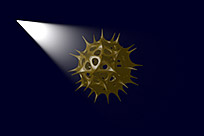
Volumetrics
When light shines on microscopic particles suspended in the air, such as water vapor, smoke or even pollution, the light rays become visible. In computer graphics this phenomenon is known as a volumetric light, their effect can be subtle or pronounced, either way it adds a good amount of believability and atmosphere to rendered images. For volumetrics to work, they must first be enabled in the light item's properties where additional settings specific to the volume itself are located.
Scattering Color: This allows you to set an RGB color value for the light volume itself. You usually want this to be the same color as the light, however, there may be some creative reasons one might want to change it to something else entirely.
|
Density value of 25% |
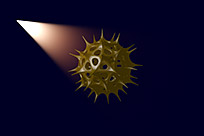
Density value of 50% |
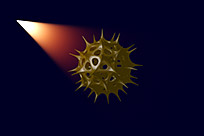
Density value of 75% |
Density value of 100% |
Density: This value sets the density or thickness for the volumetric effect, higher values make the volume thicker and more opaque and lower values make it appear more sparse and transparent.
|
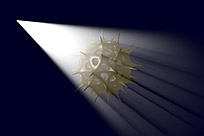
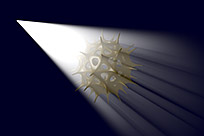
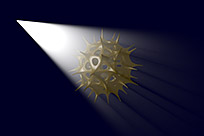
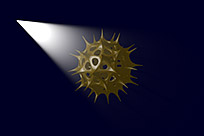
Attenuation value of 25% |
Attenuation value of 50% |
Attenuation value of 75% |
Attenuation value of 100% |
Light Attenuation: Attenuation is the gradual loss of intensity when light is passing through any medium. With an attenuation setting of 0%, Modo produces a smooth gradual falloff along its length. as the Light Attenuation value increases, the volumetric effect gradually fades in overall intensity with a bias toward the light source.
TIP: Combine with Light Shift to mimic large volumes of light scattering.
|
Light Shift value of -100% |
Light Shift value of -50% |
Light Shift value of 50% |
Light Shift value of 100% |
Light Shift: As the light is increasingly attenuated, certain wavelengths are absorbed or scattered. The Light Shift function simulates this phenomenon. Negative values push the color of the volume increasingly toward cooler light blues, while positive values push the color toward warmer orange and red hues. The Light Attenuation value must be a number above 0% to see any effect