
The particle generator produces arrays of particles that can then be used as a point source for Replicators. They can also be used with Blobs, Sprites, and Volumes (though the results may not be quite as interesting). These arrays can be further modified with the Particle Modifiers that apply further transformations upon the cloned elements.
To add a particle generator item, in the Items list, click Add Item > Particles > Point Clouds > Particle Generator. Once added, you can specify the type of particle array to generate and using the additional options, determine the layout and density of the array. The resulting points are not visible to the user in the 3D Viewport or the render output until a Replicator is applied and a source mesh is specified (or another effect that requires a point source is applied). For more information, see Replicators for more information on defining point sources.
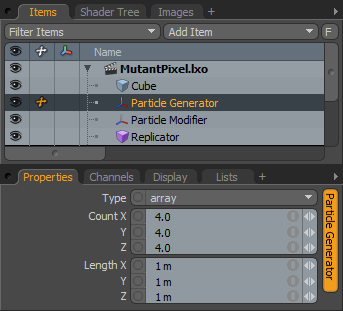
Type: This option determines the style of array that is generated.
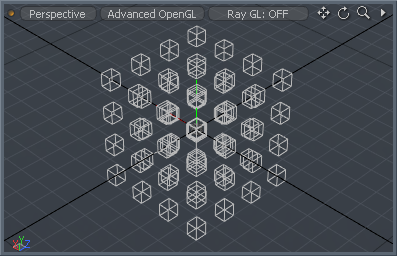
• Array: produces a 3-D grid of evenly spaced particles.
• Radial: produces a circular array of evenly spaced particles.
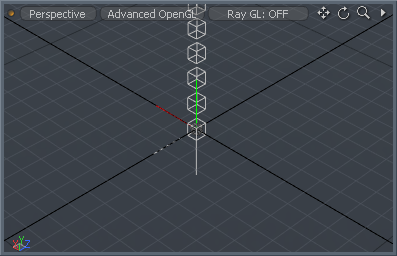
• Linear: produces a straight line of evenly spaced particles.
These options appear when the Type is set as Array.
|
Option |
Description |
|---|---|
|
Count X/Y/Z |
Determines the number of elements generated along each axis. |
|
Length X/Y/Z |
The three values determine the overall size of the volume where the particles are evenly spaced within. |
These options appear when the Type is set as Radial.

|
Option |
Description |
|---|---|
|
Count |
Determines the number of elements generated around the perimeter. |
|
Align |
When enabled, the subsequent cloned elements are rotated to align along the rotation of the circle. When disabled, the elements retain their initial world axis rotation. |
|
Radius |
Determines the outside diameter of the circle of particles, calculated as the radius (length from the center to the edge). |
|
Angle Start/End |
Instead of having the generated elements evenly spaced around the entire length of the circle, you can limit the distribution to a specific arc segment by defining an Angle Start and Angle End value. |
|
Offset |
This value offsets the initial clone (and all subsequent clones) from the Angle Start position the specified amount. Animate this value to get the elements to travel around the circle. |
These options appear when the Type is set as Linear.
|
Option |
Description |
|---|---|
|
Count X/Y/Z |
Determines the number of elements generated along the length of the line. |
|
Length X/Y/Z |
Determines the distance between each individual element for each individual axis. |
|
Scale X/Y/Z |
Determines a scale value for each individual axis. Assigned as a step, where each subsequent particle inherits the scale of the previous element, producing a slowing scaling up/down across the total length. |
|
Rotate X/Y/Z |
Determines a rotation value for each individual axis. Assigned as a step, where each subsequent particle inherits the rotation of the previous element, producing a twisting of the elements across the total length. |
|
Step Rotate X/Y/Z |
Different from the Rotate value, which rotates individual elements from their center positions, the Step Rotate offsets the rotation of each element producing a corkscrew/spring effect. |
NOTE: All the various channel values can be animated over time. When combined with multiple instances of particle arrays, all animating in sync to one another, you can achieve very interesting and unique effects.